How to Fix HP Printer Blinking Amber Exclamation Light Error
Technical Analysis of the HP Amber Exclamation Light Alert
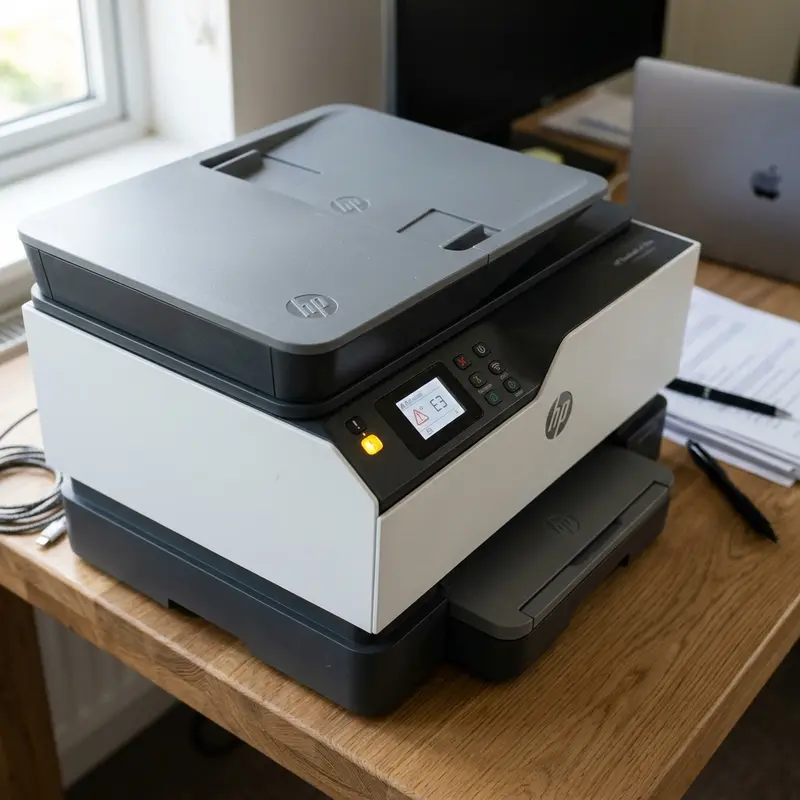
The control panel of HP consumer printers (such as the DeskJet 2700, 2300, 3700, and Ink Advantage series) features a dedicated status LED for critical hardware alerts, typically represented by an amber (or yellow) light alongside an exclamation point icon. From an electrical engineering perspective, this LED is triggered by the printer's main microcontroller firmware when a hardware interrupt is registered on the CPU's error status registers. It signals that the normal microcode execution loop has stalled because a physical operating threshold or safety photodiode barrier has been breached.
The three main hardware triggers for this amber warning are: electrical communication dropouts with the thermal inkjet printheads, physical paper path obstructions along the drive roller assembly, or optical phototransistor alignment faults. When one of these mechanical or electrical events is logged, the printer's SoC cuts power to the carriage DC stepper motor and paper feed drive motor to prevent gear stripping or motor winding overheating, locking the console interface in warning mode until the error is cleared and verified by a subsequent initialization test.
If your HP printer is also showing as offline or unavailable on your computer, check out our guide on how to fix an HP printer offline on Windows.
Physical Mechanisms and Sensors Involved in the Error State
Understanding the internal sensors and electronics of your HP DeskJet is vital for performing an accurate diagnosis:
- Optical Media Sensors (Photo-Interrupters): Located along the paper feed path are small spring-loaded plastic levers. As paper passes through, it pushes the lever, which blocks or clears an infrared beam emitted by an IR LED and received by an adjacent phototransistor. If a tiny scrap of paper remains wedged in the path, holding the lever down, or if paper dust (cellulose microfibers) covers the optical lenses, the board registers a paper jam status, turning on the amber light.
- Back-EMF and Motor Overcurrent Detection: The carriage drive motor is monitored by a current-sensing shunt resistor on the main control board. If the carriage hits an obstacle (such as a paper ball or misplaced plastic component), it stops moving. Since a stalled motor cannot generate back-electromotive force (back-EMF), its electrical resistance drops, and current consumption spikes. The motor driver IC instantly cuts off the power rail to protect the windings and triggers a "Carriage Jam" error, flashing the panel lights.
- I2C Serial Interface and Cartridge Circuitry: Data transmission between the printer's logic board and the ink cartridge's cryptographic memory chip occurs over a synchronous serial bus resembling the I2C protocol. Ink deposits, grease, or oxidation on the gold-plated contacts on the carriage wall will disrupt this bus. When serial packet loss occurs, the SoC fails to authenticate the cartridge ID, generating a cartridge error state that illuminates the amber exclamation LED.
Step-by-Step Diagnostic and Repair Protocol
Perform the following hardware inspections in sequence to isolate and resolve the root cause of the amber warning:
Step 1: Mechanical Inspection of the Feed Path and Rollers
- Turn off the printer by pressing the Power button and unplug the power cord from the wall outlet.
- Remove any paper sheets sitting in the paper input tray.
- Shine a flashlight down into the input tray path. Inspect the feed rollers for foreign objects like paperclips, hair pins, or scrap paper.
- Inspect the output tray and cartridge access area for obstructions.
- Using tweezers, carefully extract any torn paper fragments lodged in the feed rollers or around the plastic sensor levers.
- Clean the gray rubber pickup rollers using a lint-free swab slightly dampened with distilled water. Rotate the rollers manually to ensure you clean the entire circumference, removing built-up paper dust.
Step 2: Cleaning the Printhead Carriage Electrical Interface
- Plug in the printer and open the cartridge access door. Wait for the carriage to glide to its center maintenance position.
- With the printer still powered on, pull the power cord from the back of the device. This cuts the voltage rail instantly and leaves the carriage unlocked.
- Remove both ink cartridges by gently pressing down on them and sliding them out of their slots.
- Inspect the gold-colored contact pads on the cartridge backs and the mating leaf-spring pins inside the carriage. If ink or grime is present, wipe them clean using a microfiber cloth moistened with 99% isopropyl alcohol.
- Caution: Avoid touching the nozzles on the bottom face of the cartridge; static discharge from your skin (ESD) can destroy the thermal resistors in the nozzle plate.
- Let the alcohol dry for 3 minutes, reinstall the cartridges, and close the access door.
Step 3: Power Drain and Hardware Initialization (Hard Reset)
If all mechanical checks are clear but the amber warning persists, the firmware's volatile error state registers may be locked. Drain the board to force a clean POST cycle:
- Reconnect the power cord to the printer and wall socket.
- Turn the printer on using the front panel button.
- While the printer is on, pull the power cord from the back of the printer.
- Press and hold the physical Power button on the front panel for 15 seconds while the unit is unplugged to discharge the electrolytic capacitors on the mainboard.
- Plug the power cord back in and turn the printer on. The printer will run an extended initialization cycle, checking the optical sensors and resetting the carriage home coordinate.
For other technical guides addressing mechanical errors and motor stalls in smart home appliances, consult our analysis on the Liectroux C30B robot vacuum beeping and stalling.
Troubleshooting Table: Blink Code Diagnostics
Observe the flashing patterns of the LEDs on the HP control panel to diagnose specific error conditions:
| Control Panel Light Behavior | Firmware Diagnostic Code | Root Hardware Cause | Recommended Action |
|---|---|---|---|
| Amber exclamation light blinking slowly by itself. | Media Mismatch / Out of Paper | Input tray is empty or the optical sensor lever is stuck in the 'no-paper' position. | Add paper, align the paper guides, and press the Resume button (paper sheet icon). |
| Amber exclamation light and Ink drop LEDs blinking together. | Cartridge Rejected / I2C Failure | Communication failure with the cartridge memory chip or mismatched cartridge ID. | Clean cartridge contact pads with isopropyl alcohol or replace the faulty cartridge. |
| Amber exclamation light flashing rapidly along with the Power LED. | Carriage Jam / Motor Stall | The carriage is blocked, or the optical encoder strip is dirty, causing position loss. | Clean the encoder strip with water and a soft cloth, and check for physical blockages. |
| Amber exclamation light glowing solid (not flashing). | Firmware Lock / Boot Failure | The main logic board processor has frozen during the execution of its boot code. | Perform an electrical hard reset (Method 3) to drain the power rails. |
| Wireless LED flashing blue while the amber exclamation light is blinking. | Network Connection Drop | The printer lost its DHCP lease or is unable to connect to the configured network. | Run a wireless reset by holding down the Wireless and Cancel buttons. |
Cleaning the Optical Encoder Strip
The encoder strip is a semi-transparent plastic strip positioned horizontally above the carriage guide rail. It contains thousands of microscopic vertical markings that are read by an optical sensor (photodiode pair) on the back of the print carriage. If this strip becomes contaminated with grease, dust, or ink mist, the optical sensor will fail to calculate carriage speed and position, causing the printhead to slam against the chassis sides and trigger the amber warning light.
- Power off the printer and disconnect the power cord.
- Open the cartridge access door to view the internal assembly.
- Locate the transparent plastic strip running parallel to the metal guide rail. Caution: The strip is fragile and spring-loaded. Do not bend or pull it hard to avoid breaking it or popping it off its mounts.
- Dampen a soft paper towel or cotton swab with distilled water. Do not use isopropyl alcohol on the encoder strip, as solvents can dissolve the printed timing lines.
- Gently pinch the strip with the damp swab and wipe from one end to the other in a single smooth motion.
- Wipe the strip dry with a fresh, dry cotton swab.
- Allow the unit to dry for 5 minutes before plugging it back in and powering it up.
If you need further technical guides for troubleshooting connected office or home appliances, check out our articles on connect Epson L3250 to Wi-Fi from phone or learn what to do when Epson L3250 paper ink lights flashing together.
Frequently Asked Questions (FAQ)
1. Why does my HP printer flash the amber light even when there is paper in the tray?
This is usually caused by paper size mismatch errors (e.g., your print job configuration is set to 'Letter' size, but you have 'A4' loaded in the tray). The printer's optical sensor measures the sheet length as it feeds and triggers the amber light when it detects a discrepancy to prevent printing off-page. Make sure your driver properties match your physical paper size.
2. How can I tell which cartridge is triggering the exclamation light?
The printer's LCD screen features two ink level indicator icons (usually shaped like vertical buckets). If the color ink icon (left) or black ink icon (right) is blinking in sync with the amber exclamation light, it confirms that specific cartridge is failing the communication check and needs inspection.
3. Do refilled or third-party ink cartridges cause the amber light error?
Yes. Refilled cartridges may have worn-out copper pads or clogged nozzles that overheat the printhead resistors. Additionally, the printer's firmware may flag the cartridge's serial number if it was logged as spent in a previous cycle. Cleaning the contacts and resetting the power can help, but replacing the cartridge with a new one is often required.
4. What does it mean when the exclamation light and Power light flash fast together?
This pattern indicates a carriage jam or motor stall. The print carriage motor encountered resistance that exceeded its programmed current threshold. Check the carriage path for paper scraps, ensure the carriage glides smoothly on the rail, and clean the encoder strip.
5. Can I clear the amber exclamation light using the HP Smart app on my computer?
No. When a physical hardware error is active (flashing amber light), the printer disables its network and USB inputs, blocking incoming control packets. You must perform the mechanical clearances and physical resets directly on the printer itself as detailed in this guide.
6. How do I clean the optical paper sensor on an HP DeskJet?
The paper sensor is positioned inside the paper feed path below the intake rollers. To clean it without taking the printer apart, use a can of compressed air. Point the nozzle straw down into the paper feed slot and apply short bursts of air to clear away paper dust or debris covering the phototransistor lens.
Frequently Asked Questions (FAQ)
What does the blinking amber exclamation light mean on HP printers?
It indicates a non-critical error state, typically caused by a Wi-Fi connection loss, a physical paper jam in the mechanical roller assembly, paper sensor issues, or ink cartridge authentication failures.
How do I clear the blinking amber exclamation light error?
Perform a power reset. Unplug the power cable from the printer while it is turned on. Wait 60 seconds, press the Power button for 15 seconds to drain remaining capacitance from the motherboard, plug it back in, and power it up.
How can I resolve physical paper sensor errors on HP DeskJet?
Use a flashlight to check the paper path and clean the intake rollers with a lint-free cloth slightly dampened with distilled water. Use compressed air to blow out any paper dust blocking the optical sensors.
Why is the exclamation light flashing alongside the Wi-Fi icon?
This combined state means the printer cannot authenticate with your wireless router. Reset the network settings by holding the Wireless + Cancel buttons for 5 seconds, then run the HP Smart app to reconfigure the network.


