How to Fix Epson L3250 Paper and Ink Lights Flashing Together: Guide
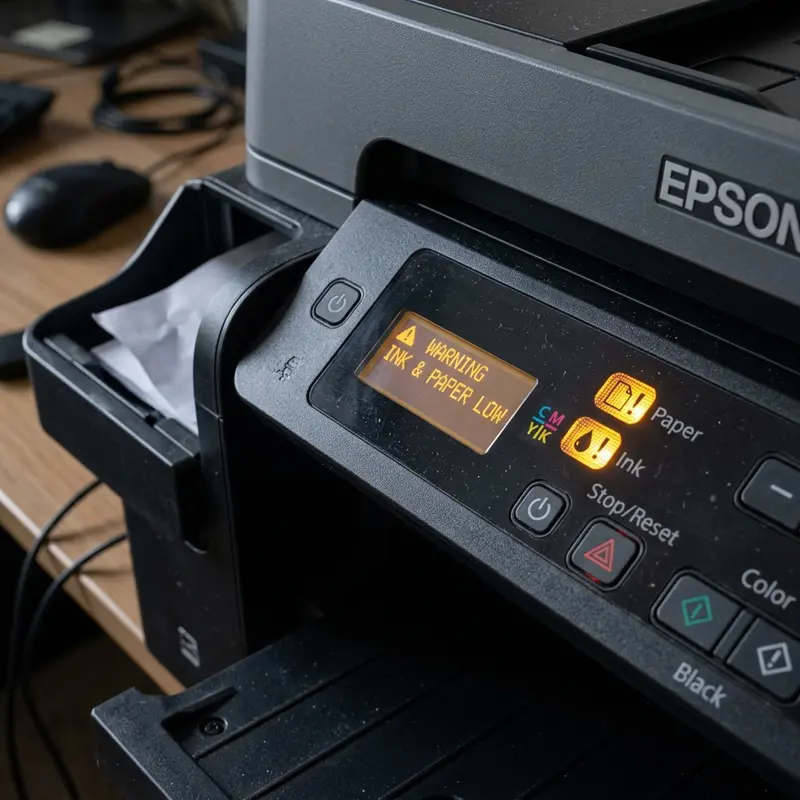
The Epson EcoTank L3250 is a widely used inkjet printer designed for home office environments. However, like any precision printing machine, it relies on safety lockouts implemented in its firmware. One of the most common issues that users encounter is when the printer halts all mechanical movements and begins flashing both the paper (sheet icon) and ink (droplet icon) LEDs simultaneously on the control panel. This behavior indicates a critical error state, and the main logical board will refuse new print jobs until the root cause is resolved.
In this technical diagnostic guide, we will analyze the electrical and mechanical systems behind this blinking light error on the Epson L3250. We will examine the function of components such as the carriage encoder strip (CR encoder strip), paper passage photodiode sensors, carriage stepper motors, and the digital counter stored in the EEPROM non-volatile memory that monitors the waste ink pad absorption capacity. You will learn how to distinguish between a mechanical jam and a logical lockout, along with instructions for corrective maintenance. If you run into issues with other home electronic devices, check out our guide on troubleshooting a Liectroux C30B robot vacuum that is beeping and stuck or learn how to connect the Epson L3250 to Wi-Fi using your phone.
1. The Mechanical and Logical Triggers Behind the Flashing Lights
The main logic board of the Epson L3250 continuously monitors several physical sensors throughout the printer chassis. When two status lights blink simultaneously, the firmware classifies the stoppage under two main categories:
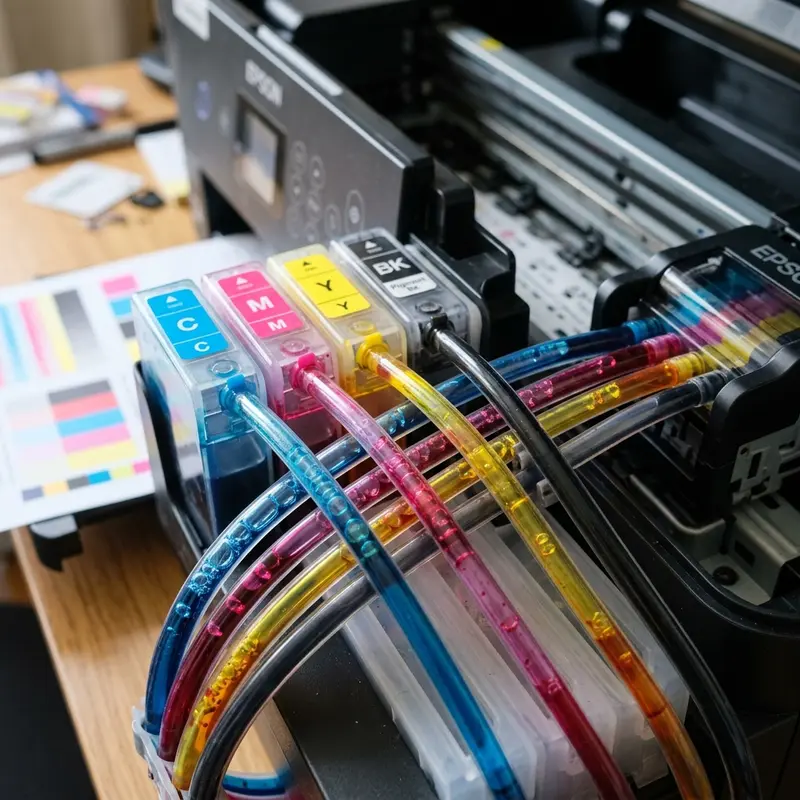
- Waste Ink Pad Saturation (Service Life Limit): Every time the printer conducts automatic or manual head cleaning cycles, a peristaltic pump draws ink from the printhead nozzles and deposits it into a plastic tray filled with absorbent polyethylene felt pads located in the lower rear portion of the chassis. The logic board tracks this waste ink volume by writing hexadecimal values to a persistent counter in the EEPROM. When this counter reaches 100% (typically after 15,000 to 20,000 pages of equivalent purge volume), the printer locks up to prevent liquid ink from overflowing and damaging your desk or flooring.
- General Hardware Failure (Fatal Error): This occurs when the motherboard detects physical resistance that threatens the stepper motors or the carriage mechanism. If the carriage carriage meets obstruction (caused by dust, paper scraps, hardened grease, or foreign objects), the motor driver chip detects an electrical current surge (overcurrent) and cuts power to the motor coils to prevent burnout. A dirty, smudged, or scratched optical encoder strip also triggers this error because the logic board loses track of the carriage's coordinates.
2. Diagnosing the Root Cause: Waste Ink Pad vs. Mechanical Error
To determine if the flashing lights on your Epson L3250 are caused by saturated waste ink pads or a general mechanical failure, run the following diagnostic test on a PC:
- Connect the printer to a Windows computer using a high-quality USB A-to-B cable. Wireless Wi-Fi diagnostic checks are prone to timing out during error states.
- Navigate to the Control Panel, select Devices and Printers, right-click the Epson L3250 icon, and select Printing Preferences.
- Click the Maintenance tab and open the Epson Status Monitor 3 utility.
- The utility will poll the printer's logic board and display a popup window with the exact status code:
- If the message states: "A printer's ink pad is at the end of its service life. Please contact Epson Support." the lockout is logical (EEPROM counter limit reached) and requires a software reset.
- If the message states: "General Error. Turn the printer off and then on again. Clear any jammed paper or foreign objects from inside the printer." the issue is mechanical and requires physical inspection.
3. Troubleshooting Mechanical General Errors
If the diagnostic utility indicates a General Error, the problem lies in sensor blockages or mechanical friction. Use the following technical maintenance checklist to isolate and fix the issue:
Step 1: Check for Paper Jams and Foreign Objects
Disconnect the power cable from the wall outlet to discharge the capacitors on the power supply board. Open the top maintenance access door. Using a flashlight, inspect the carriage track and the paper feed rollers. Even tiny fragments of torn paper, adhesive label backing, hair, or paperclips can block the transmissive photodiode sensors (such as the paper edge sensor) or block the paper path.
Step 2: Clean the Encoder Strip
The encoder strip is a thin, semi-transparent plastic band suspended behind the carriage path. It is printed with microscopic vertical lines that are read by an optical sensor behind the printhead. If lubricant grease, paper dust, or atomized ink mist settles on the strip, the optical sensor cannot count the lines. This causes the carriage to lose track of its position, often causing it to slam violently into the side frames before locking up.
To clean the encoder strip safely, moisten a lint-free microfiber cloth or cotton swab with 99.8% isopropyl alcohol. Do not use household rubbing alcohol or multi-purpose window cleaners, as their water content and additives can strip the printed lines off the plastic. Wipe the strip gently from one side to the other. Do not pull too hard, as you can easily detach the strip from its spring-loaded anchor on the left frame.
Step 3: Lubricate the Carriage Guide Shaft
The printhead carriage slides along a metal guide shaft. If this shaft dries out or becomes coated with dust, friction increases. The stepper motor controller chip on the motherboard will detect an overcurrent condition as it struggles to push the carriage. Apply a single drop of high-viscosity silicone printer oil to the metal shaft, then slide the carriage assembly back and forth manually with the power off to spread the lubricant evenly.
| Potential Root Cause | Physical Symptom | Recommended Corrective Action |
|---|---|---|
| Dirty Encoder Strip | Carriage slams violently into the left or right wall during startup. | Clean the plastic strip gently with isopropyl alcohol. |
| Ink Pad Saturation | Carriage completes its initial scan quietly, but lights flash immediately afterward. | Reset the internal EEPROM counter using software and replace the felt pads. |
| Carriage Shaft Friction | Carriage moves slowly, makes grinding noises, or stops mid-stroke. | Clean off dirty grease and lubricate the guide shaft with silicone oil. |
| Paper Sensor Blocked | Printer pulls sheets at an angle or reports jams when feed tray is empty. | Blow out the paper path area and sensor optocouplers with compressed air. |
4. Resolving Waste Ink Pad Issues (Logical and Physical Fixes)
If the Status Monitor indicates that the ink pads have reached their service life limit, you must perform two distinct steps: a logical reset of the EEPROM counter and a physical replacement of the saturated felt pads.
Part 1: The Logical Software Reset
To clear the software lockout, use the Epson Adjustment Program (AdjProg) or a third-party utility like the WIC Reset Utility. The technical procedure is as follows:
- Connect the L3250 to your computer via USB. Disconnect any other USB-connected imaging devices to prevent COM port conflicts.
- Open the adjustment software and select the L3250 model configuration.
- Click on Particular Adjustment Mode.
- Select Waste Ink Pad Counter from the maintenance options and click OK.
- Check the box next to Main Pad Counter (and Platen Pad Counter if listed).
- Click Check to read the current count, then click Initialize. The utility will send a reset command to rewrite the EEPROM counter values back to 0%.
- Turn off the printer using its power button to write the new data to the memory chip, then turn it back on.
Part 2: Physical Waste Ink Pad Replacement
Performing a software reset without replacing the saturated felt pads is a common mistake that can lead to physical damage. Once the pads are saturated, excess ink will leak out of the bottom of the printer, risking short circuits in the internal high-voltage printhead circuits.
Follow these steps to replace the waste ink pads:
- Power down the printer and unplug all cables.
- Locate the single retaining screw on the lower back cover of the printer and remove it.
- Carefully slide the black plastic waste ink container out of the printer chassis.
- Remove the ink-saturated felt pads from the plastic container. Clean the container shell with soapy water and dry it completely.
- Insert new replacement felt pads designed specifically for the Epson L3250 chassis (available online), or install an external waste ink bottle mod (ink dump kit) by routing a silicone tube from the pump outlet into an external container.
- Slide the waste ink box back into the chassis and secure the back cover panel with the screw.
Safety Warning: The piezoelectric printhead on the Epson L3250 operates at voltages between 36V and 42V to flex the nozzle crystals. If waste ink leaks onto the printhead flat cables or the nozzle contact pins, it can cause a short circuit that will instantly burn out the SMD motherboard fuses (such as fuse F1), rendering the printer useless. Do not bypass the physical pad replacement.
5. Best Practices for Printer Longevity
To prevent future hardware errors and maximize the service life of your Epson L3250, adopt these technical habits:
- Avoid Excessive Manual Cleanings: If print quality drops, do not run more than three consecutive head cleanings. Each software cleaning cycle pumps a large amount of ink into the waste pad, quickly filling the EEPROM counter. Instead, let the printer sit idle for a few hours to allow air bubbles in the nozzles to rise naturally, or manually bleed the ink lines if they are empty.
- Use Quality Paper: Lower-grade paper drops fine cellulose dust into the mechanical assembly. This dust mixes with the carriage grease, creating an abrasive paste that wears down the carriage bushings and blocks optical sensors.
- Use a Dust Cover: Keeping a dust cover over your printer when it is not in use protects the encoder strip and carriage track from airborne dust, which is a major cause of carriage jams and alignment errors.
By using the Epson Status Monitor utility to diagnose issues, cleaning the optical encoder strip, and performing both logical resets and physical pad replacements, your Epson EcoTank L3250 will continue to run reliably for a long time.
Diagnosing Logic Board Component Failures and Voltage Instability
When the paper and ink warning lights flash in an alternating pattern on the Epson L3250, and the print carriage remains completely locked at the home position, the underlying issue could stem from voltage fluctuations on the logic board's power rail. The motherboard uses dedicated linear voltage regulators to step down the incoming DC voltage from the power supply block to the 3.3V and 5V required by the logic circuits, while the printhead drivers operate at a higher 42V rail. If the main capacitor on the 42V rail loses its capacitance or develops a high equivalent series resistance (ESR), the driver chips will trigger an over-current protection flag.
This protection mechanism halts all motor operations and signals the CPU to enter a critical error state, visually represented by the blinking warning LEDs. If you are comfortable using diagnostic tools, you can measure the voltage levels at the main test points on the logic board using a digital multimeter. A steady 42V reading should be present during initial power-up. If the voltage drops below 38V when the main carriage motor attempts to rotate, the power supply module is failing to handle the load and needs replacement. Connecting the printer to a high-quality voltage stabilizer or UPS unit protects the delicate logic gates from damage caused by grid spikes.
Frequently Asked Questions
What is the difference between blinking lights flashing together and alternating?
When the paper and ink LEDs flash alternately (one after the other), the printer is performing a normal function like a firmware update, a heavy cleaning cycle, or WPS Wi-Fi pairing. If the lights flash together in unison, it indicates a critical lockout (saturated ink pads or a general hardware error).
Can I perform a waste ink pad reset using my phone?
No. Resetting the EEPROM ink pad counter requires low-level commands sent via a virtual serial COM port over a physical USB connection. This process can only be performed using a Windows or macOS computer running specialized service utility software.
Where are the waste ink pads located on the L3250?
The waste ink pads are housed inside a black plastic box located in the bottom right-rear corner of the printer. The container is secured by a single Philips screw on the back panel.
Can I wash and dry the old waste ink felt pads for reuse?
We do not recommend washing and reusing the felt pads. The original pads are made of a high-absorbency synthetic felt that loses its structure and capillary properties when washed. Reused pads will not absorb waste ink efficiently, which increases the risk of ink leaking into the internal components of the printer.


