
Setting up a VPS for WordPress can significantly improve your website's performance and reliability. A Virtual Private Server (VPS) provides dedicated resources, offering better control and flexibility than shared hosting environments. This allows you to tailor your server settings to meet the specific needs of your WordPress installation, enhancing both speed and security.
Whether you are running a personal blog or a large-scale e-commerce site, mastering the VPS setup can lead to a more robust online presence. This guide will take you through the complete process of setting up and configuring a VPS for WordPress, including essential components like Nginx, MySQL, and optimization techniques for platforms like DigitalOcean.
Understanding Web Servers and Hosting
Web servers and hosting are foundational concepts in web technology that dictate how websites are delivered to users. A web server is a software or hardware device that stores, processes, and delivers web pages to users via the internet. When a user enters a website’s URL in their browser, a request is sent to the web server hosting that site, which then responds with the requested content. Hosting, in this context, refers to the service of providing storage space for websites on servers, ensuring they are accessible over the internet.When it comes to WordPress, understanding the intricacies of web servers is important. WordPress can be hosted in various environments, including shared hosting, dedicated servers, and VPS.
Shared hosting is the most economical option but comes with limitations on performance and control. Dedicated servers offer maximum resources but are often unnecessary for smaller sites.
VPS strikes a balance by providing dedicated resources within a virtualized environment, allowing users to install custom software and optimize their server settings without the high costs of dedicated hosting.
Moreover, the choice of web server software plays a significant role in the performance and scalability of a WordPress site. The two most common web servers are Apache and Nginx.
Apache is well-known for its extensive documentation and widespread use, offering flexibility through its modules. Nginx, on the other hand, is renowned for its high performance and ability to handle multiple concurrent connections, making it an excellent choice for high-traffic sites.
This guide will specifically focus on using Nginx due to its efficiency and speed, particularly in a VPS environment.
Step-by-Step Guide to Setting Up a VPS for WordPress
Setting up a VPS for WordPress involves several key steps, from selecting a provider to configuring your server environment. First, you need to choose a VPS provider. DigitalOcean is a popular choice among developers due to its user-friendly interface and robust infrastructure. Once you have selected your provider, follow these steps to set up your VPS.
1. **Provisioning Your VPS**: Start by creating an account with your selected VPS provider. After signing in, navigate to the dashboard and initiate the creation of a new droplet or server.
Choose an operating system—Ubuntu is highly recommended for WordPress installations due to its stability and extensive support. You will also need to select the size of your VPS; for small to medium-sized WordPress sites, a plan with at least 1GB of RAM is advisable.
2. **Configuring Your Server**: Once your VPS is provisioned, you will receive an IP address to access it via SSH. Use an SSH client like PuTTY or the terminal on macOS/Linux to connect to your server.
The command typically looks like this: `ssh root@your_server_ip`. Upon connecting, you should immediately update your package lists with `sudo apt update` and upgrade any existing packages using `sudo apt upgrade`.
This ensures that your server is running the latest software versions, reducing vulnerabilities.
3. **Installing Nginx, MySQL, and PHP**: The next step is to install the necessary software stack. Begin by installing Nginx with `sudo apt install nginx`. After the installation, start and enable Nginx to run on boot using the commands `sudo systemctl start nginx` and `sudo systemctl enable nginx`.
Next, install MySQL, which is needed for WordPress to manage its database. The installation command is `sudo apt install mysql-server`. After installation, run the MySQL secure installation script to enhance security.
Finally, install PHP and the necessary PHP extensions for WordPress compatibility using the command `sudo apt install php-fpm php-mysql`.
4. **Configuring Nginx for WordPress**: After installing the essential components, configure Nginx to serve your WordPress site. Create a new server block file in the `/etc/nginx/sites-available/` directory. You can use the following command to create the file: `sudo nano /etc/nginx/sites-available/your_domain`.
Add the server block configuration, specifying the root directory, index files, and PHP processing directives. Link this file to the `sites-enabled` directory and test the configuration with `sudo nginx -t`. Finally, reload Nginx to apply the changes using `sudo systemctl reload nginx`.
5. **Downloading and Configuring WordPress**: With Nginx up and running, it’s time to download and install WordPress. Navigate to the web root directory (`/var/www/html`) and download the latest version of WordPress using `wget`. Extract the files and set the correct permissions to ensure Nginx can serve the site.
Create a MySQL database for WordPress and a user with the necessary privileges. Update the `wp-config.php` file with your database details. Finally, visit your server's IP address in a web browser to complete the WordPress installation through the setup wizard.
Completing these setup steps will prepare your VPS to host a fully functional WordPress site. However, optimization and security are also critical. Stay tuned for further enhancements such as caching, SSL configuration, and regular backups to ensure the longevity and security of your WordPress installation.
Comparative Analysis of VPS Hosting Options
When selecting a VPS hosting plan for your WordPress site, it is essential to compare various options based on performance metrics, pricing, and features. Below is a structured table that outlines different VPS providers and their offerings, enabling you to make an informed decision.| Provider | Plan Type | RAM | CPU Cores | Storage | Monthly Price | Support |
|---|---|---|---|---|---|---|
| DigitalOcean | Standard | 1 GB | 1 | 25 GB SSD | $5 | 24/7 |
| Vultr | High Frequency | 1 GB | 1 | 32 GB SSD | $6 | 24/7 |
| Linode | Standard | 2 GB | 1 | 50 GB SSD | $10 | 24/7 |
| A2 Hosting | Turbo | 4 GB | 2 | 75 GB SSD | $35 | 24/7 |
This table illustrates the various offerings from several VPS providers, highlighting key specifications such as RAM, CPU cores, and storage capacities. DigitalOcean and Vultr present affordable entry-level options suitable for small to medium-sized WordPress sites, whereas Linode offers slightly better storage for a modest increase in price.
A2 Hosting provides robust performance with an emphasis on speed, but at a higher cost. Evaluating these options based on your specific needs—such as anticipated traffic, resource requirements, and budget constraints—will guide you to the most suitable VPS plan for hosting your WordPress site.

Additional Resources and Recommended Links
For more in-depth information and guidance on VPS configurations and WordPress management, consider exploring the following resources. You can learn about the best practices in selecting hosting plans by visiting our article on best cheap cloud hosting solutions. Additionally, if you are interested in utilizing a control panel for easier management of your VPS, you can follow our guide on how to install CyberPanel dashboard on VPS. These resources will provide further insights into optimizing your hosting environment and enhancing your website's performance.Advanced Server Performance Tuning: Cache Policies and Core Networking Metrics
Redis and Memcached are other powerful caching solutions that can be utilized to store data and objects in memory, thus speeding up dynamic web applications by alleviating database load. Redis, being an advanced key-value store, provides functionalities such as data persistence and replication, which can further enhance your server’s reliability and performance.
Memcached, on the other hand, is simpler and focuses primarily on caching arbitrary data to speed up database-driven websites. By strategically implementing these caching layers, you can achieve a significant reduction in server load, thereby optimizing the overall performance of your WordPress site.
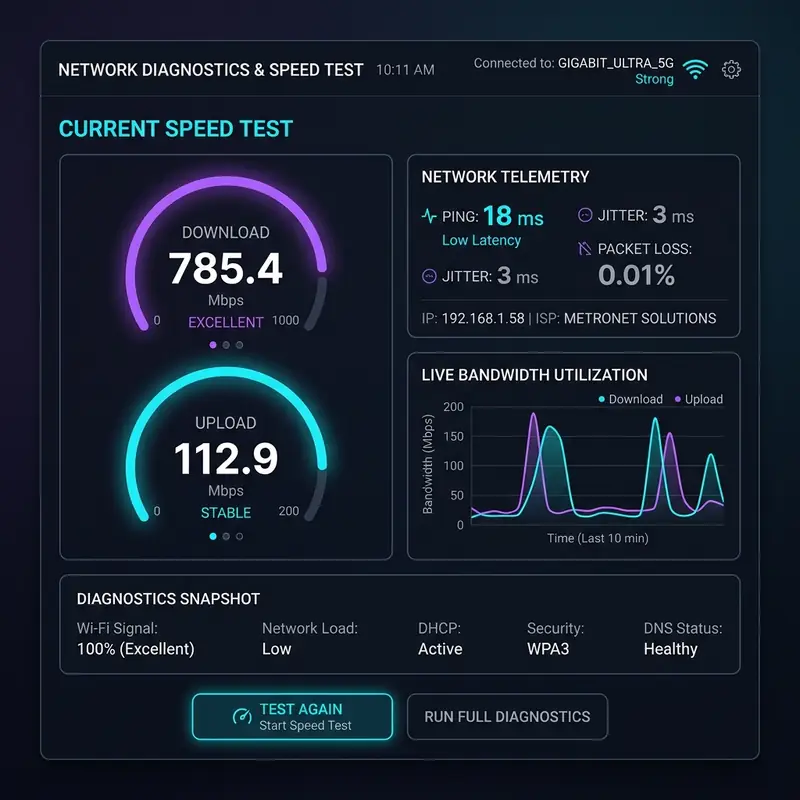
Another key aspect of server performance is monitoring core networking metrics, including server load and bandwidth allocation. Server load refers to the amount of computational work that the server is currently handling, and understanding this metric can help you prevent overloading your VPS.
Tools such as top or htop can be employed to monitor real-time server load, enabling administrators to identify performance bottlenecks and take corrective actions. Bandwidth allocation is equally important; a well-configured VPS should ensure that sufficient bandwidth is available for both inbound and outbound traffic.
Monitoring tools like vnStat can provide insights into bandwidth utilization, allowing you to optimize resource allocation.
Latency, specifically in terms of round trip time (RTT), is another important metric that can greatly affect performance. High latency can lead to delays in data transmission, which can frustrate users and lead to an increase in bounce rates.
Optimizing your server’s geographical location, using Content Delivery Networks (CDNs), and ensuring that your server hardware is capable of handling the expected load are all strategies that contribute to minimizing latency. Moreover, implementing HTTP/2 can further reduce latency by allowing multiplexing of requests, thus making better use of available bandwidth.
Finally, it’s imperative to regularly review and adjust your server configuration settings. This includes tweaking PHP settings, optimizing MySQL performance, and adjusting web server configurations like Apache or Nginx to handle traffic more efficiently. Performance tuning is an ongoing process that requires monitoring and adjustment based on usage patterns, traffic spikes, and evolving best practices in web performance optimization.
Server-Side Cybersecurity Protocols: Configurations and Best Practices

IP tables are another essential component of server-side security. This Linux-based firewall tool allows you to control incoming and outgoing traffic based on pre-defined rules.
Configuring IP tables effectively can help you block unauthorized access and mitigate potential attacks such as DDoS (Distributed Denial of Service). By setting up rules to allow only necessary ports (like HTTP, HTTPS, and SSH) and restricting all others, you can significantly reduce the attack surface of your VPS.
Additionally, regularly updating your firewall rules in response to emerging threats is a best practice that should not be overlooked.
DDoS attacks can be particularly devastating, and employing a dedicated DDoS firewall is a proactive measure that can help safeguard your VPS against such threats. These firewalls are designed to identify and mitigate traffic anomalies that indicate a DDoS attack, allowing legitimate traffic to flow while blocking malicious requests.
Incorporating a DDoS protection service can be part of a layered security strategy, which may also include rate limiting and traffic scrubbing to further shield your server from excessive load caused by attack traffic.
Directory permissions play a important role in maintaining server security as well. Configuring file and directory permissions correctly ensures that only authorized users can access critical files.
The principle of least privilege should be applied, meaning that users should only have the minimum permissions necessary to perform their tasks. For a WordPress installation, this typically means setting directories to 755 and files to 644, along with ensuring that sensitive files such as wp-config.php are well-protected.
Regular audits of file permissions can help identify any misconfigurations that could lead to vulnerabilities.
Continuous monitoring and logging of server activity are also vital in maintaining a secure environment. Implementing tools such as fail2ban can help automatically block IPs that exhibit suspicious behavior based on log file entries.
Furthermore, setting up alerts for various security events can enable you to react swiftly to any potential breaches. Keeping your software updated and employing security plugins specifically designed for WordPress can add an additional layer of defense, ensuring that your site remains secure against evolving threats.
Understanding Hosting Limitations: Comparing Server Types and Optimization Challenges
The choice of hosting for your WordPress site can significantly influence its performance and reliability. Understanding the limitations of different server types—such as shared, dedicated, and cloud machines—is key to making an informed decision. Shared hosting, while cost-effective, comes with inherent limitations, including resource sharing among multiple users. This can lead to slower performance during high traffic periods and increased vulnerability to security risks, as the actions of one user can potentially impact others on the same server. On the other hand, dedicated servers provide exclusive access to resources, allowing for enhanced performance and security but often at a higher price point.Cloud hosting offers a flexible alternative, enabling scaling resources according to demand. However, it is essential to note that not all cloud services are created equal, and misconfigurations can lead to increased latency and downtime.
Furthermore, understanding the Service Level Agreement (SLA) with your hosting provider is important, as it outlines the expected uptime, support response times, and compensation for downtime. A comprehensive SLA can provide peace of mind, especially for businesses relying on consistent website availability.
DNS propagation errors can also pose challenges during the setup phase of a VPS. When you update DNS settings, changes can take time to propagate across the internet, leading to temporary disruptions in website accessibility.
It is advisable to plan DNS changes during off-peak hours and to use tools that can help monitor the DNS propagation status. Additionally, maintaining a backup of the previous DNS configuration can be a lifesaver in case you need to revert changes swiftly.
Database optimization is another area where many users encounter pitfalls. Improper database configurations can lead to performance issues such as slow queries and increased load times.
Regularly optimizing your database by cleaning up unnecessary data, using indexing, and ensuring that the database server is adequately configured for peak loads can dramatically enhance performance. Additionally, employing caching strategies within the database layer can alleviate pressure on the server, leading to faster response times for users.
Ultimately, understanding the limitations and characteristics of different hosting environments allows you to better tailor your VPS setup to meet your specific needs. Regular performance assessments and adjustments based on user feedback and traffic patterns can help maintain an optimized environment. By being proactive in these areas, you can ensure that your WordPress site runs smoothly, providing a seamless experience for your visitors while also safeguarding against potential issues.