How to Configure W3 Total Cache Plugin for WordPress Performance

Configuring the W3 Total Cache plugin enhances WordPress performance significantly. As WordPress continues to dominate the web development landscape, optimizing your website's performance has never been more critical. The W3 Total Cache (W3TC) plugin is a powerful tool that enables WordPress users to leverage caching mechanisms to improve page load times and overall user experience.
By utilizing various caching methods such as object caching, database caching, and browser caching, W3 Total Cache can dramatically reduce server load and ensure that your website performs efficiently, even during high traffic situations. This article will provide a comprehensive guide on how to configure the W3 Total Cache plugin correctly to maximize your WordPress site's performance.
Understanding Web Servers and Hosting
In the context of web development, web servers play a critical role in delivering content to users. A web server is a specialized computer system that stores, processes, and serves web pages to users across the Internet.
When users enter a URL in their web browser, their request is sent to a web server, which in turn retrieves the relevant web page and sends it back to the user's device. The performance and configuration of the web server can significantly impact the speed and reliability of a website.
Various factors come into play, including server specifications, network bandwidth, and the software stack in use.
Hosting refers to the service that allows individuals and organizations to make their websites accessible via the Internet. Web hosting providers offer a range of solutions, from shared hosting to dedicated servers, each catering to different needs and budgets.
Shared hosting, for instance, is often the most economical option, where multiple websites share server resources. While it may be suitable for small sites or blogs, the performance can suffer when traffic spikes.
On the other hand, dedicated hosting offers superior performance and reliability as the server resources are allocated solely to a single website.
Another vital aspect of web servers and hosting is the database management system (DBMS). Most dynamic websites, including those built on WordPress, rely on a DBMS to store and retrieve data efficiently.
The configuration of the database, especially when combined with caching strategies, can significantly enhance website performance. W3 Total Cache integrates seamlessly with various database technologies, including Redis, which is an in-memory data structure store known for its speed.
By understanding these fundamental concepts, WordPress users can make informed decisions about hosting and caching to ensure their sites are optimized for performance.
Step-by-Step Guide to Configuring W3 Total Cache
Configuring the W3 Total Cache plugin requires careful attention to detail to ensure optimal performance. Start by installing the plugin from your WordPress dashboard.
Navigate to "Plugins" then "Add New," search for "W3 Total Cache," and click "Install Now." After installation, activate the plugin. Once activated, you will find a new menu item labeled "Performance" on the left sidebar of your WordPress dashboard.
Click on it to access the plugin's settings.
Upon entering the performance settings, you will be greeted with various options to enhance your website's performance. The first step is to enable caching. Under the "General Settings" tab, you will find several caching options, including Page Cache, Minify, Database Cache, Object Cache, and Browser Cache.
To begin, check the box next to "Enable" for Page Cache and Database Cache. These two settings are important for reducing server load and speeding up page delivery. For Page Cache, you can choose the method of caching; for optimal performance, select "Disk: Enhanced." This method serves cached files directly from the disk, significantly speeding up delivery.
Next, navigate to the "Page Cache" settings. Here, you can configure specific options to enhance your site's performance even further. For example, enable the "Cache front page" option to ensure that your homepage is cached for faster loading.
Additionally, consider enabling "Cache feeds" to optimize the loading of your RSS feed. After configuring these options, save your changes and proceed to the "Minify" section. Minification reduces the size of your HTML, CSS, and JavaScript files by removing unnecessary spaces and comments.
Check the "Enable" box and select the preferred minification method. It’s advisable to start with "Auto" and test your site to ensure everything works as expected.
After completing the minification settings, move to "Object Cache." This feature allows you to store database query results in memory, reducing the time it takes to retrieve frequently accessed data. To utilize object caching effectively, consider using a Redis server, which can greatly enhance performance.
If you choose to implement Redis, you will need to install the Redis Object Cache plugin in addition to W3 Total Cache. Once installed, configure the Redis settings in W3 Total Cache by entering the Redis server information such as host and port.

Continue with the configuration by navigating to the "Browser Cache" settings. This feature allows you to instruct web browsers to store certain files locally, reducing the need to download them again during subsequent visits. Enable options such as "Set expires header" and "Cache control header" to ensure that browsers cache your content effectively.
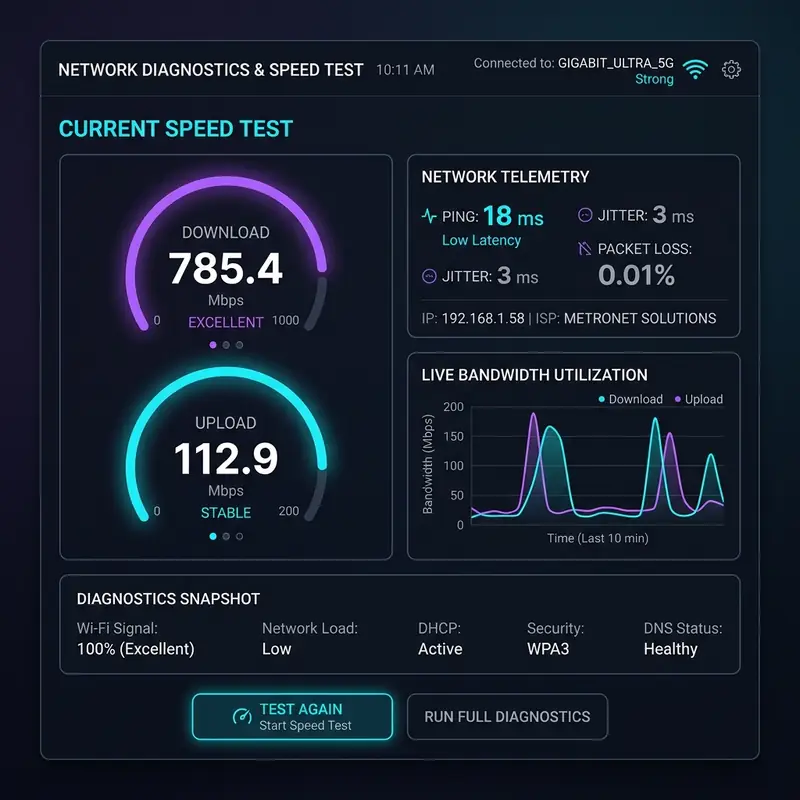
After completing these configurations, it's essential to test your website thoroughly. Use tools like Google PageSpeed Insights or GTmetrix to analyze your site's performance before and after implementing W3 Total Cache. This will help you gauge the effectiveness of your caching settings and identify further optimization opportunities.
Comparative Analysis of Caching Options
When it comes to caching options for WordPress, several choices are available, each with its unique advantages and drawbacks. Below is a comparative table highlighting popular caching methods, their functionalities, and performance benchmarks to help you make an informed decision.
| Caching Method | Performance Boost | Ease of Setup | Best Use Case |
|---|---|---|---|
| Page Cache | Up to 80% faster loading | Easy | Static content-heavy sites |
| Database Cache | Reduces DB load by 50% | Moderate | Dynamic websites with frequent queries |
| Object Cache | Improves response time by 70% | Advanced | Web applications with complex data structures |
| Browser Cache | Improves repeat visits by 60% | Easy | Sites with returning visitors |
| CDN Integration | Global load balance | Moderate | High-traffic sites |
This table illustrates the various caching methods available and their respective benefits. Choosing the right caching method depends on your website's unique requirements and expected traffic. For instance, if you run a high-traffic e-commerce site, object caching combined with a robust CDN solution could provide the performance boost needed to handle multiple simultaneous users. Conversely, static websites may benefit more from page caching alone.

Additional Resources and Recommended Links
For those looking to delve deeper into optimizing WordPress performance or seeking alternatives to W3 Total Cache, several resources are available. Websites like WPBeginner and Kinsta offer comprehensive guides on WordPress optimization techniques, including caching strategies and performance benchmarks.
Additionally, forums such as Reddit's r/WordPress provide a platform for users to share their experiences and solutions regarding caching issues. For alternative caching plugins, you might want to explore options like WP Super Cache or LiteSpeed Cache, each with its unique features and user communities.
If you are also interested in enhancing your overall web hosting experience, consider reading articles like How to Setup CyberPanel with OpenLiteSpeed and How to Setup Free Windows VPS to gain insights into setting up robust server environments that complement your caching strategies.
Advanced Server Performance Tuning: Cache Policies and Core Networking Metrics
Redis and Memcached offer robust solutions for object caching, which can significantly reduce database load by storing frequently requested data in memory. By implementing these caching systems, website administrators can ensure that repeated queries for the same data are served directly from memory rather than hitting the database each time.
This not only accelerates response times but also lowers the overall server load, allowing resources to be allocated more efficiently. Monitoring server load in conjunction with caching policies enables developers to fine-tune performance, ensuring that resources are not overtaxed during peak usage times.
Another vital aspect of server performance tuning is understanding core networking metrics. TTFB latency, server load, and bandwidth allocation are key indicators of how well a server is performing under various conditions.
TTFB latency reflects the time taken for the server to process a request and send the first byte of data to the client. A low TTFB is indicative of a well-optimized server, while high latency can suggest bottlenecks in processing or network delays.
Regularly analyzing TTFB can guide developers in identifying performance issues and implementing necessary adjustments.
Bandwidth allocation is equally important in managing server performance, especially for sites with high traffic. A misconfigured bandwidth can lead to slow loading times, particularly during traffic spikes.
Employing techniques such as traffic shaping can help distribute bandwidth more evenly across users, ensuring that no single user hogs resources and that all visitors receive equitable service. Additionally, this strategic allocation can prevent server overload, which is important for maintaining optimal performance during peak times.
Lastly, for sustained performance, it’s essential to combine these strategies with proactive monitoring and tuning. Utilizing tools that track server metrics in real time can alert administrators to potential issues before they impact users. This ongoing analysis is fundamental to maintaining the health of the server environment and ensuring that caching policies and other performance enhancements deliver their intended benefits.
Implementing Robust Server-Side Cybersecurity Protocols for WordPress

Beyond SSL, configuring effective IP tables is important in managing incoming and outgoing traffic. IP tables are a firewall feature in Linux that enables administrators to define rules for packet filtering based on IP addresses, ports, and protocols.
By establishing strict rules, you can prevent unauthorized access attempts and mitigate potential threats. Regular audits of IP tables should be conducted to adjust rules as needed, particularly following any changes in the site's traffic patterns or hosting environment.
The threat of Distributed Denial of Service (DDoS) attacks is another significant concern for server security. Implementing a DDoS firewall can provide an additional layer of protection by filtering malicious traffic before it reaches the server.
These firewalls analyze traffic patterns and can differentiate between legitimate requests and potential attacks. When a DDoS attack is detected, the firewall can automatically activate measures to mitigate the impact, ensuring that the website remains operational even under duress.
Directory permissions also play a critical role in safeguarding a WordPress site. Properly configuring permissions ensures that only authorized users have access to sensitive files and directories.
A common best practice is to set file permissions to 644 and directory permissions to 755, which allows the server to read files while preventing unauthorized write access. Regularly reviewing and adjusting these permissions in line with the principle of least privilege can significantly reduce the risk of exploitation.
Finally, ongoing monitoring and security updates are integral to maintaining a strong cybersecurity posture. Regularly updating WordPress core, themes, and plugins is vital, as vulnerabilities are often discovered and patched by developers.
Utilizing security plugins that offer features such as malware scanning and automatic updates can help streamline this process, ensuring that the website remains fortified against emerging threats. By combining these protocols, you can create a robust security framework that protects both the site and its users.
Understanding Hosting Limitations: Shared vs. Dedicated and Cloud Solutions
Understanding the various hosting solutions available is critical for optimizing a WordPress site's performance and reliability. Shared hosting, where multiple websites share the same server resources, can be an economical choice for small sites. However, this approach often comes with significant limitations, especially concerning speed and performance during peak traffic times. The shared nature of this hosting type means that the performance of one site can directly affect others on the same server, leading to slow load times and potential downtime.In contrast, dedicated hosting provides an entire server solely for one website, allowing for greater control over server resources and configurations. This option is ideal for high-traffic sites that require significant bandwidth and storage capabilities.
With dedicated hosting, administrators can fine-tune server settings to match specific application needs, optimize performance, and ensure that the site remains operational during traffic spikes. However, dedicated hosting comes with a higher price tag and typically requires more technical expertise to manage effectively.
Cloud hosting is another alternative that combines the benefits of dedicated and shared hosting. By utilizing a network of virtual servers, cloud hosting offers scalability and flexibility, accommodating varying traffic loads without compromising performance.
This model allows sites to draw resources from multiple servers, ensuring that if one server goes down, another can take over, thereby enhancing reliability. Businesses experiencing fluctuating traffic patterns may find cloud solutions particularly beneficial, as they can scale their resources up or down based on demand.
DNS propagation errors are often an overlooked aspect of hosting limitations that can impact a website's availability. When changes are made to DNS settings, such as updating an IP address or changing hosting providers, it can take time for these changes to propagate across the internet.
This delay can lead to confusion among users attempting to access the site, as some visitors might reach the old server while others access the new one. Understanding this process and planning accordingly can help minimize disruption during migrations or updates.
Database optimization is another area where hosting limitations can come into play. Optimizing a database involves ensuring that queries execute efficiently, which is important for sites that rely heavily on dynamic content.
However, poorly configured databases can lead to significant slowdowns, especially in shared hosting environments where resources are limited. Regular maintenance tasks such as cleaning up old data, optimizing tables, and ensuring proper indexing can enhance performance, but these tasks may be constrained by the limitations inherent in the hosting environment.
Finally, Service Level Agreements (SLAs) are critical factors to consider when assessing hosting options. SLAs outline the expected level of service, including uptime guarantees, support response times, and performance benchmarks. Understanding the terms of an SLA can help businesses select a hosting provider that aligns with their operational needs and ensures that they receive the level of reliability and support required to maintain optimal performance.