
How to Connect a Robot Vacuum to the Smart Life App: A Technical Guide
Modern robot vacuums have transformed domestic cleaning routines, but to fully leverage their intelligent capabilities, integration with your smart home ecosystem is crucial. To connect your robot vacuum to the Smart Life app, you must activate pairing mode by pressing and holding the power and home buttons simultaneously for 3 to 5 seconds (until the Wi-Fi LED flashes rapidly), configure your router to the 2.4 GHz frequency band, and use the "Auto Scan" option or manually add the device under the "Home Appliances" section. Running on the global Tuya IoT platform, this application allows you to manage schedules, track cleaning maps in real time, and integrate the device with voice assistants.
Although the connection process seems simple, many users face technical challenges related to network frequency compatibility, router port isolation, and security authentication errors. Synchronizing smart home appliances requires technical precision and appropriate adjustments to your wireless router settings. In this comprehensive technical guide, we will cover everything from physical network requirements to the step-by-step pairing process, troubleshooting common firmware glitches, and advanced voice integrations.
1. Wi-Fi Network Requirements and Router Band Configurations
The vast majority of integrated Wi-Fi microchips on robot vacuum mainboards operate exclusively on the 2.4 GHz frequency band. Unlike smartphones or laptops, which utilize dual-band chips compatible with 5 GHz or 6 GHz frequencies, smart appliances prioritize the 2.4 GHz band because of its superior physical range and ability to penetrate thick walls. If you try to pair the robot while your smartphone is connected to a 5 GHz network, the data exchange will fail.
To prepare your local network before starting the synchronization with the Smart Life app, follow these technical recommendations:
- Access Your Router Admin Dashboard: Open a web browser on a computer or phone and type your router's IP address (typically 192.168.0.1 or 192.168.1.1). Enter the admin credentials printed on the device's sticker.
- Separate Your SSIDs (Network Names): If your router uses Band Steering (where both 2.4 GHz and 5 GHz share a single SSID), temporarily disable it. Create distinct names like "MyHome_2G" and "MyHome_5G". This prevents your phone from switching to 5 GHz during pairing.
- Select the Best Wi-Fi Channel: 2.4 GHz networks suffer from interference from microwave ovens, baby monitors, and neighbors' networks. In the router dashboard, set the channel bandwidth to 20 MHz (instead of the automatic 40 MHz) and manually select non-overlapping channels: 1, 6, or 11.
- Verify the Security Encryption: Robot vacuum wireless receivers work best with WPA2-PSK (AES) security. Avoid WPA3-only configurations or open guest networks, as the built-in firmware of the vacuum may fail to authenticate.
If you need additional tips to stabilize your network before setting up, check our guide on how to clean Multilaser vacuum cliff sensors to understand how physical maintenance correlates with overall device health.
2. Pairing Modes Explained: EZ Mode vs. AP Mode on Tuya
Devices running on the Smart Life and Tuya ecosystem offer two distinct methods for establishing the initial connection between the vacuum's logic board and the cloud servers. These methods ensure that even in high-interference environments, pairing can succeed.
EZ Mode (Easy Connect — Rapid Flashing): This is the default connection method. When the robot is in EZ Mode, it acts as a passive listener, scanning for Wi-Fi data packets sent by your smartphone containing the SSID and encrypted password. To activate this mode, press and hold the Power and Home buttons simultaneously for about 3 to 5 seconds until you hear a voice prompt and the Wi-Fi LED begins flashing rapidly (about twice per second).
AP Mode (Access Point — Slow Flashing): If EZ Mode fails due to network blocking, AP Mode must be used. In this mode, the robot vacuum generates its own low-power Wi-Fi hotspot (usually named "SmartLife-XXXX" or "SL-XXXX"). The smartphone connects to this network to transfer credentials directly. To activate it, press the physical buttons again until the LED flashes slowly (once every two or three seconds).
3. Step-by-Step Pairing via Auto Scan and Manual Addition
With your smartphone connected to the 2.4 GHz Wi-Fi network and Bluetooth turned on, open the Smart Life app. Follow this sequence to complete the pairing process:
- Installation and Login: Download the Smart Life app from the Google Play Store or Apple App Store. Create a new account or log in. Grant permissions for Bluetooth, Location, and Local Network, as they are required to map wireless devices.
- Using Auto Scan: Tap the addition (+) icon in the top-right corner. The Auto Scan function will look for nearby pairing devices. When the robot vacuum appears, tap "Add" and enter your 2.4 GHz Wi-Fi credentials.
- Manual Addition (Alternative): If Auto Scan fails, select "Add Manually". Go to the "Home Appliances" tab and select "Robot Vacuum (Wi-Fi)". Input the SSID and password for your 2.4 GHz router network.
- Confirm LED Indicator: The application will ask you to confirm the LED status. Choose whether it is flashing rapidly (EZ Mode) or slowly (AP Mode) and proceed as guided.
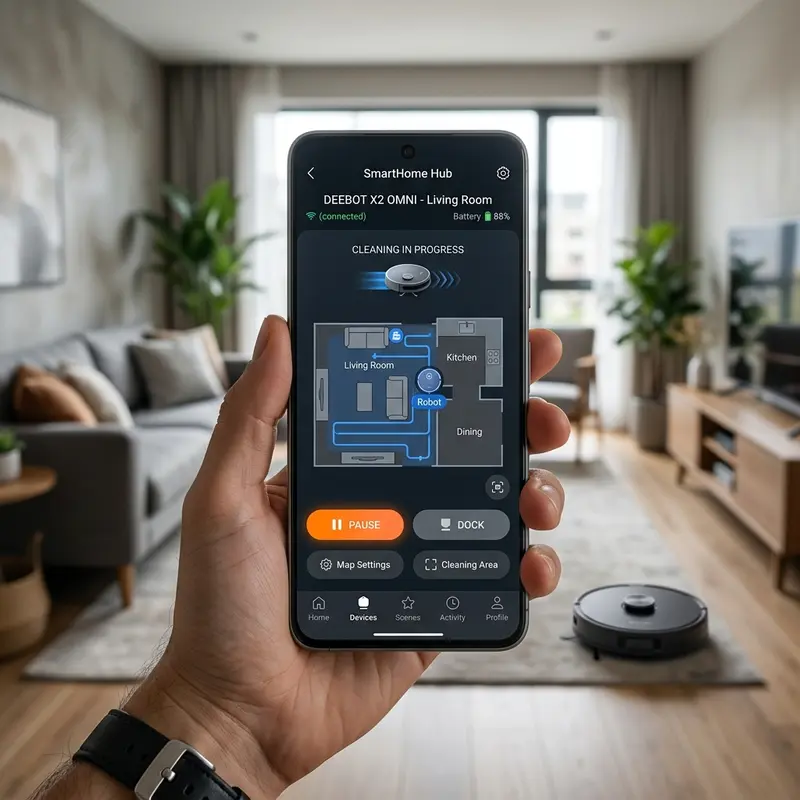
- Final Configuration: Once connected, name your robot vacuum and allocate it to a virtual room. Tap "Done" to open the device's main dashboard in the Smart Life app.

4. Troubleshooting: What to Do When Pairing Fails
If the progress bar times out or displays an error code, there is no need to worry. Most pairing issues are caused by minor network configuration mismatches.
Try the following technical troubleshooting steps to resolve the connection failure:
- Disable Mobile Data: During pairing, your phone might detect that the robot's temporary network has no internet access and automatically switch back to cellular data (LTE/5G). Turn off mobile data until pairing is complete.
- Bring the Robot Closer to the Router: Move the robot and its charging dock close to the router for the initial setup. This eliminates packet loss caused by distance or thick brick walls during the handshake.
- Check DHCP Client Limits: Routers provided by ISPs often limit the maximum number of simultaneous IP addresses distributed by the DHCP server. Temporarily disconnect other devices or expand the IP range in your router dashboard.
- Clear the App Cache: Temporary data corruption in the Smart Life app can prevent pairing logs from executing. Go to your phone settings, select the Smart Life app, and tap "Clear Cache".
For users concerned with home safety, it is also useful to understand the physical operating risks of these devices. Check our guide on are robot vacuums safe for pets and cats to see how to configure virtual boundaries within the Smart Life app to protect your household animals.
5. Voice Integration with Google Home and Amazon Alexa
Connecting your vacuum to the Smart Life app unlocks voice controls through Amazon Alexa and Google Assistant, letting you start, pause, or dock the vacuum without picking up your phone.
To configure voice controls, follow these steps:
Configuring Alexa: Open the Alexa app on your phone. Go to "More" in the bottom-right corner and select "Skills & Games". Search for "Smart Life" and tap "Enable to Use". You will be redirected to the Tuya/Smart Life authentication page. Enter your login credentials to link the accounts. Alexa will scan for devices and find your robot vacuum.
Configuring Google Home: Open the Google Home app. Tap the add (+) button in the top-left corner and select "Set up device". Choose "Works with Google" and search for "Smart Life". Log in with your app account credentials and authorize access. The robot vacuum will appear on your dashboard.
6. Feature Comparison: Smart Life vs. Tuya Smart App
Many users wonder whether they should install the Smart Life app or the Tuya Smart app. This technical table outlines the differences between the two applications:
| Software Feature | Smart Life App | Tuya Smart App | Usage Recommendation |
|---|---|---|---|
| User Target | End Consumers (Automations) | Developers & Integrators | Smart Life is more user-friendly. |
| IFTTT Compatibility | Built-in Native Support | API Development Access | Choose Smart Life for complex triggers. |
| Mapping Interface | Advanced Map Visualization | Map View & System Logs | Both render the same Tuya map engine. |
| Firmware Updates | Automatic Over-The-Air (OTA) | Manual OTA with technical logs | Updates are delivered simultaneously. |
7. Creating Automation Scenarios for Smart Cleaning
The intelligence of the Smart Life app goes beyond manual controls. You can create automated routines triggered by external variables such as weather, status of other devices, or your phone's GPS location.
Consider configuring the following automation scenarios:
- Away-From-Home Automation: Set a location trigger that runs the vacuum when you move more than 100 meters away from your house, keeping your home clean without noise disruption while you are away.
- Return-to-Dock Safety Routine: Integrate your vacuum with door contact sensors. If a sensor detects your front door opening in the evening, the app can pause the cleaning run and send the robot to its dock to prevent tripping.
- Scheduled Quiet Windows: Avoid cleaning during rest hours. Schedule deep cleans on Mondays, Wednesdays, and Fridays at 10 AM, and restrict the vacuum to low-suction silent modes during the evening.
8. Device Sharing and Family Group Management
The Smart Life app lets you share control of the robot vacuum with other household members easily, without needing to repeat the pairing process on their phones. This helps avoid network conflicts and settings resets.
To set up family sharing in the app:
Access the device settings by tapping the pencil or three-dot icon in the top-right corner of the vacuum panel. Select "Share Device" and tap "Add Sharing". Enter the phone number or email linked to the family member's Smart Life account. The recipient will receive an invitation on their phone. Once accepted, they will be able to start, stop, and schedule the vacuum from their own app interface.
Following these network and app setup instructions ensures a stable connection, allowing you to enjoy all the automations your smart robot vacuum has to offer.
Multicast and Broadcast Traffic Routing in Tuya Pairing
During the Smart Life pairing process, the mobile app uses UDP multicast and broadcast packets to discover Tuya-based chips operating in EZ pairing mode. If your home network router features advanced security protocols like AP Isolation (Client Isolation) or firewall rules blocking multicast traffic between local IP addresses, the app will fail to communicate with the vacuum. To resolve this, access your router's administration portal and disable AP Isolation and multicast filtering. Temporarily setting your router to a single 2.4 GHz SSID during the initial handshake will prevent connectivity failures.
Tuya Smart Cloud API Token Expiration and App Re-pairing
Smart Life and Tuya devices establish communication with cloud servers through secure API tokens. Occasionally, after router firmware updates or long periods of inactivity, these tokens can expire, causing the robot vacuum to appear offline in the app despite having a solid Wi-Fi connection indicator. To resolve this, you must delete the device from the Smart Life app and perform the Wi-Fi pairing process again. Importantly, re-pairing the robot on the same network does not delete your custom automation routines or scenes, as they are saved under your user account profile in the Tuya cloud rather than the physical device memory.
Frequently Asked Questions
Why won't my robot vacuum connect to my 5 GHz Wi-Fi?
Most robot vacuums use single-band Wi-Fi receivers designed only for the 2.4 GHz frequency. You must connect your phone to a 2.4 GHz network before starting the pairing process in the Smart Life app.
How do I reset my robot vacuum's Wi-Fi module?
Press and hold the Power and Home buttons simultaneously for 3 to 5 seconds. The vacuum will play an audio prompt and the Wi-Fi LED will start flashing quickly, indicating pairing mode is active.
What is the difference between EZ Mode and AP Mode?
EZ Mode is the default pairing method where the app broadcasts credentials to the vacuum. AP Mode is a fallback method where the vacuum hosts a temporary hotspot that your phone connects to for direct configuration.
How do I control my vacuum using Amazon Alexa?
Enable the "Smart Life" skill in the Alexa app and log in with your Tuya credentials. Alexa will discover the vacuum, enabling voice commands like "Alexa, turn on the vacuum."


