
Learn how to use Krea AI for real-time image generation by drawing or typing prompts with its free features.
What is Krea AI? Introducing Real-time Latent Consistency Models (LCM)
DomineTec Tip: Keep your shapes simple in the draw window and let Krea interpret colors. For local super-resolution upscale alternatives, check our article on how to upscale images using AI for free.
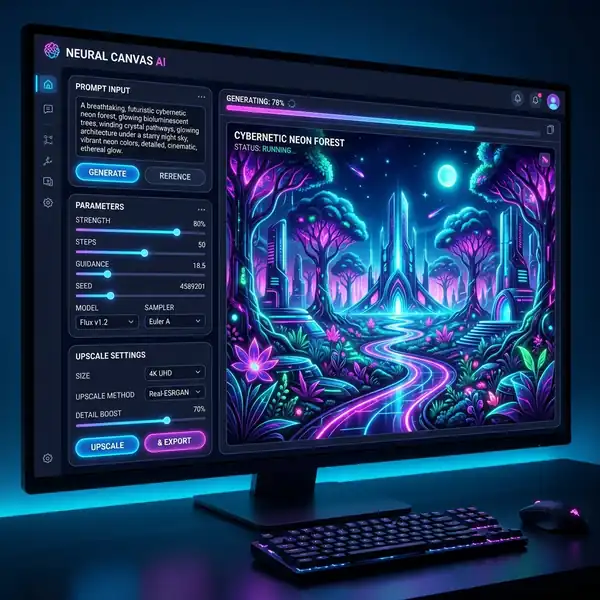
Krea AI is an innovative platform that leverages state-of-the-art artificial intelligence to generate images in real time, making it a powerful tool for artists, designers, and anyone interested in creative visual content. At the core of Krea AI's functionality is its Real-time Latent Consistency Models (LCM), which enable users to create high-quality visuals from basic sketches or textual prompts instantaneously.
Latent Consistency Models work by utilizing a sophisticated neural network architecture that processes information in a latent space—a compressed representation of the input data. This allows Krea AI to maintain a high degree of consistency in the generated images, ensuring that the output remains relevant to the user’s input. By analyzing patterns and structures in the latent space, the model can generate images that are not only coherent but also rich in detail and creativity.
The application of LCM technology allows Krea AI to excel in real-time image generation, offering a seamless experience where users can see their creations come to life as they draw or type prompts. This capability is particularly valuable for artists who require instant feedback and iteration, as well as for designers looking to quickly prototype visual ideas.
Step-by-Step Guide: Converting Doodles and Shapes into High-Fidelity Art
| Krea Tool | Krea Free Account | Krea Pro subscription |
|---|---|---|
| Real-Time Generator | Yes (Subject to daily GPU allocations) | Yes (Priority rendering speeds, unlimited runs) |
| Image Enhancer | Available (Subject to queuing wait times) | Yes (Faster rendering for bulk jobs) |
To effectively use Krea AI’s drawing features, follow these detailed steps:
1. Accessing Krea AI
Begin by visiting the official Krea AI website. If you do not already have an account, sign up for free. The registration process typically requires an email address and a password.
2. Navigating the User Interface
Once logged in, familiarize yourself with the Krea AI interface. The main components include:
- Canvas Area: The central area where you will draw or type prompts.
- Toolbar: Located on the side, it contains tools for drawing, undoing actions, and configuring settings.
- Output Gallery: Displays the images generated based on your inputs.
3. Selecting Drawing Tools
Krea AI provides a variety of drawing tools that you can use to create your initial sketches. These tools typically include:
- Pencil: For fine lines and detailed drawings.
- Brush: For broader strokes and artistic effects.
- Eraser: To remove unwanted parts of your drawing.
Select the tool best suited for your intended style. For initial designs, the pencil tool may be most effective for outlining shapes.
4. Drawing Your Image
Start sketching your idea directly on the canvas. Krea AI’s real-time generation will activate as you draw. You can create simple shapes, complex structures, or even abstract designs. As you draw, the AI will analyze your strokes and begin generating a corresponding image in the background.
5. Refining Your Sketch with Prompts
After you’ve created your initial drawing, you can enhance it further by typing descriptive prompts. For example, if you sketched a simple flower, you might type “a vibrant, multi-colored flower with intricate petal details.” The AI will then adjust the generated image to reflect the new input, adding details and improving the overall quality.
6. Iterating and Experimenting
Continue to refine your image by adjusting your drawing or modifying your prompts. Krea AI allows for dynamic interaction, meaning you can see changes in real time. This iterative process is important for achieving the desired output.
7. Saving and Exporting Your Work
Once you are satisfied with the generated artwork, you can save it directly to your account or export it in various formats such as PNG or JPEG. Make sure to check the resolution settings to ensure you capture the highest quality for your artwork.
Krea AI Upscale and Enhancer: Tuning Details to Render Photorealistic Prints
Krea AI also offers advanced features like upscaling and enhancing images, which are essential for artists looking to produce high-fidelity prints. Here’s how to utilize these features effectively:
1. Understanding Upscaling
Upscaling involves increasing the resolution of an image while maintaining its quality. Krea AI employs advanced algorithms that intelligently add pixels and enhance details, making your artwork suitable for printing or high-resolution displays.
2. Accessing the Upscaling Feature
After generating your image, locate the upscaling option in the output gallery. This feature is typically represented by an icon resembling an upward arrow or magnifying glass. Click on this icon to initiate the upscaling process.
3. Configuring Upscaling Settings
Krea AI typically provides several settings for upscaling. Depending on the platform updates, these settings may include:
- Resolution: Choose the desired resolution (e.g., 1080p, 4K).
- Enhancement Level: Adjust the level of detail enhancement from subtle to aggressive.
- Noise Reduction: Enable this option to minimize artifacts in the generated image.
Select the settings that best align with your project's requirements.
4. Processing the Image
After configuring the settings, click the “Upscale” button. The AI will process your image, which may take a few moments depending on the complexity and the chosen resolution.
5. Previewing and Saving the Enhanced Image
Once the upscaling is complete, a preview will be displayed. Review the enhanced image to ensure it meets your expectations. If satisfied, save the image to your account or download it directly to your device.
Krea AI Pricing Table: Free GPU Limits versus Krea Pro Subscription Benefits
Krea AI offers a tiered pricing structure that allows users to access varying levels of features and capabilities. Understanding these tiers is important for selecting the best option for your needs.
1. Free Tier
The free tier of Krea AI provides access to essential features, including:
- Basic drawing tools
- Limited real-time generation capabilities
- Access to a predefined set of prompts
However, there are some limitations:
- Restricted GPU usage, which may slow down processing during peak times.
- Lower resolution outputs compared to paid tiers.
This tier is suitable for casual users or those just starting with AI-generated art.
2. Krea Pro Subscription
The Krea Pro subscription provides extensive benefits, including:
- Unlimited GPU usage for faster processing times.
- Access to premium drawing and enhancement tools.
- Higher resolution outputs suitable for professional print quality.
- Priority customer support and access to exclusive features.
The Pro subscription is ideal for professional artists and designers who require more advanced capabilities and higher quality outputs.

Advanced Prompting and Control: Connecting Screen Capture Streams into Krea Editor
Krea AI supports advanced prompting techniques that allow users to integrate real-time screen capture streams directly into the Krea editor. This feature is particularly beneficial for creating dynamic and responsive artworks.
1. Setting Up Screen Capture
To connect screen capture streams, you will need compatible software, such as OBS Studio or any other screen recording tool that supports real-time streaming. Ensure your software is properly configured to capture the desired screen section.
2. Configuring Krea AI to Accept Stream Input
In Krea AI, navigate to the settings menu and locate the “Input Sources” section. Here you will find options to connect your screen capture tool. Follow these steps:
- Select your screen capture software from the list of available input options.
- Adjust the input settings to define the area of the screen you want to capture.
- Enable real-time streaming by toggling the relevant option.
3. Utilizing Streamed Content in Krea AI
After your screen capture is set up, you can begin drawing or inputting prompts based on the content being streamed. For example, if you are capturing a live drawing session, Krea AI will generate images based on your live sketches and any prompts you provide.
4. Experimenting with Dynamic Inputs
This feature allows for a high degree of creativity. Experiment by adjusting your prompts based on the evolving artwork in your stream. This interaction leads to unique outputs that can significantly enhance the creative process.
5. Saving and Sharing Stream-Based Creations
Once satisfied with the generated artwork, save it in your Krea account or download it. You can also share your creations directly on social media platforms or collaborate with other artists by sharing your Krea link.
Conclusion
Krea AI represents a significant advancement in real-time image generation technology, empowering users to create stunning visuals from simple inputs. With its intuitive drawing tools, powerful upscaling features, and flexible subscription options, Krea AI caters to both casual users and professionals alike. By following the steps outlined in this guide, you can harness the full potential of Krea AI for your artistic and design needs, creating high-quality images that reflect your unique vision.
Additional Resources and Recommended Links
For more guides and tutorials on AI image and video generators, check out our step-by-step articles on how to upscale images using AI for free and can I use Leonardo AI images commercially. For official platforms and tools, visit the Official Krea AI Platform.
Advanced Techniques for Integrating Krea AI into Your Workflow
Integrating Krea AI into your workflow for real-time image generation can significantly enhance your creative projects, whether you are a digital artist, a content creator, or a marketing professional. To leverage Krea AI effectively, it’s essential to familiarize yourself with its advanced configuration settings and optimization techniques. By tailoring the tool to your specific needs, you can generate high-quality images that align perfectly with your creative vision. This section will delve into advanced tutorials that guide you through a seamless integration process, showcasing how to optimize Krea AI for the best performance in various scenarios.
First and foremost, understanding the configuration settings available in Krea AI is important for maximizing its capabilities. When you first access the platform, take the time to explore the settings menu. Here, you will find options to adjust the resolution, aspect ratio, and style parameters of the images you want to generate. For instance, if you are creating images for social media, you might prefer a specific aspect ratio that fits platforms like Instagram or Facebook. Additionally, adjusting the style parameters can significantly impact the aesthetic appeal of your images. Experimenting with different settings will allow you to find the optimal configuration that balances quality and performance based on the intended use of the generated images.
Another vital aspect of integrating Krea AI into your workflow is the use of API access for automated image generation. The Krea AI API allows developers to programmatically access the image generation capabilities of the platform, enabling seamless integration into existing applications or workflows. This is particularly useful for businesses that require a high volume of images, such as e-commerce platforms or content management systems. By setting up automated scripts that call the API, you can generate images in bulk, ensuring that your inventory is always visually appealing and up-to-date without manual intervention. Furthermore, incorporating error handling and logging within your scripts will help you troubleshoot any issues that may arise during the image generation process.
Beyond the technical setup, optimization techniques play a significant role in ensuring that Krea AI delivers the best possible results. One effective strategy is to refine your prompts to yield more accurate and relevant images. The way you phrase your requests can greatly influence the output quality. For example, instead of a vague prompt like "a landscape," consider a more descriptive approach, such as "a serene sunset over a mountain range with a clear sky." This specificity helps the AI to understand your vision better and align the output with your expectations. Additionally, utilizing feedback loops by reviewing generated images and iteratively improving your prompts based on what works best can lead to remarkable enhancements in image generation quality over time.
Lastly, real-world use cases demonstrate the versatility of Krea AI in various industries. For instance, in the fashion industry, designers can use Krea AI to create virtual clothing models or runway looks, allowing them to visualize collections before production. Similarly, in the advertising sector, marketers can rapidly generate eye-catching visuals for campaigns, significantly reducing the time spent on creative development. Educational institutions can leverage Krea AI to produce custom illustrations for learning materials, enhancing student engagement through tailored visuals. By exploring these diverse applications, users can uncover innovative ways to incorporate Krea AI into their projects, ultimately driving creativity and efficiency in their workflows.


