
Learn how to upscale images using free AI software like Upscayl, BigJPG, and Stable Diffusion tools for enhanced resolutions.
What is AI Upscaling? Super-Resolution Algorithms versus Traditional Resizing
DomineTec Tip: Upscayl runs locally on your graphics card using Vulkan API. To ensure you have the best hardware configuration for local models, see our article on best GPU for Stable Diffusion WebUI.
AI upscaling, or super-resolution, refers to the process of enhancing the resolution of images using artificial intelligence techniques. Unlike traditional resizing methods, such as bilinear interpolation, which simply increases pixel count by averaging neighboring pixels, AI upscaling utilizes deep learning models to predict and generate new pixel data. This results in sharper, more detailed images that retain their quality even at higher resolutions.
The fundamental difference lies in how these two approaches handle image data. Traditional resizing techniques often lead to blurriness or pixelation when an image is scaled up. In contrast, super-resolution algorithms analyze the image's content and learn intricate patterns through training on vast datasets. These algorithms leverage convolutional neural networks (CNNs), which excel at recognizing and reconstructing image features, thus providing a superior quality output.
Common super-resolution algorithms include:
- ESRGAN (Enhanced Super-Resolution Generative Adversarial Network): This model enhances image quality by using a generator-discriminator architecture, which allows it to produce realistic textures. - SRGAN (Super-Resolution Generative Adversarial Network): A precursor to ESRGAN, SRGAN focuses on generating high-resolution images that look visually appealing. - FSRCNN (Fast Super-Resolution Convolutional Neural Network): Known for its speed, FSRCNN is optimized for real-time applications while delivering relatively high-quality results.
In summary, AI upscaling is a revolutionary approach that surpasses traditional image resizing methods, enabling users to achieve high-quality images from lower-resolution originals.
Desktop Powerhouse: Installing and Running Upscayl Open-Source Tool on Your PC
| AI Upscaler | Hardware Requirements | Pricing Model |
|---|---|---|
| Upscayl | Vulkan-compatible GPU (NVIDIA/AMD) required | Completely Free (Open-source) |
| BigJPG | Standard web browser (Cloud processing) | Free options (Paid tier for 8x upscale resolution) |
Upscayl is a free, open-source application designed specifically for image upscaling using advanced AI algorithms. Below are the detailed steps to install and run Upscayl on your PC.
Step 1: System Requirements
Before installation, ensure that your system meets the following requirements:
- Operating System: Windows 10/11, macOS 10.15 or later, or Linux (Ubuntu 18.04 or later). - Minimum RAM: 8 GB (16 GB recommended for better performance). - GPU: A dedicated graphics card with at least 4 GB of VRAM (NVIDIA, AMD, or Intel).
Step 2: Downloading Upscayl
1. Visit the official Upscayl GitHub repository at https://github.com/upscayl/upscayl. 2. Navigate to the "Releases" section on the right side of the page. 3. Download the version compatible with your operating system (e.g., Upscayl-Windows-x64.exe for Windows).
Step 3: Installation
For Windows:
1. Locate the downloaded .exe file and double-click to run the installer. 2. Follow the on-screen instructions to complete the installation. 3. Once installed, you can find Upscayl in your Start Menu.
For macOS:
1. Open the downloaded .dmg file. 2. Drag the Upscayl app into your Applications folder. 3. Launch the application from your Applications folder or Launchpad.
For Linux:
1. Open the terminal. 2. Navigate to the directory where you downloaded the .AppImage file. 3. Make the file executable with the command: ``` chmod +x upscayl.AppImage ``` 4. Run the application using: ``` ./upscayl.AppImage ```
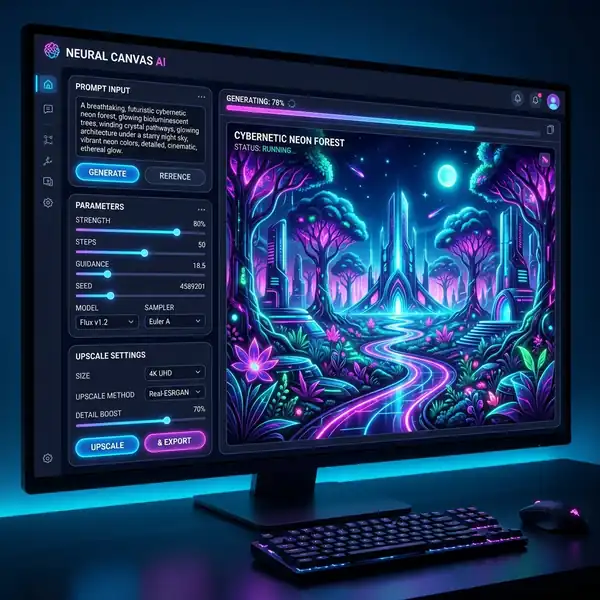
Step 4: Configuring Upscayl
1. Open the Upscayl application. 2. On the main interface, you will see options to load an image. Click on the "Open Image" button. 3. Select the image you wish to upscale. 4. Choose the scale factor from the options: 2x, 4x, or 8x. 5. Select the model to be used for upscaling (e.g., ESRGAN or Real-ESRGAN). Each model has its own strengths, so experiment to see which one works best for your image. 6. Adjust additional settings like noise reduction and sharpening if needed. 7. Click the "Upscale" button to begin the processing.
Step 5: Saving the Upscaled Image
1. After the processing is completed, a preview of the upscaled image will appear. 2. Click on the "Save" button to choose the destination folder and file format (JPEG or PNG). 3. Name your file and hit "Save."
With Upscayl, you can easily enhance your images, giving them a new life with minimal effort.
Online Cloud Upscalers: Leveraging BigJPG and VanceAI for Quick Projects
For those who prefer not to install software, online cloud-based upscaling solutions like BigJPG and VanceAI offer convenient alternatives. These platforms utilize proprietary AI algorithms to enhance images directly in your web browser.
BigJPG
BigJPG specializes in upscaling images while preserving details, especially for anime and illustrations. Here’s how to use it:
1. Visit the BigJPG website at https://bigjpg.com. 2. Click on the "Select Images" button to upload your image. You can also drag and drop files for convenience. 3. Choose the upscale factor (2x, 4x, or up to 16x) and select the enhancement type (Art & Animation or Normal). 4. Click on "Start" to initiate the upscaling process. 5. Wait for the processing, then download the upscaled image.
BigJPG offers a free tier with limitations on file size and the number of images processed per month, making it suitable for occasional use.
VanceAI
VanceAI provides a broader range of image enhancement tools, including upscaling, denoising, and sharpening. To use VanceAI for upscaling:
1. Navigate to the VanceAI website at https://vanceai.com/image-upscaler. 2. Click on the "Upload Image" button to select your file. 3. Choose the desired scale (2x, 4x, or 8x) from the options. 4. Click on "Start Processing" to begin the enhancement. 5. Once the process is complete, download the high-resolution image.
VanceAI also offers a subscription model for users requiring extensive features beyond the free tier.

AI Upscaling Tools Comparison Table: Free Limits, GPU Usage, and Batch Modes
To provide a clearer understanding of the available tools, here’s a comparison table summarizing their features:
| Tool | Type | Free Limits | GPU Usage | Batch Mode |
|---|---|---|---|---|
| Upscayl | Desktop | No limits | Yes (Local GPU) | Yes |
| BigJPG | Online | Max 5 images/month, 5 MB/image | No | No |
| VanceAI | Online | Max 5 images/day, 5 MB/image | No | Yes (Paid) |
This table highlights the strengths and limitations of each tool, allowing users to choose the most suitable option based on their needs.

Integrating Upscale in Stable Diffusion: Using Ultimate SD Upscale Script in WebUI
For users familiar with Stable Diffusion, integrating image upscaling into your workflow can enhance the output quality significantly. The Ultimate SD Upscale script is a popular choice for this purpose.
Step 1: Setting Up Stable Diffusion WebUI
1. Ensure you have a functioning Stable Diffusion setup on your local machine. Follow the official documentation for installation if necessary. 2. Make sure your system has the required dependencies, including Python and necessary libraries.
Step 2: Downloading the Ultimate SD Upscale Script
1. Visit the GitHub repository for the Ultimate SD Upscale script at https://github.com/AUTOMATIC1111/stable-diffusion-webui. 2. Clone the repository or download the ZIP file to your local machine. 3. Extract the contents if downloaded as a ZIP.
Step 3: Installation in WebUI
1. Navigate to the directory where the Stable Diffusion WebUI is installed. 2. Move the downloaded script files into the `scripts` folder of your WebUI directory. 3. Start the Stable Diffusion WebUI by running the following command in your terminal: ``` python app.py ```
Step 4: Configuring the Upscale Script
1. Once the WebUI is running, navigate to the "Scripts" tab. 2. Locate the "Ultimate SD Upscale" option in the dropdown menu. 3. Select the desired upscaling parameters, including scale factors and model choices. 4. Upload the image you want to enhance. 5. Execute the script by clicking the "Run" button.
Step 5: Viewing and Saving Results
1. After processing, the upscaled image will be displayed in the output section. 2. You can download the high-resolution version by right-clicking on the image and selecting "Save As."
Integrating the upscale script with Stable Diffusion allows users to enhance their generated images further, maximizing quality and detail.
Conclusion
In conclusion, AI-based image upscaling tools provide unparalleled solutions for enhancing image quality. Whether you opt for a powerful desktop application like Upscayl, convenient online services like BigJPG and VanceAI, or integrate upscaling into Stable Diffusion workflows, the options available today make it easier than ever to improve image resolution without compromising on quality. By understanding the underlying technologies and methods, users can choose the right tools to meet their specific needs and achieve stunning results.
Additional Resources and Recommended Links
For more guides and tutorials on AI image and video generators, check out our step-by-step articles on best GPU for Stable Diffusion WebUI and how to run Stable Diffusion online for free. For official platforms and tools, visit the Official Upscayl Download Portal.
Advanced Techniques for Integrating AI Image Enhancement into Your Workflow
As the demand for high-quality images continues to rise in various industries, integrating AI image enhancement tools into your workflow can significantly optimize both efficiency and output quality. This section explores advanced techniques for effectively incorporating free AI software into your existing image processing pipeline. By understanding how to configure these tools and utilize their features, you can streamline your workflow and achieve superior results with minimal manual intervention.
One of the first steps in integrating AI image enhancement into your workflow is to select software that offers batch processing capabilities. Free AI tools like Let’s Enhance and GIMP with AI plugins allow users to process multiple images simultaneously. This feature can save considerable time, especially for photographers, marketers, and e-commerce businesses that rely on a high volume of images. To maximize this capability, it’s essential to configure settings that align with your specific needs. This may involve adjusting parameters such as image resolution, output format, and enhancement levels before initiating batch processing. Additionally, consider the hardware limitations of your system, as processing large batches of high-resolution images can be resource-intensive, necessitating a capable CPU and sufficient RAM.
Another critical aspect of workflow integration is the ability to customize the AI parameters for different types of images. Free AI software often provides settings that can be fine-tuned based on the content and desired output. For instance, when enhancing portraits versus landscapes, the emphasis on color saturation, sharpness, and noise reduction may vary. By experimenting with these settings on sample images, one can establish presets tailored for different scenarios. This not only ensures consistency across projects but also enhances the overall quality of the images processed. Furthermore, utilizing software that supports plugin functionalities can allow users to integrate AI tools with existing photo editing software, enabling a seamless transition between basic adjustments and advanced enhancements.
In addition to configuration settings, optimization techniques play a important role in achieving the best possible results with AI-enhanced images. After processing, it’s vital to perform a quality check to ensure that the enhancements align with your expectations. This can involve comparing the original and processed images side-by-side to evaluate improvements in clarity, color accuracy, and overall aesthetic appeal. Utilizing tools like histogram analysis can provide insights into exposure levels and color distribution, guiding further adjustments. If the AI-enhanced images are intended for specific platforms, such as social media or websites, it’s also advisable to optimize file sizes without compromising quality. Techniques such as image compression and format conversion can help maintain fast loading times and enhance user experience.
Real-world use cases of AI image enhancement illustrate the practical benefits of these advanced techniques. For instance, a small business owner who sells products online can use free AI software to enhance product images, making them more appealing to potential customers. By utilizing batch processing and customized settings, the owner can quickly enhance a library of images, improving their chances of attracting buyers. Similarly, photographers can integrate AI enhancements into their post-production workflow, allowing them to focus more on creative aspects rather than tedious editing tasks. By leveraging these advanced integration techniques, users across various sectors can harness the power of AI to elevate their visual content, ensuring it stands out in a crowded marketplace.
Advanced Image Upscaling Techniques Using Free AI Software
When diving deeper into the realm of image upscaling with free AI software, it becomes essential to explore advanced techniques that can significantly improve the quality and efficiency of your workflow. One such technique involves the integration of multiple AI algorithms to achieve a more refined output.
For instance, utilizing a combination of convolutional neural networks (CNNs) alongside generative adversarial networks (GANs) can yield superior results in image enhancement. By leveraging the strengths of each algorithm, users can reduce artifacts and noise while preserving essential details, resulting in a more visually appealing final product.
Configuring these tools appropriately requires a keen understanding of their parameters, such as learning rates, epoch counts, and batch sizes, which can drastically influence the quality of the upscaled images.
In addition to algorithmic integration, optimizing the workflow through batch processing can streamline the upscaling process significantly. Many free AI software solutions offer batch processing capabilities that allow users to upscale multiple images simultaneously.
This feature is particularly beneficial for photographers, graphic designers, and content creators who work with large volumes of images. By setting up a workflow that leverages batch processing, users can save time and maintain consistency across their projects.
It is important to configure the software settings properly, such as output resolution and format, to ensure that all images are processed under the same criteria, which can help maintain a uniform look and feel across the entire project.
Real-world applications of these advanced techniques can be seen in various industries, from e-commerce to digital marketing. For instance, an online retailer might use AI upscaling to enhance product images for their website.
By applying advanced upscaling techniques, they can improve the visual quality of their images, making them more appealing to potential customers. Enhanced images can lead to higher engagement rates and, ultimately, increased sales.
Furthermore, with the ability to integrate these techniques into existing content management systems, retailers can automate the image enhancement process, ensuring that all product images are consistently high-quality without requiring additional manual effort.
Lastly, it is essential to consider optimization techniques that can further enhance the upscaled images. Techniques such as noise reduction, sharpening, and color correction can be vital in achieving the desired output. Most free AI software includes built-in features for these tasks, but understanding how to tweak these settings can make a significant difference.
For example, applying a subtle noise reduction algorithm before upscaling can help minimize distractions in the image, while sharpening algorithms can enhance edges and details post-upscale. Additionally, color correction tools can ensure that the upscaled images maintain accurate color representation, which is important for branding and visual consistency. By mastering these optimization techniques, users can take full advantage of free AI software, transforming their images into high-quality visual assets that stand out in any field.


