How to Unclog a Dried and Clogged HP Printer Ink Cartridge
To unclog a dried and clogged HP printer ink cartridge, the most reliable and safe method is to dissolve the hardened ink crust on the printhead nozzles by soaking them in warm demineralized water (around 50°C / 120°F) for several minutes, followed by vacuum suction using a specialized cartridge priming tool (commonly known as a Snap Tool). This procedure physically pulls the coagulated pigment out of the microscopic nozzles without exposing the delicate thermal resistors inside the head to excessive dry heat, which could burn them out permanently.
When an inkjet printer sits idle for weeks or months, the liquid solvents (mainly water and organic humectants) in the ink evaporate through the microscopic printhead openings. This process leaves behind a solid polymer-pigment matrix that forms a tough crust, sealing the nozzle openings shut. Trying to print through a clogged cartridge is not only futile but can ruin the printhead electronics. In this extensive guide, we will analyze the thermodynamics of HP ink cartridges and walk you through the precise step-by-step procedures used by professional technicians to revive them safely.
The Physics of Thermal Inkjet Technology
To understand why HP cartridges clog and how to fix them, we must first look at the technology that drives them. Unlike Epson printers, which utilize Piezoelectric printheads (using physical deformation of piezo crystals to squeeze ink out), HP cartridges employ Thermal Inkjet (TIJ) technology. The printhead is built directly into the base of the cartridge rather than the printer itself.
Within this printhead, there is a silicon wafer lined with hundreds of tiny ink chambers, each containing a microscopic thin-film resistor. When you send a print command, the printer’s logic gates send a high-speed electrical pulse to the contact pins on the back of the cartridge. This electrical current heats the thin-film resistor to a temperature of over 300°C (approx. 572°F) in a fraction of a microsecond. This intense heat causes a thin layer of the ink solvent to instantly vaporize, forming a high-pressure steam bubble. The expansion of this bubble forces a tiny droplet of ink (usually measured in picoliters) out of the nozzle orifice and onto the paper. As the bubble collapses, it draws a fresh charge of cool ink from the internal reservoir into the nozzle chamber, repeating the cycle thousands of times per second.
This thermodynamic system depends entirely on two critical factors:
- Cooling Mechanism: The continuous flow of fresh, cool liquid ink acts as a heat sink for the tiny resistors. If a nozzle is blocked by dry ink and no liquid flows, the resistor will quickly exceed its thermal limit and burn out, causing a permanent electronic failure.
- Solvent Vapor Pressure: The ink is formulated to keep the pigments in a suspension state. When exposed to dry air, the volatile solvents evaporate, altering the viscosity of the ink. The remaining binder polymers cross-link and solidify into a hard, crystalline plug.
Pre-Diagnostic Checklist: Clogged vs. Failed Cartridge
Before spending time attempting physical unclogging methods, you must ensure the cartridge is still electrically viable. If the copper contact pads or the internal connections are damaged, the printer will reject the cartridge entirely.
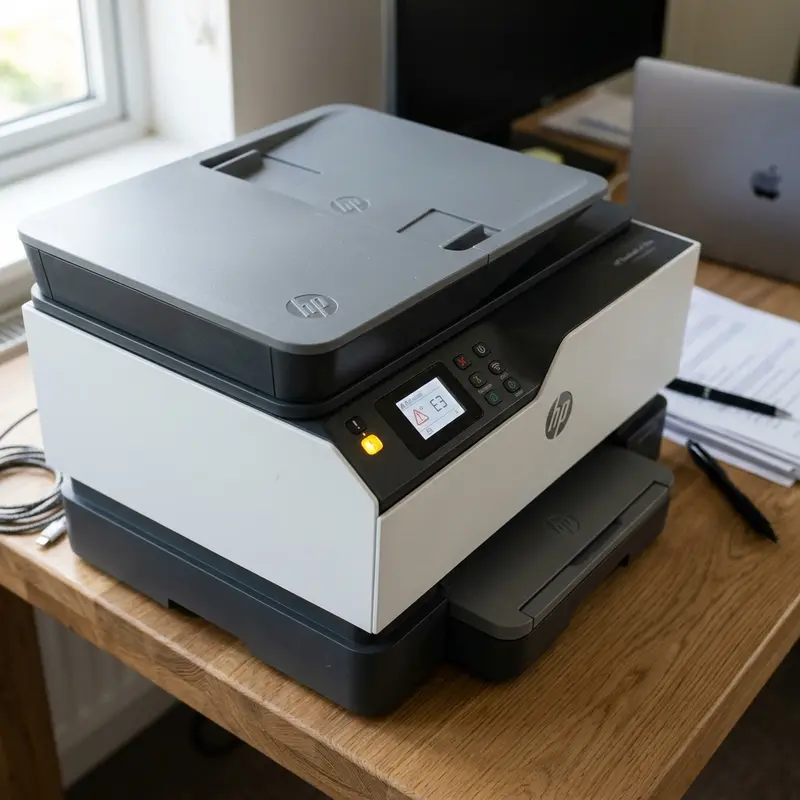
If your printer’s control panel displays blinking lights, an exclamation mark, or an error code indicating the cartridge is not recognized or damaged, clean the copper contacts on the back of the cartridge with a soft pencil eraser or a lint-free cloth moistened with isopropyl alcohol (99% purity). Do not use rubbing alcohol that contains oils. If the electrical error persists, the cartridge is likely dead and cannot be recovered. For details on troubleshooting hardware error lights, see our guide on the HP printer blinking amber exclamation light. If the cartridge is recognized but prints blank pages, you are dealing with a purely physical clog.
| Printer Symptom | Root Physical Cause | Recommended Technician Action |
|---|---|---|
| Cartridge error light flashes; printer states cartridge is missing. | Dirty or oxidized copper contact pads, or burnt internal circuit trace. | Clean contact points with isopropyl alcohol. Replace cartridge if error remains. |
| Cartridge is recognized, but prints blank sheets. | Complete solidification of pigment across the nozzle plate. | Perform demineralized warm water soak and apply vacuum with the Snap Tool. |
| Horizontal white lines appear or colors are dull and incomplete. | Partial blockage of individual nozzles (micro-clogs). | Run software-based printhead cleaning cycles, or apply localized printhead cleaning solution. |
| Ink leaks continuously from the nozzle plate. | Ruptured internal bladder or loss of negative pressure balance. | Prime the cartridge with a Snap Tool, drawing out 1ml of ink to rebuild internal vacuum. |
Method 1: The Professional Snap Tool Vacuum Method
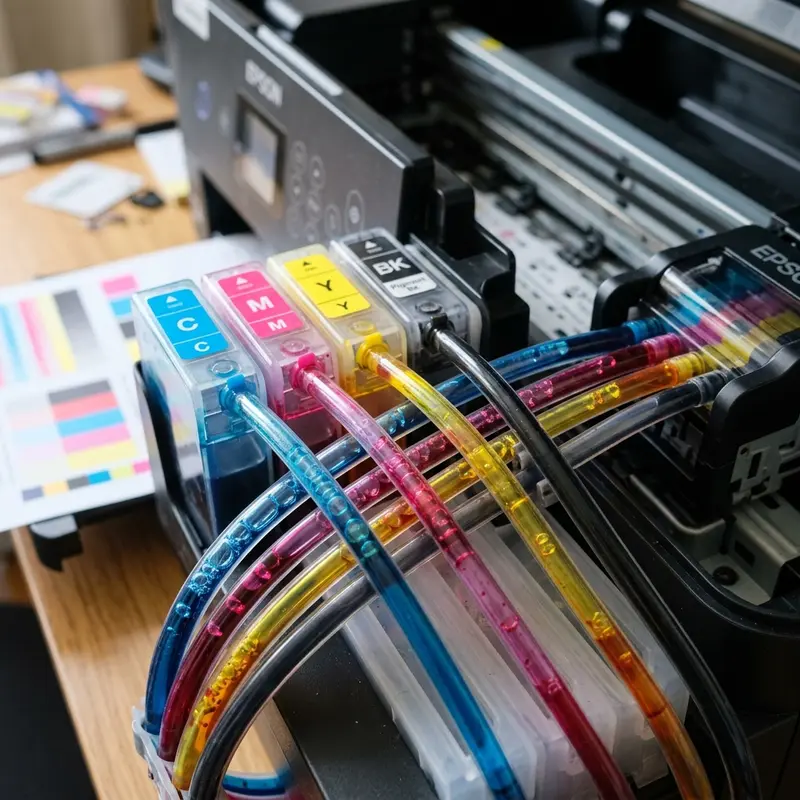
The Snap Tool (also known as a cartridge priming or suction tool) is the standard device used in professional ink refilling shops. It consists of a plastic clamp that holds the cartridge and features a silicone gasket that seals around the printhead. A standard syringe (without a needle) is attached to the bottom of the tool to pull ink and air through the nozzles.
Step-by-Step Instructions:
- Choose the Gasket: Select the correct silicone gasket. Black cartridges require a longer, narrower gasket, while tri-color cartridges use a shorter, wider gasket with internal divisions. Fit the gasket into the base of the Snap Tool.
- Insert the Cartridge: Slide the HP cartridge into the tool and press it down firmly until it clicks locked. The silicone gasket must form an airtight seal around the metal printhead nozzle plate.
- Attach the Syringe: Insert the tip of a clean, needleless 10ml syringe into the hole at the bottom of the Snap Tool.
- Pull the Vacuum: Slowly pull back the plunger of the syringe to draw about 1 to 2 ml of ink. You will feel resistance as the vacuum builds, followed by a rush of thick, dried ink, air bubbles, and fresh ink entering the syringe. Hold the plunger back for 5 seconds to clear the internal ink channels.
- Clean and Test: Remove the syringe, then release the cartridge from the tool. Wipe the printhead gently with a damp, lint-free paper towel (do not rub, just dab it). Test the cartridge by blotting it on a clean paper towel. A healthy black cartridge will leave a solid, dark rectangle, while a tri-color cartridge will leave three distinct colored stripes (cyan, magenta, and yellow).
Method 2: The Warm Demineralized Water Soak (Safe Home Method)
If you do not have a Snap Tool, you can use heat and humidity to dissolve the dried ink. Regular tap water contains minerals like calcium and chlorine that will corrode the copper circuit tracks and clog the microscopic nozzle ports. Always use demineralized, distilled, or deionized water for this process.
Step-by-Step Instructions:
- Heat the Water: Heat about 50ml of demineralized water until it is warm to the touch (around 50°C / 120°F). Never use boiling water. High temperatures can soften the adhesives that bond the silicon nozzle plate to the plastic cartridge body, destroying the cartridge.
- Prepare the Bath: Pour the warm water into a shallow saucer. The water level should be very low (only 2 to 3 millimeters deep) so that only the metal nozzle plate at the bottom of the cartridge is submerged. The copper contact contacts on the back of the cartridge must remain completely dry.
- Soak: Place the cartridge upright in the warm water. Let it sit for 5 to 10 minutes. You will see clouds of colored or black ink bleed into the water as the hardened plugs dissolve.
- Dab and Dry: Remove the cartridge from the water. Carefully dry the plastic housing and copper contacts with a clean, lint-free paper towel. Gently press the printhead against a dry paper towel to check the ink flow. If the printhead leaves a clean, well-defined footprint, the clog has been successfully cleared.
Method 3: Using Commercial Printhead Cleaning Solutions
For cartridges that have been sitting unused for months, warm water might not be strong enough to break down the dried pigment binders. In these cases, a specialized Printhead Cleaning Solution is required. These solutions are formulated with surfactant agents, deionized water, and mild solvents like ethylene glycol to break down dried ink without damaging the delicate printhead electronics.
Warning: Never use common rubbing alcohol, methylated spirits, or acetone on the printhead. Acetone will melt the ABS plastic and epoxy sealants of the cartridge, while cheap rubbing alcohols contain additives and high water ratios that can corrode the electronics. If you need to clean the electrical contacts, use 99% pure isopropyl alcohol on a cotton swab, but keep it away from the printhead nozzles as it can dry out the internal sponge.
To use printhead cleaning solution, place 3 to 4 drops directly onto the nozzle plate. Allow it to sit for 15 to 20 minutes to penetrate the dry ink. Then, use the Snap Tool or blot the cartridge against a lint-free towel to draw out the dissolved ink.
Technician Tips to Prevent Ink Cartridge Dry-Out
Preventative maintenance is the best way to avoid clogged printheads and save money on replacement cartridges. Follow these professional recommendations:
- Print a Test Page Every Week: Set a reminder to print a test sheet containing black text and colored graphics once a week. This clears out the old ink from the nozzles and draws fresh ink into the firing chambers, preventing crystallization.
- Always Turn the Printer Off Correctly: Never turn off the printer by pulling the plug or switching off a power strip. Always press the power button on the printer panel. This tells the internal controller to move the print carriage to its Service Station. At this station, a rubber capping assembly seals the nozzles from the air, preventing evaporation.
- Store Spare Cartridges Properly: If you have spare cartridges that have been opened, store them in airtight plastic containers with a damp sponge nearby (not touching the cartridge) to maintain humidity, or keep them sealed in their original packaging until needed.
- Fix Software Glitches: Sometimes printing issues are caused by communication errors between the computer and the printer. If your HP printer continues to show offline status after cleaning the cartridge, refer to our step-by-step diagnostic guide on fixing an HP printer offline in Windows.
Preventative maintenance for domestic inkjet printers
To avoid future physical blockages in the printhead nozzles and extend the overall lifespan of your printer components, it is highly recommended to print a test page containing all primary colors at least once a week. This routine forces fresh ink to flow through the internal delivery lines and clears any dried residue from the nozzle plate, preventing crystallization due to prolonged inactivity. Additionally, keeping the printer away from direct drafts and heat sources reduces the rate of solvent evaporation inside the ink chambers.
Frequently Asked Questions (FAQ)
Why is my cartridge leaking ink after I unclogged it?
If ink drips continuously from the printhead after using a Snap Tool, you have likely lost the internal negative pressure balance. HP cartridges rely on an internal sponge or bladder system that creates a slight vacuum to keep the ink from leaking out. To fix this, place the cartridge back in the Snap Tool and draw about 1ml of ink into the syringe to re-establish the vacuum. Wipe the nozzles and let the cartridge rest on a paper towel for 10 minutes. If it continues to leak, the internal physical structure or sponge has degraded, and the cartridge must be replaced.
Can I use an ultrasonic cleaner to unclog my HP cartridge?
Yes, an ultrasonic cleaner can be used, but you must be extremely careful. Only submerge the bottom 2mm of the printhead in printhead cleaning fluid inside the ultrasonic bath. Run the cleaner for no more than 20 to 30 seconds at a frequency of 35-40kHz. Longer exposures can break the microscopic gold wire bonds that connect the silicon wafer circuitry to the external copper contact pads, destroying the electronic functions of the cartridge.
Why does my tri-color cartridge print only one or two colors after unclogging?
This is a common issue with multi-chamber cartridges. It occurs when one of the colors has dried out completely inside its internal sponge compartment, or when ink from one chamber has migrated into another (cross-contamination). Use the Snap Tool to draw ink until all three primary colors (cyan, magenta, and yellow) flow clearly onto the waste paper. If one color remains missing, the internal chamber may need to be refilled with fresh ink to re-wet the dried sponge.
How many times can an HP cartridge be refilled and reused?
On average, an original HP integrated cartridge can be refilled 3 to 6 times before the thermal resistors wear out or the internal sponge loses its holding capacity. Using high-quality ink and refilling the cartridge before it runs completely dry will maximize its lifespan.
Understanding Cartridge Ventilation and Priming Mechanics
The upper plastic cover of HP integrated ink cartridges features a labyrinth of microscopic ventilation channels. These channels allow atmospheric air to enter the cartridge and replace the volume of ink consumed during printing. If these tiny air channels are blocked by dust, adhesive labels, or dried ink, a partial vacuum will build up inside the ink chamber. This vacuum prevents the ink from flowing down to the nozzle plate, resulting in faded output or blank pages even if the cartridge is completely full. When using a Snap Tool, the vacuum suction clears these top ventilation channels as well, ensuring a balanced, continuous flow of ink.


