How to Configure Smart DNS on Your Router to Bypass Geoblocks

Learn how to configure Smart DNS on your router to bypass geoblocks by adjusting the DNS settings in your router’s configuration panel.
What is Smart DNS and How Does It Help Bypass Geoblocks?
DomineTec Tip: Clear the DNS cache on your computer (ipconfig /flushdns) after editing router settings. For securing mobile devices, read how to use a VPN on phone.
Smart DNS is a technology that allows users to access geographically restricted content by changing the DNS (Domain Name System) settings on their devices or routers. It reroutes specific traffic through proxy servers without altering the user's IP address. By doing so, Smart DNS enables users to access streaming services and websites that might be blocked in their region, essentially allowing them to "trick" websites into thinking they are accessing them from a different location.
Unlike traditional VPN services that encrypt all user traffic and mask the user's IP address, Smart DNS focuses solely on DNS queries. This means that while you can access geo-restricted content, your internet speed remains unaffected since there is no encryption involved, making it particularly appealing for streaming high-definition content.

The Core Differences: Smart DNS vs VPN Encryption Routing
| DNS Provider | Primary Server | Secondary Server | Main Benefit |
|---|---|---|---|
| Cloudflare | 1.1.1.1 | 1.0.0.1 | Maximum speeds and privacy |
| Google Public DNS | 8.8.8.8 | 8.8.4.4 | Worldwide resolution stability |
Understanding the differences between Smart DNS and VPN services is crucial for choosing the right solution for bypassing geoblocks.
Smart DNS
- Functionality: Smart DNS modifies your DNS queries to redirect traffic intended for certain websites, allowing access to restricted content.
- Speed: Since Smart DNS does not encrypt data, it typically offers faster connection speeds suitable for streaming.
- Privacy: Smart DNS does not hide your IP address, which means it offers less privacy compared to VPNs.
- Compatibility: Smart DNS can be configured on various devices, including smart TVs, gaming consoles, and routers.
VPN (Virtual Private Network)
- Functionality: A VPN encrypts your entire internet connection and routes it through a secure server, masking your IP address and location.
- Speed: VPNs often introduce latency due to encryption overhead, which can slow down connection speeds.
- Privacy: VPNs provide a higher level of anonymity since they hide your IP address and encrypt all data traffic.
- Compatibility: VPNs usually require client software and can be less versatile on devices lacking native support.
In summary, if your primary goal is to access geo-restricted content quickly and without the need for privacy, Smart DNS is the preferred option. However, for users seeking enhanced privacy, a VPN would be more suitable.

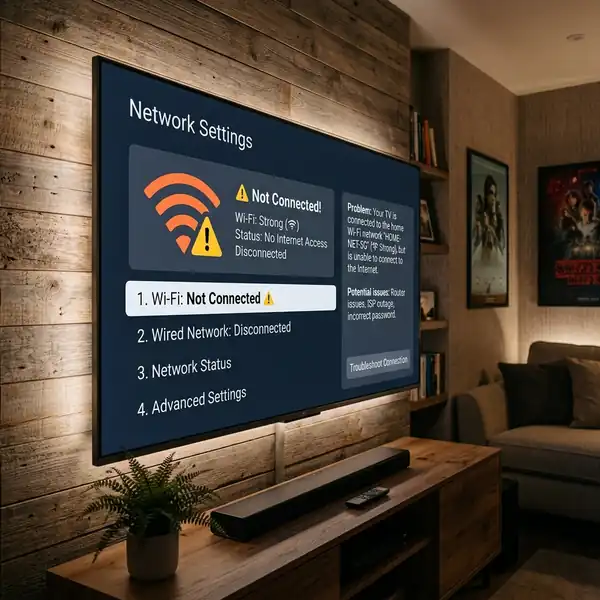
How to Log in to Your Home Router Admin Settings Dashboard
To configure Smart DNS on your router, you first need to access its administrative settings. Here’s how to do it:
- Connect to Your Network: Ensure that your computer or mobile device is connected to your home network either via Ethernet or Wi-Fi.
- Open a Web Browser: Launch a web browser of your choice (Chrome, Firefox, Safari, etc.).
- Enter the Router's IP Address: In the address bar, type in your router's IP address. Common addresses include 192.168.1.1 or 192.168.0.1. If unsure, consult your router’s manual or check the label on the device itself.
- Log In: Enter your router’s admin username and password. If you haven’t changed these, the default credentials can usually be found in the router’s manual or on a sticker attached to the device.
Once logged in, you will be presented with the router’s dashboard, where you can make various configurations, including changing DNS settings.
Step-by-Step: Changing DNS Address Settings in LAN/WAN Configurations
To set up Smart DNS on your router, follow these step-by-step instructions for popular router brands like TP-Link, D-Link, and Netgear.
TP-Link Routers
- Access the Router Dashboard: Log in to your TP-Link router as described earlier.
- Navigate to DHCP Settings: Click on the “Network” tab, then select “DHCP.”
- Change DNS Settings: Look for the “DNS Server” fields. Enter the Smart DNS server addresses provided by your service provider. Typically, there are two fields for primary and secondary DNS.
- Save Settings: Click “Save” to apply the changes. Your router may reboot to apply these settings.
- Flush DNS Cache: To ensure that your device uses the new DNS settings, flush the DNS cache on your computer or device.
D-Link Routers
- Access the Router Dashboard: Log in to your D-Link router.
- Navigate to WAN Settings: Click on “Setup” and then “WAN.”
- Modify DNS Settings: In the WAN settings, locate the DNS section. Enter the Smart DNS server addresses.
- Save Changes: Click “Save” to apply your changes. The router may need to reboot.
- Verify Configuration: Check your device’s network settings to confirm the DNS has been updated.
Netgear Routers
- Access the Router Dashboard: Log in to your Netgear router.
- Select Internet Setup: Click on “Advanced” and then “Setup.”
- Modify DNS Settings: In the Internet Setup section, find the DNS settings. Enter the Smart DNS server addresses as provided by your service.
- Apply Changes: Click “Apply” to save the settings, and allow the router to reboot if necessary.
- Test the Configuration: Ensure your device reflects the new DNS settings.

Checking Configuration Stability: Testing for DNS Leaks Online
After configuring your router with Smart DNS, it’s essential to verify that everything is functioning correctly and that your DNS requests are routed through the Smart DNS servers. Here’s how to check for DNS leaks:
- Visit a DNS Leak Test Website: Open your web browser and go to a DNS leak test site such as www.dnsleaktest.com.
- Run the Test: Choose the “Standard Test” or “Extended Test” option. This will check which DNS servers your device is currently using.
- Review Results: Check the results page to see if the DNS servers listed match those of your Smart DNS provider. If they do, your setup is successful.
- Troubleshoot if Necessary: If the results show your ISP's DNS servers, revisit your router settings to ensure the Smart DNS addresses were entered correctly.
Conclusion
Configuring Smart DNS on your router is a straightforward process that can significantly enhance your online experience by allowing you to access geo-restricted content seamlessly. By understanding the differences between Smart DNS and VPNs, you can make an informed decision based on your specific needs. Ensuring proper setup and testing your configuration will help maintain a stable and unrestricted internet connection. With the steps outlined for TP-Link, D-Link, and Netgear routers, you should be well-equipped to leverage Smart DNS technology effectively.
For further assistance or advanced configuration options, consider reaching out to your Smart DNS service provider’s support team, as they can offer tailored guidance and ensure optimal performance.
Understanding DNS Protocols and Their Role in Smart DNS Configuration
When setting up a Smart DNS on your router, it's vital to comprehend the underlying DNS protocols that facilitate the translation of domain names into IP addresses. At its core, the Domain Name System (DNS) operates using a hierarchical structure and several protocols that ensure efficient and reliable domain resolution.
The primary protocol used within the DNS framework is User Datagram Protocol (UDP), which allows for fast, connectionless communication. Most DNS queries utilize UDP port 53 for this reason. However, TCP (Transmission Control Protocol) is also employed in situations where data integrity is paramount, such as when transferring large DNS responses or during zone transfers between DNS servers.
Smart DNS services typically leverage DNS forwarding techniques to reroute specific queries based on the user's geographical location. When a user requests content that is region-locked, the Smart DNS intercepts the DNS query and forwards it to a proxy server that can handle the request from a different location. This process often involves DNS caching, where frequently accessed DNS records are stored temporarily to improve resolution speed and reduce latency.
Moreover, tunneling protocols such as HTTP/2 and QUIC can complement Smart DNS configurations by providing enhanced performance features such as multiplexing and header compression. HTTP/2 allows multiple requests and responses to be multiplexed over a single connection, significantly reducing latency. QUIC, originally developed by Google, operates over UDP and integrates encryption, reducing the time it takes to establish connections and improving load times for web pages.
When configuring Smart DNS on your router, pay close attention to the DNS server addresses provided by your Smart DNS service. These addresses are crucial as they determine where your DNS queries will be forwarded. Commonly, users will configure their router settings to point to these Smart DNS IP addresses, replacing the default ISP DNS servers. This simple adjustment can dramatically enhance your streaming experience and online browsing, circumventing geographical restrictions and improving access to content.
Advanced Configuration Techniques for Optimizing Smart DNS Performance
Beyond the basic setup of a Smart DNS on your router, there are several advanced configuration techniques that can help optimize performance and reliability. Two fundamental aspects to consider are DNS leak protection and the effective use of DNS caching.
DNS leaks occur when a device bypasses the configured Smart DNS settings and defaults to the ISP's DNS servers. This can reveal the user's actual geographic location, defeating the purpose of using Smart DNS. To prevent DNS leaks, ensure that your router's firmware is updated to the latest version, as manufacturers often release patches that enhance security and functionality. Additionally, some routers allow for the configuration of DNS leak protection settings, which can be enabled to ensure that all DNS requests are routed through the Smart DNS servers. For routers lacking this feature, consider using third-party firmware such as DD-WRT or OpenWRT, which provide enhanced control over network settings.
Implementing effective DNS caching can significantly enhance the performance of your Smart DNS setup. When a DNS query is made, the result is cached locally on the router or device for a predetermined period (Time to Live, or TTL). By adjusting the TTL settings, you can control how long a cached DNS record remains valid, thereby reducing the frequency of DNS lookups. Shorter TTL values can lead to increased DNS traffic, whereas longer TTL values can improve load times for frequently accessed domains.
Furthermore, consider the geographical distribution of your Smart DNS provider's servers. Many providers operate multiple DNS servers located in various regions to maximize redundancy and minimize latency. By configuring your router to utilize the closest or least congested DNS server, you can enhance the speed of DNS resolution. Some advanced routers also feature DNS round-robin capabilities, allowing them to alternate between multiple DNS servers for load balancing and redundancy.
Lastly, to monitor and troubleshoot your Smart DNS performance, utilize tools such as DNS benchmarking applications. These tools can test various DNS servers' response times and reliability, helping you identify the most efficient DNS servers for your specific location and needs. By fine-tuning your Smart DNS settings and continuously monitoring performance, you can ensure a seamless streaming experience and optimal internet performance.
Understanding DNS Resolution and Smart DNS Functionality
To grasp how Smart DNS works, it's essential to understand the underlying DNS (Domain Name System) resolution process. DNS translates human-readable domain names into IP addresses that computers use to identify each other on the network. When you enter a URL in your browser, a DNS query is sent to a DNS server, which resolves the domain to its corresponding IP address. In a traditional setup, this process can introduce latency due to the time taken for the DNS server to respond.
Smart DNS services leverage a technique that modifies the DNS resolution process without rerouting all of your internet traffic. Instead of encapsulating the entire data stream like a VPN, Smart DNS alters specific DNS requests while leaving the rest of the internet connection untouched. This approach minimizes latency and improves speed, making it ideal for streaming services which require a stable connection.
When setting up Smart DNS on a router, the configuration typically involves changing the DNS server addresses to those provided by the Smart DNS service. This adjustment can often be made within the router's settings menu. However, it is crucial to ensure that the router firmware supports custom DNS configurations. Additionally, some Smart DNS providers utilize DNS tunneling, which allows users to bypass geo-restrictions by routing only selected DNS queries through their servers while maintaining direct access to unblocked content. This selective routing ensures that users can access region-specific content while optimizing performance and minimizing packet loss.
Router Configuration for Optimal Smart DNS Performance
Configuring your router for Smart DNS is a critical step that can significantly impact your internet experience. To ensure optimal performance, begin by logging into your router's admin interface, typically accessed via a web browser. Most routers use a common IP address, such as 192.168.1.1 or 192.168.0.1, but this can vary based on the manufacturer.
Once logged in, navigate to the DNS settings section. Here, you will need to replace the existing DNS server addresses with those provided by your Smart DNS provider. This often includes primary and secondary DNS addresses. It's important to verify the addresses, as incorrect entries can prevent successful connections to services.
Advanced configurations may also involve adjusting the router's MTU (Maximum Transmission Unit) settings. An improperly set MTU can lead to fragmentation, causing slower speeds and increased latency. The recommended MTU size for most routers is typically around 1500 bytes, but it can vary depending on the type of internet connection. Additionally, activating DNS forwarding can help direct requests to the Smart DNS server more efficiently.
Lastly, consider enabling any features related to QoS (Quality of Service) on your router. QoS prioritizes traffic for specific applications, ensuring that streaming services receive the necessary bandwidth even during peak usage times. This is particularly beneficial when multiple devices are connected to the network, as it helps maintain a consistent and high-quality streaming experience.
Additional Resources and Recommended Links
For more networking and security guides, check out our step-by-step tutorials on how to use a VPN on phone and how to setup VPN on router. For official hardware troubleshooting, visit the Official Cloudflare Portal.


