How to Clean HP Deskjet Printheads and Cartridges: Troubleshooting Guide
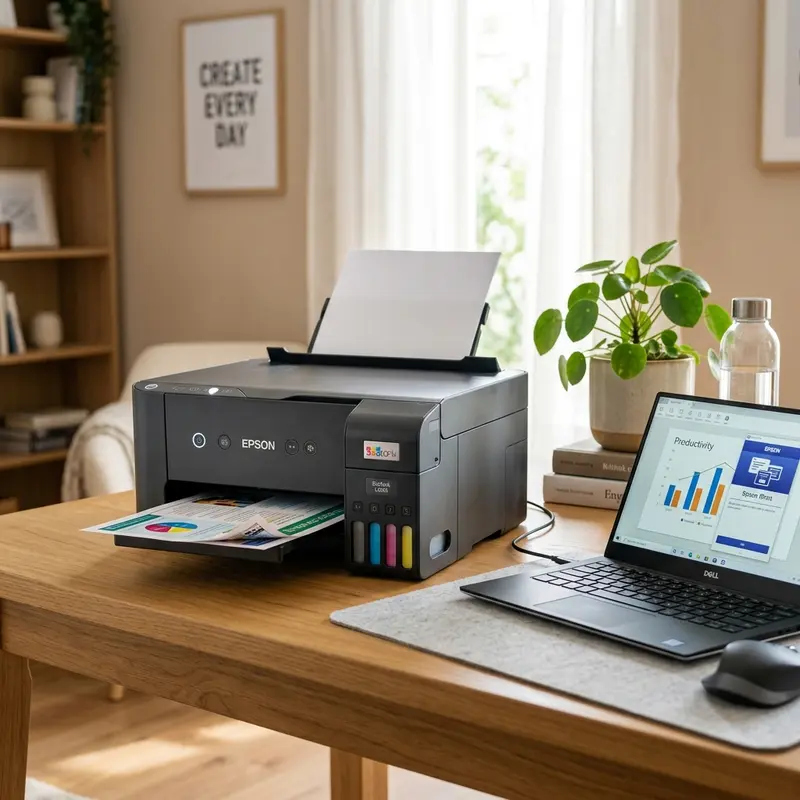
As an owner of an HP Deskjet printer, you may have encountered issues with print quality over time. Faded prints, streaks, and smudges can be frustrating, particularly when you need important documents or vibrant images. One of the primary culprits behind these problems is the printhead and cartridges. Cleaning these components regularly ensures optimal performance and print quality. In this comprehensive guide, we'll walk you through the steps to effectively clean your HP Deskjet printheads and cartridges, including troubleshooting tips and techniques to maintain them in pristine condition.
Understanding how to clean the printheads and cartridges can vastly improve the longevity of your printer and enhance your printing experience. This guide will provide you with detailed instructions using various methods, including utilizing the HP Smart app, manual cleaning techniques, and more.
Understanding Your HP Deskjet Printer
Before diving into the cleaning process, it's essential to understand the components involved in the printing mechanism of your HP Deskjet printer. The printer consists of several key elements:
- Printhead: The component responsible for transferring ink onto paper.
- Ink cartridges: These hold the ink that the printhead uses during printing.
- Printer software: The application interface that allows you to manage printing tasks.
Importance of Printhead and Cartridge Maintenance
Regular maintenance of the printhead and cartridges is crucial for several reasons:
- Quality Printing: Clean printheads ensure that the ink is distributed evenly, resulting in clear and sharp prints.
- Longevity: Well-maintained components can extend the lifespan of your printer, reducing the need for costly repairs or replacements.
- Cost Efficiency: Proper care minimizes ink wastage and maximizes the usage of cartridges.
Preparing for the Cleaning Process
Before you start cleaning your HP Deskjet printer's printheads and cartridges, it's important to gather the necessary supplies and prepare your workspace.
Gathering Necessary Supplies
- Lint-free cloth or paper towels
- Distilled water (for manual cleaning)
- Isopropyl alcohol (optional)
- Gloves (to avoid ink stains)
- HP Smart app (for automatic cleaning)
Workspace Preparation
Ensure that your workspace is clean and well-lit. It’s advisable to work on a surface that can be easily cleaned in case of ink spills. Lay down some paper towels to absorb any excess ink and protect your work area.
Using the HP Smart App for Cleaning
The HP Smart app offers a user-friendly interface to help maintain your printer. Here’s how to use it for cleaning the printheads:
Step 1: Download and Install HP Smart
If you haven't already installed the HP Smart app, download it from the HP website or your device's app store.
Step 2: Connect Your Printer
Open the app and follow the prompts to connect your HP Deskjet printer to your Wi-Fi network. Make sure the printer is powered on and connected to the same network as your device.
Step 3: Access Printer Maintenance
Once connected, select your printer in the app. Navigate to the 'Printer Maintenance' section, where you will find options for cleaning the printheads.
Step 4: Initiate Printhead Cleaning
Choose the option for 'Clean Printheads' and follow the on-screen instructions. The printer will perform a self-cleaning cycle, which usually takes a few minutes.
Step 5: Print a Test Page
After the cleaning cycle, it’s crucial to print a test page to check if the print quality has improved. If issues persist, you may need to repeat the cleaning process.
Manual Cleaning Techniques
If the HP Smart app does not resolve the issues, manual cleaning may be required. Here's how to manually clean the printheads and cartridges:
Step 1: Prepare the Printer
Turn off the printer and unplug it from the power source. Open the printer cover to access the cartridges.
Step 2: Remove the Ink Cartridges
Carefully remove the ink cartridges from the printhead. Be cautious not to touch the copper contacts or the nozzles directly with your fingers.
Step 3: Clean the Printhead
Using a lint-free cloth dampened with distilled water or isopropyl alcohol, gently wipe the printhead nozzles. Avoid excessive pressure to prevent damage.
Step 4: Clean the Cartridges
Similarly, clean the copper contacts of the cartridges with a damp cloth. Ensure that these contacts are free from any dried ink or debris.
Step 5: Reinsert Cartridges and Test
Once cleaned, reinsert the cartridges back into the printhead. Power on the printer and perform another test print to check for quality.
DomineTec Tech Tip: Always handle cartridges with care, avoiding any contact with the nozzles and copper contacts to prevent ink clogs and damage.
Common Print Quality Issues and Solutions
Despite regular maintenance, you may still encounter print quality issues. Here’s how to troubleshoot common problems:
Streaky Prints
Streaks may indicate a clogged printhead. Utilize the cleaning functions in the HP Smart app or manually clean the printhead as detailed above.
Faded Prints
Faded prints can result from low ink levels or worn-out cartridges. Check the ink levels and replace cartridges as necessary.
Incorrect Colors
If colors appear incorrect, perform a color calibration through the HP Smart app to realign the printhead.
Prints with Smudges
Smudged prints often mean that the printhead is not clean or that the ink is not dry. Allow prints to dry properly before handling them.
Paper Jams
While not directly related to print quality, paper jams can disrupt the printing process. Check for any obstructions in the paper tray and ensure that the paper is loaded correctly.
Comparing Cleaning Methods
Below is a comparison of different cleaning methods for printheads and cartridges:
| Method | Ease of Use | Effectiveness | Time Required | Cost |
|---|---|---|---|---|
| HP Smart App | Easy | High | 5-10 minutes | Free |
| Manual Cleaning | Moderate | Very High | 15-30 minutes | Minimal (supplies) |
| Professional Service | Easy | Very High | Varies | High |
| Automatic Maintenance (Printer) | Easy | Moderate | 5 minutes | Free |
| DIY Cleaning Kits | Moderate | High | 10-20 minutes | Low to Moderate |
Maintaining Your HP Deskjet Printer
Maintaining your printer goes beyond just cleaning the printheads and cartridges. Implementing regular practices can keep your printer functioning optimally:
Regular Software Updates
Ensure that your printer's firmware and software are up to date by regularly checking the HP website or using the HP Smart app.
Use Quality Paper
Using high-quality paper can reduce the chances of jams and print issues, ensuring better overall print quality.
Store Cartridges Properly
Store any unused cartridges in a cool, dry place, standing upright to avoid leaks and drying out.
Perform Regular Test Prints
Conducting occasional test prints can help identify any issues before they escalate, allowing you to address them promptly.
Advanced Printhead Troubleshooting Techniques
If you continue to experience poor print quality even after cleaning, consider these advanced troubleshooting techniques:
Step 1: Check Ink Levels
Before diving deeper, verify that your ink cartridges are not empty. Most HP printers will alert you when ink levels are low, but you can also check via the HP Smart app. Replace any cartridges that are low or empty, as they can significantly impact print quality.
Step 2: Printhead Alignment
Misalignment can lead to poor print quality. To realign the printhead:
- Open the HP Smart app and select your printer.
- Navigate to the 'Printer Maintenance' section.
- Select 'Align Printheads' and follow the prompts.
- Print the alignment page and follow the instructions to adjust.
Step 3: Update Printer Drivers
Outdated printer drivers can cause compatibility issues, leading to print quality problems. To update your drivers:
- Visit the HP Support website.
- Enter your printer model and select the appropriate driver for your operating system.
- Download and install the latest driver.
Step 4: Inspect the Printhead
Physically inspect the printhead for damage. If any components appear cracked or broken, you may need to replace the entire printhead. Consult your printer’s manual or HP support for guidance on replacement.
Step 5: Run a Diagnostic Test
Many HP printers include built-in diagnostic tools. Access these through the HP Smart app or printer interface. Running a diagnostic test can help identify specific issues, allowing for targeted solutions.
Best Practices for Long-Term Maintenance
To ensure the longevity of your HP Deskjet printer, adopt the following best practices:
Regular Use
Regularly using your printer prevents ink from drying and clogging the nozzles. If you don’t print often, perform a test print at least once every two weeks to keep the printhead functioning correctly.
Clean the Exterior
Dust and debris can accumulate on the exterior and control panel of your printer. Regularly dust off these areas with a soft cloth to maintain the printer’s aesthetics and functionality.
Proper Shutdown
Always use the power button to turn off the printer rather than unplugging it. This ensures that the printhead returns to its resting position, preventing damage and drying out.
Advanced Maintenance with Cleaning Kits
For those looking to enhance their printer maintenance routine, consider using a DIY cleaning kit specifically designed for printheads and cartridges. These kits typically include specialized cleaning solutions and tools that can make the cleaning process more effective. Here’s a step-by-step guide on how to use a cleaning kit:
Step 1: Purchase a Quality Cleaning Kit
Select a cleaning kit that is compatible with your HP Deskjet printer model. Look for kits that include printhead cleaning solution, cleaning swabs, and gloves.
Step 2: Follow the Instructions
Each kit will have specific instructions. Generally, the process involves:
- Turning off and unplugging the printer.
- Removing the cartridges and printhead, if applicable.
- Applying the cleaning solution to the cleaning swabs or directly to the printhead.
- Gently wiping the printhead and nozzles to remove residue and clogs.
- Reassembling the printer and running a test print.
Step 3: Frequency of Use
Using a cleaning kit once every few months can help maintain optimal print quality. However, be mindful not to overuse cleaning solutions, as they can sometimes affect the printhead if used excessively.
Utilizing Professional Cleaning Services
When all else fails, consider utilizing professional printer cleaning services. These services employ advanced techniques and tools that can restore your printer to peak performance. Here’s when to consider this option:
When to Seek Professional Help
If you have tried all the cleaning techniques and troubleshooting steps without success, it may be time to consult a professional. Signs that indicate the need for professional cleaning include:
- Persistent print quality issues despite multiple cleanings.
- Visible damage or wear on the printhead.
- Frequent error messages regarding print quality or ink levels.
Finding a Professional Service
Look for certified HP service centers or reputable local printer repair shops that offer cleaning services. Ensure they have experience with HP Deskjet models to guarantee proper handling and care.
Cleaning Printer Rollers and Paper Feed Mechanism
In addition to printhead and cartridge maintenance, keeping the printer rollers and paper feed mechanism clean is essential for avoiding paper jams and ensuring smooth operation. Here’s how to clean these components:
Step 1: Gather Supplies
You will need:
- Lint-free cloth or microfiber cloth
- Distilled water
- Isopropyl alcohol (optional)
- Compressed air (for dust removal)
Step 2: Turn Off and Unplug the Printer
For safety, turn off the printer and unplug it from the power source before beginning the cleaning process.
Step 3: Locate the Rollers
Open the printer cover to access the rollers. Depending on your printer model, you might need to remove the paper tray to reach all rollers.
Step 4: Clean the Rollers
Dampen a lint-free cloth with distilled water or isopropyl alcohol. Gently wipe the rollers to remove any dust, debris, or ink residue. Rotate the rollers manually to clean all sides.
Step 5: Use Compressed Air
If there is significant dust buildup, use compressed air to blow out any dust from the paper feed mechanism. Be careful not to blow air directly into the printhead.
Step 6: Reassemble and Test
After cleaning, reassemble any components you removed, plug in the printer, and run a test print to ensure everything is functioning smoothly.
Frequently Asked Questions (FAQ)
1. How often should I clean my HP Deskjet printheads?
It’s advisable to clean the printheads every 1-2 months, or whenever you notice a decline in print quality. Regular cleaning helps prevent clogs and ensures optimal functioning.
2. Can I use tap water for cleaning?
It's best to use distilled water for cleaning, as tap water can contain minerals that may leave residue on the printhead and cartridges.
3. What should I do if the print quality doesn’t improve after cleaning?
If the print quality does not improve, consider replacing the cartridges, as they may be empty or faulty. You can also consult HP support for further assistance.
4. Is it safe to clean the printhead with alcohol?
Yes, isopropyl alcohol can be used to clean the printhead. However, avoid excessive use and ensure the printhead is completely dry before reinserting cartridges.
5. How do I know when it's time to replace my ink cartridges?
Most HP printers have indicators that will notify you when ink levels are low. Additionally, if you notice fading or streaks in prints, it may be time to replace the cartridges.






