How to Perform Print Head Cleaning on Canon G3110 from PC
How to Perform Print Head Cleaning on Canon G3110 from PC: Ultimate Technical Guide
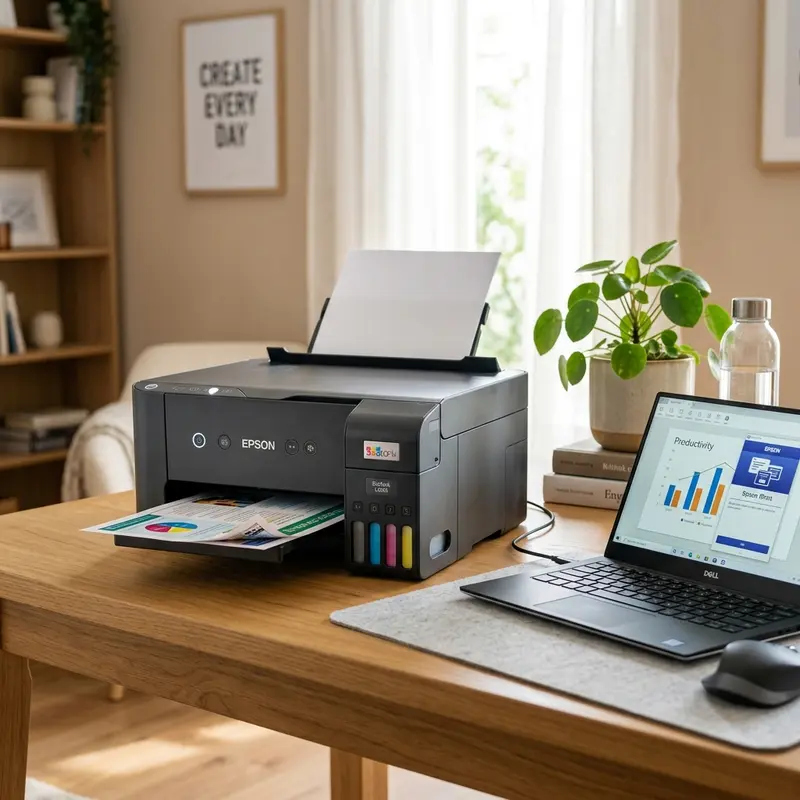
Experiencing faded documents, horizontal white lines, or missing colors on your printouts is a typical issue that affects continuous ink supply system (CISS) users. To perform a print head cleaning on the Canon G3110 from a PC, open the Windows Control Panel, navigate to "Devices and Printers", right-click the Canon G3010/G3110 Series printer, select "Printing Preferences", access the "Maintenance" tab, and launch the "Cleaning" or "Deep Cleaning" command, which transmits a digital signal via USB to the motherboard controller, activating the peristaltic pump to vacuum dried ink and air bubbles out of the print head nozzles. Running this maintenance program clears clogged microchannels and restores color accuracy.
1. Physics and Electronics of Canon G3110 Thermal Print Heads
To understand why printer nozzles clog, we must look into the microfluidic design of the Canon G3110. Unlike piezo-electric print heads (which use physical crystal deflection to push droplets), Canon uses thermal inkjet technology (bubble-jet). The black head (BH-7) and color head (CH-7) house hundreds of microscopic orifices (nozzles). Behind each nozzle is a microscopic thin-film resistor element linked to the device's driver board.
When the controller board triggers a high-frequency voltage pulse (measured in microseconds), the resistor heats up rapidly to over 300°C. This boils the water solvent in the ink, creating a miniature steam bubble that expands instantly. The expansion of this vapor bubble physically forces a droplet of liquid ink out of the nozzle opening onto the paper. When the pulse ends, the resistor cools, the bubble collapses, and the resulting negative pressure draws fresh ink from the reservoir via capillary action.
Problems arise when ink sits idle in the nozzle openings. Water evaporates, leaving behind dry dye molecules and pigments that crystallize into solid plugs. Furthermore, air bubbles can enter the silicone tubing, disrupting the hydraulic seal. Since thermal nozzles rely on the liquid ink itself to dissipate heat, running the print head empty or severely clogged will quickly overheat and permanently damage (burn) the micro-resistors, requiring a physical replacement of the BH-7 or CH-7 cartridge assembly.
2. Chemical Properties and Differences of Dye vs. Pigmented Inks
The chemical composition of the ink itself directly dictates the severity and nature of the nozzle blockages. The G3110 utilizes two distinct formulations: the black ink (GI-190 BK) is a pigment-based ink, while the color inks (GI-190 C/M/Y) are dye-based. Understanding this is critical for proper printhead maintenance.
Dye inks consist of colorant molecules fully dissolved in a liquid glycol/water carrier, behaving like saltwater. The color orifices on the CH-7 head are tiny (releasing 1.2 picoliter droplets) to achieve high photographic resolutions. When dye ink dries, it forms soft crystals that are relatively easy to dissolve back into solution with a light flush. Pigment ink, however, contains solid carbon particles held in suspension by dispersing agents. The BH-7 black head nozzles are larger (5 picoliters) to prevent particle jam, but if pigment ink is allowed to dry, the solid particles bind together into a tough, water-insoluble polymer skin. This skin cannot be dissolved by water alone and often requires specialized chemical cleaning agents (containing ammonium hydroxide) or intensive mechanical deep flushes.
3. Detailed Steps: Running the Cleaning Tool in Windows
The mechanical activation of the pump and carriage purge sequence is managed by the printer driver installed on your PC. To trigger this process, make sure the printer is connected to your computer via USB or a stable Wi-Fi network, and follow these steps:
- Ensure the Canon MegaTank G3110 is powered on and has at least 3-5 sheets of standard blank A4 paper loaded in the rear paper feed tray;
- On your Windows computer, press the
Windows Key + Rto launch the Run dialog box. Type incontrol printersand press Enter to open the classic "Devices and Printers" panel; - Right-click on the Canon G3010 Series or Canon G3110 Series icon and choose Printing Preferences from the drop-down menu;
- In the properties window, click on the top right tab labeled Maintenance. This panel lists all the diagnostics and motor-driven system test protocols;
- Click the Cleaning button. A prompt will appear asking if you want to clean all colors or select specific groups (Black only or Color only). Select the target channels and click "Execute";
- The computer sends the command packet over the USB bus, telling the logic board to start the purge station motor. You will hear clicking and whirring sounds from the right-hand side of the printer. Do not interrupt the power supply or disconnect the USB connection during this cycle;
- Once the whirring noise stops (usually after 1-2 minutes), the driver utility will prompt you to print a nozzle check pattern. Click "Print Check Pattern" to verify if the lines are fully solid and clear.
4. PC-Free Troubleshooting: Panel Control Combinations
For scenarios where a PC is not connected to the printer, Canon engineers integrated a series of direct maintenance menu commands accessible entirely through the physical hardware keys on the device's control panel. Knowing these shortcuts is highly valuable for quick field troubleshooting:
- Press the Setup button (indicated by a wrench and pliers icon) on the G3110 control panel to access the firmware menu;
- Tap the + (Plus) button repeatedly until the LCD displays the number 1;
- Press either the Black or Color button. The printer will immediately execute a standard nozzle cleaning cycle;
- To run a Deep Cleaning without a PC, follow the same steps, but increment the number on the display to 2 before pressing the Black or Color start button;
- If you want to print a diagnostic nozzle check pattern, press the Setup button, press the + key until the letter A is displayed, and press the Color button to execute the test pattern print.
5. Standard Cleaning vs. Deep Cleaning (Purge Station Mechanics)
If the nozzle check printout reveals broken grids or completely missing colors, you need to understand the mechanical distinction between standard cleaning and deep cleaning options inside the maintenance menu.
A Standard Cleaning cycle engages the peristaltic pump at a moderate duty cycle. The printer parks the carriage on the right-hand side, sealing the nozzles against rubber caps (the Cap Assembly). The purge motor rotates the pump gears, squeezing a flexible tube to create a light vacuum. This suction pulls a small quantity of ink through the nozzles to dissolve soft dried plugs. It uses very little ink and is suitable for minor clogs.
A Deep Cleaning (System Purge) runs the pump motor continuously at a higher voltage. The rubber cap remains tightly sealed, generating maximum pressure differential. This forces a rapid stream of ink through the print head nozzles, dragging out persistent air pockets and thick dried residue. However, this process consumes a significant volume of ink and deposits it directly into the waste ink pads (absorber felt) inside the printer base. If the tubes are completely empty of ink, even a deep cleaning might fail, requiring a "System Cleaning" run, which sweeps the entire line volume but should be used sparingly due to high waste ink generation.
If you also operate other brands of continuous ink printers and experience printing gaps, you might want to look at our guide on how to run Epson L3250 printhead cleaning from PC, which covers the distinct piezo-electric cleaning procedures used by Epson.
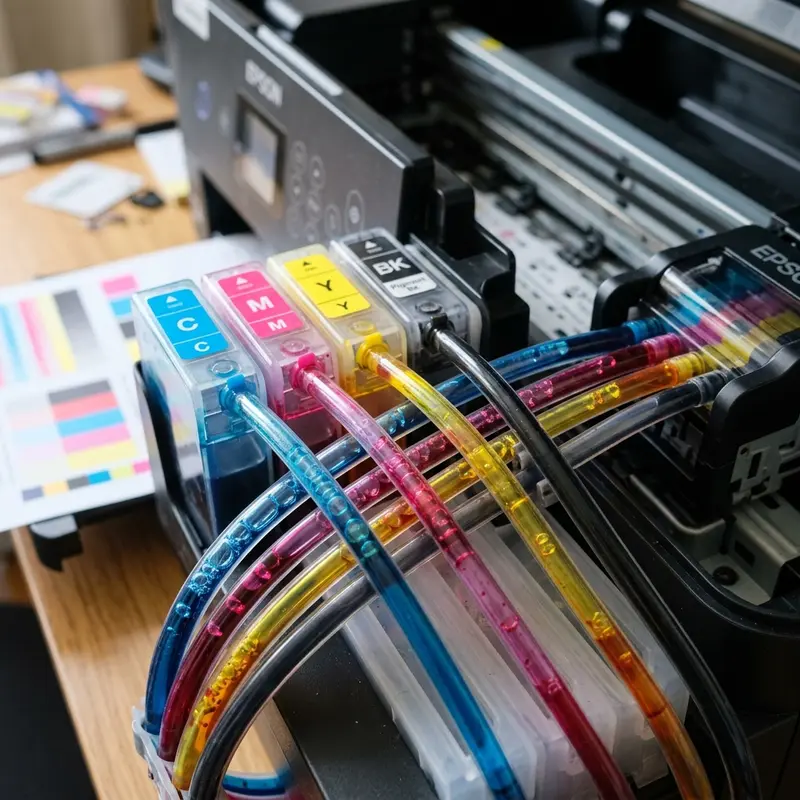
6. Hydraulic Issues: Air Ingestion and Tube Maintenance
In continuous ink supply systems (CISS) like the Canon G3110, maintaining a hermetic seal throughout the ink delivery line is critical. Silicone tubes connect the stationary ink tanks to the moving carriage. While the physical movement of the carriage is designed to handle bending, the main failure mode is air intrusion.
Canon print heads have internal non-return check valves. When you open the blue carriage cover clips, mechanical levers pinch the silicone tubes to prevent gravity from pulling the ink back into the main tanks. If you open these blue levers without first closing the black rubber caps on the ink tanks, the vacuum is lost, and the ink immediately drains back to the bottles, filling the tubes with air. Attempting to print with air-filled tubes will prevent ink from reaching the thermal resistors. Over time, running the resistors without liquid ink cooling will burn them out. In this situation, normal cleanings won't work. You must run a "System Cleaning" through the driver to pull the ink back, or use specialized manual suction tools (a snap-fill kit with a syringe).
To prevent similar air lock issues on other models, check out our guide on how to remove air from Epson L3250 ink tubes, which offers detailed tips on restoring ink flow through manual vacuuming.
7. Print Failure Diagnostic Table
To avoid wasting ink on unnecessary cleaning cycles, use this diagnostic table to match your print symptoms with the correct hardware action:
| Visual Printing Defect | Root Technical Cause | Recommended Action |
|---|---|---|
| Thin white horizontal lines in black text blocks | Partial nozzle blockage in the BH-7 print head | Run 1 Standard Cleaning cycle from the PC Driver Maintenance tab |
| Complete absence of one primary color (e.g., Cyan) | Empty ink tube or severe nozzle blockage in the CH-7 head | Check physical tank level; run a Deep Cleaning cycle |
| Mixed or bleeding colors (e.g., Yellow appears green) | Ink contamination on the nozzle plate face due to excess residue | Clean the purge pad area manually; perform 1 Standard Cleaning |
| Totally blank sheet printed with no ink traces | Resistor array failure or loose carriage ribbon cables | Inspect print head copper contacts; clean contacts with isopropyl alcohol |
| Fuzzy, double-image, or skewed vertical lines | Dirty linear encoder strip (the optical sensor track) | Gently wipe the transparent encoder strip with dry microfiber cloth |
8. Troubleshooting Common Cleaning Errors
During the cleaning process, you may encounter system errors or hardware interruptions. A common error on the Canon G3110 is the P02 carriage error or P07 waste ink error shown on the LCD screen.
A P02 error occurs when the carriage motor senses high electrical resistance (overcurrent). This is often caused by misaligned silicone tubes or a piece of paper blocking the carriage track. The logic board aborts the cleaning process to protect the motor coil. Another issue is dirty electrical contacts. If ink leaks onto the gold contacts of the BH-7 or CH-7 cartridges, it can cause short circuits. To fix this, remove the print heads and clean the gold contacts using a lint-free cloth lightly dampened with isopropyl alcohol.
If you see the P07 error, it means the internal waste ink absorber pads are full. The printer's EEPROM locks the device to prevent ink from spilling out. When this happens, you will need to replace the physical pads and reset the firmware's internal counter before you can perform any further cleaning cycles.
Preventative maintenance for domestic inkjet printers
To avoid future physical blockages in the printhead nozzles and extend the overall lifespan of your printer components, it is highly recommended to print a test page containing all primary colors at least once a week. This routine forces fresh ink to flow through the internal delivery lines and clears any dried residue from the nozzle plate, preventing crystallization due to prolonged inactivity. Additionally, keeping the printer away from direct drafts and heat sources reduces the rate of solvent evaporation inside the ink chambers.
Frequently Asked Questions (FAQ)
How many times can I clean the Canon G3110 print head in one day?
You should run no more than two standard cleanings and one deep cleaning in a single day. If the nozzles are still clogged, wait 24 hours to let the fresh ink dissolve the dry deposits before trying again.
Why does the print head cleaning use so much ink?
The printer uses a peristaltic pump to vacuum ink through the nozzles. This suction is necessary to pull out stubborn dried ink plugs, but it draws a significant amount of ink into the waste pad.
Can I inject cleaning fluid directly into the Canon G3110 print heads?
Direct manual injection with a syringe is not recommended for Canon BH-7 or CH-7 print heads. The internal nozzles and thermal membranes are highly delicate and can rupture under manual pressure.
How do I know if my print head is burned out?
If a color remains completely blank on the nozzle check sheet even after you've cleared the air from the tubes and run a deep cleaning, the thermal resistor array has likely overheated and failed.
Technical Conclusion
Regularly cleaning the print head on your Canon G3110 is key to maintaining sharp prints and accurate colors. Understanding the mechanics of thermal bubble-jet technology and the dynamics of the ink tubes helps you manage the system efficiently. By avoiding excessive deep cleanings, you can prevent premature waste pad saturation and keep your printer hardware running smoothly for years to come.
Printhead Driver Voltage Adjustment Settings
The Canon driver utility in Windows also communicates directly with the printhead's digital-to-analog converter (DAC) on the carriage board. Under advanced maintenance settings, technicians can adjust the voltage thresholds sent to the thermal resistors. Increasing the drive voltage slightly can help force ink through partially restricted nozzles during standard cleaning runs, though this setting should be used with extreme caution to avoid overheating the printhead resistors and shortening their service lifespan.


