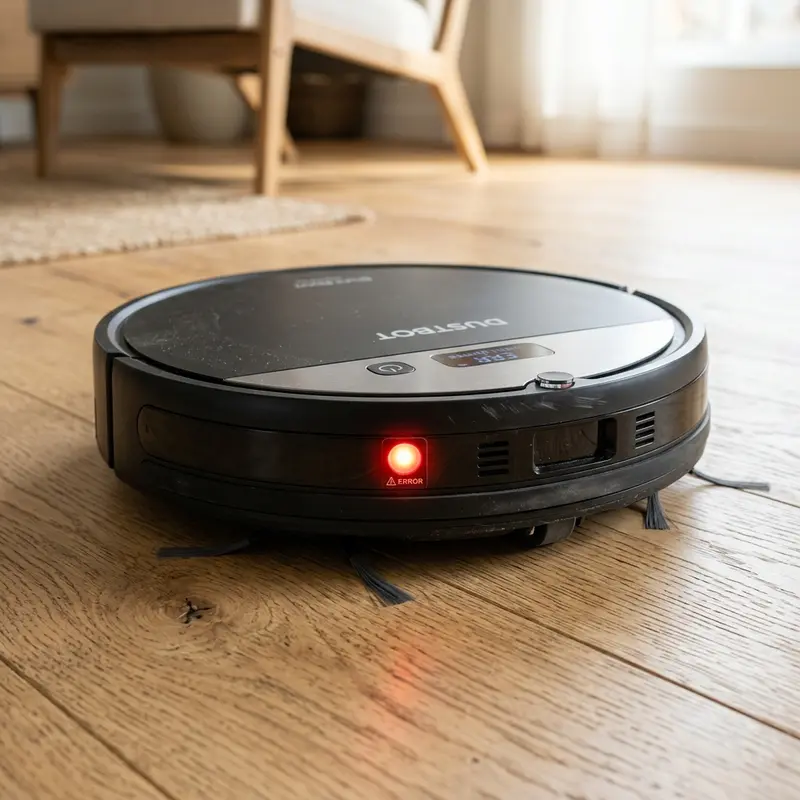
How to Fix a Robot Vacuum That Only Moves Backwards
If your appliance has started reversing erratically, fixing a robot vacuum that keeps going backwards or spinning in circles requires cleaning the underside cliff sensors, checking the front bumper for stuck debris, or testing the internal collision micro-switches. Unlike battery failures, this behavior is directly related to false positive readings from the vacuum's optical and mechanical safety sensors. The device senses a non-existent obstacle and backs up for protection.
1. Optical Cliff Sensor False Positives
The cliff sensors (located along the bottom front edge of the vacuum) utilize infrared emitters and receivers. The vacuum shoots an invisible beam of light at the floor and measures the reflection. If the beam does not bounce back, the motherboard registers a step (cliff), cuts forward wheel drive, and initiates a reversing maneuver.
If these sensor windows are coated in fine dust or pet dander, the infrared light cannot pass through the acrylic lenses. The vacuum assumes it is hanging over a ledge and drives backwards. Turn off the vacuum, flip it over, and wipe the lenses with a dry cotton swab. If your vacuum spins or stalls, read our guide on robot vacuum spinning in circles fix.
2. Stuck Front Bumper Panel or Faulty Micro-switches
The front bumper is a physical collision sensor. Behind the movable plastic frame are small micro-switches. When the bumper hits a wall, it presses the switch, telling the motherboard to change cleaning paths.
If small debris like dry pet kibble or sand grains slide into the gap between the bumper and the main casing, the bumper can jam in the "pressed" position. The vacuum assumes it is touching a wall. To get unstuck, it drives backwards, trying to disengage from the imaginary obstacle.
Press the bumper repeatedly to make sure it springs back into place. If it feels stiff or remains depressed, tap it gently to dislodge trapped dirt.
3. Blocked Obstacle Detection Infrared Windows
Mid-range and premium vacuums feature infrared proximity sensors behind the dark tinted front window of the bumper. These sensors let the vacuum slow down before touching furniture.
If the tinted panel is scratched or covered in static dust, the emitted light reflects off the dust layer, bouncing directly back into the receiver (crosstalk effect). The vacuum assumes a wall is right in front of its bumper and reverses.
Wipe down the tinted window with a clean microfiber cloth. Never use rubbing alcohol or chemical cleaners, as they can damage the plastic lenses, causing permanent sensor failure.
4. Troubleshooting Guide for Reversing Robot Vacuums
The table below helps diagnose the cause of your robot vacuum's backward movement based on its behavior:
| Observed Symptom | Likely Cause | Diagnostic Method | Recommended Solution |
|---|---|---|---|
| Backs up for 5s, then beeps and shuts off | Dirty underside cliff sensors | View sensor using phone camera (IR light active) | Clean lens with dry swab and isopropyl alcohol |
| Reverses and spins to one side | Stuck mechanical bumper switch | Press the bumper sides to test click feel | Clear debris from bumper gaps and realign springs |
| Reverses on tile but works on carpet | Scratched cliff sensor cover | Test vacuum on different floor colors | Polish cover or tape over sensors (single-level home) |
| Reverses immediately at startup | Short circuit in control board | Power on vacuum away from charging dock | Check circuit board voltages or contact technician |
5. Realigning Loose Sensor Mounting Brackets
A hard crash or drop-off can dislodge the plastic brackets that hold the infrared sensors inside the chassis. A loose sensor panel will dangle, pointing the light beam in the wrong direction and sending incorrect readings to the CPU.
If your vacuum is out of warranty, open the bottom panel to inspect the sensor mounts. Applying a drop of silicone adhesive secures the sensor block in place, restoring the correct optical alignment.
If your unit has docking issues after these adjustments, read our troubleshooting guide on robot vacuum cant find charging dock.
Bumper Coil Springs Alignment and Retraction Problems
The physical retraction of the bumper depends on two coil springs located inside the bumper frame. High-impact collisions can displace these springs from their plastic alignment pins.
Without spring tension, the bumper remains tilted back, keeping the micro-switches closed. Open the bumper assembly by removing the bottom screws, and place the springs back on their guide pins to restore the click response.
Clearing Hair Wraps from the Driving Wheel Shafts
Long hair and carpet fibers can wrap around the axles of the left and right drive wheels. When hair wraps block a wheel, the control board senses the increased current draw and reverses the wheels to clear the stall, causing the vacuum to drive backward or spin.
Inspect the drive wheel wells weekly. Use a pair of tweezers to pull out wound hair from behind the rubber tire treads.
Testing Infrared Emitter Diodes with a Smartphone Camera
Cliff sensors emit infrared light, which is invisible to the human eye. However, digital CMOS cameras on smartphones can capture this wavelength, showing it as a glowing purple light on the screen.
Turn on the vacuum in a dark room and look at the underside sensors through your phone's camera. If you see a purple glow, the emitter LED is functioning, indicating the issue lies with dirt or a failed receiver diode.
Resolving False Edge Alarms on High-Contrast Black Rugs
Black carpets and dark flooring absorb infrared light rather than reflecting it. When the vacuum drives onto a dark area, the cliff sensor registers a drop-off, causing the vacuum to drive backward even on flat surfaces.
If you live in a single-level home without stairs, you can bypass this issue by covering the cliff sensor windows with strips of white paper taped down, forcing the sensors to register a constant reflection.

Infrared Signal Ranging and Receiver Diode Saturation
Underside cliff sensors rely on phototransistors calibrated to measure the reflection of infrared beams from the floor. If the plastic window covers get scratched or clouded by friction on rough tiles, the infrared light scatters away from the receiver.
This causes the sensor to read a low reflection level, which the motherboard interprets as an open ledge (cliff). This triggers a defensive reversing maneuver. Wiping the lenses with isopropyl alcohol or polishing scratched covers restores correct light reflections and stops false drop-off warnings.
Diagnosing Jammed Latch Tabs and Bumper return Spring Tension
Behind the front bumper panel are plastic arms that press against micro-switches on the motherboard. If the small steel coil springs that push the bumper out become misaligned or lose tension, the bumper remains pressed against the switches.
This sends a continuous collision signal to the processor. The vacuum assumes it is blocked by furniture and repeatedly reverses to steer clear. Press the sides of the bumper to ensure it moves freely and you hear the physical clicks of the micro-switches.
Wheel Encoder Tachometers and Yaw Rate Gyroscope Drifts
The vacuum tracks its cleaning path by comparing wheel rotations via optical encoders. If pet hair wraps around a wheel shaft, it increases mechanical resistance, slowing down that wheel in comparison to the other.
The internal gyroscope (IMU) registers this tracking drift. When the navigation firmware attempts to correct the drift but detects no change in coordinate tracking, it triggers a safety backup routine to free itself. Cleaning the drive wheel shafts restores free rotation.
Testing Infrared LED Emitters Using a Smartphone Camera
Cliff sensors emit infrared light, which is invisible to the human eye. However, digital CMOS cameras on smartphones can capture this light spectrum, showing it as a glowing purple light on the screen.
To test for electrical faults, place the powered vacuum in a dark room and look at the underside sensors through your phone's camera. If you see a purple glow, the emitter LED is working, indicating the issue is dirt or a failed receiver diode.
Environmental Lighting Conflicts and High-Contrast Shadows on Floor
Direct sunlight shining through windows onto hard floors creates high-contrast shadows. This sharp transition between bright light and dark shadows can confuse the infrared readings of the cliff sensors.
The vacuum may register the shadow boundary as an open ledge, prompting it to reverse and spin. Drawing blinds or scheduling cleanings when direct sun is not hitting floors prevents these false edge alarms.
Mainboard Logic Testing for Short-Circuit Faults in Bumper Switches
If cleaning the sensors does not stop the vacuum from reversing, the issue may be a short circuit in the bumper switch wiring. High-impact collisions can bend the metal contacts inside the micro-switches, keeping the circuit closed.
You can test this with a multimeter set to continuity mode. Touch the probes to the switch terminals and press the bumper. If the meter shows continuity regardless of bumper position, the micro-switch is damaged and must be desoldered and replaced.
Bumper Sensor Assembly and Alignment Problems
High-impact collisions can dislodge the internal plastic arms that activate the bumper micro-switches. If the arm becomes loose, the switch remains pressed even when no collision is occurring.
Open the bottom panel to inspect the plastic alignment brackets, ensuring the spring-loaded bumper moves back and forth smoothly to stop the vacuum from reversing endlessly.
Preventing Copper Corrosion on Underside Sensor Boards
If the vacuum drives over wet tile spots, water can seep into the copper terminals of the cliff sensor boards. This moisture leads to copper corrosion, causing electrical signals to drift.
Always dry the bottom chassis after cleaning damp areas and clean the contact points with contact cleaner to prevent moisture from triggering false cliff warnings and reversing loops.
Testing Cliff Sensors on Dark Carpet Patterns
Black carpets and dark flooring absorb infrared light rather than reflecting it. When the vacuum drives onto a dark area, the cliff sensor registers a drop-off, causing the vacuum to drive backward even on flat surfaces, which can be solved by taping over the lenses.
Mainboard Pin Diagnostics and Voltage Audits
If mechanical checks fail, use a digital multimeter to measure the voltage on the sensor board pins. The cliff sensor receiver pins on the motherboard should show a stable 5V DC reference signal during normal operation. A reading below 4.5V indicates a resistive leak or a corroded ribbon cable connection that must be replaced.
Addressing Signal Interferences from High-Gloss Tiles
Highly reflective floors, such as high-gloss ceramic tiles, can reflect infrared light away from the receiver. If this happens, the vacuum will register a drop-off and reverse. Keeping floors dry and using matte rugs helps prevent these errors.
How Front Bumper Alignment Affects Cleaning Routines
If the bumper is misaligned even slightly, the internal micro-switches will remain pressed. Verify the bumper can spring back freely when tapped. If it is stiff, clear out any trapped sand grains from the seams.
Frequently Asked Questions (FAQ)
Why does my robot vacuum drive backward and beep?
This is usually caused by dirty cliff sensors. The vacuum mistakes dust on the lenses for a ledge, backs up to avoid a fall, and then shuts down as a safety precaution.
Can I disable the cliff sensors to stop the vacuum from reversing?
If you have a single-level home without stairs, you can cover the underside cliff sensor windows with white tape. This tricks the sensors into registering a flat floor.
Why does my vacuum spin in circles and go backward?
This behavior points to a physical jam on one side of the front bumper, keeping the micro-switch closed, or a hair wrap blocking one of the drive wheels.
How do I clean the bumper on a Mondial vacuum?
Press the bumper sides repeatedly to dislodge dust. If needed, use a can of compressed air to clear out dirt from the seams between the bumper and the main frame.
Conclusion
Fixing a robot vacuum that keeps going backward requires keeping the underside infrared lenses clean and ensuring the front bumper moves freely. Wiping down these sensors resolves false collision alerts and restores normal navigation paths.


