![How to Setup a VPN on LG Smart TV (webOS) [Easy Guide]](/images/posts/wifi-router.webp)
Learn how to set up a VPN on your LG Smart TV using Smart DNS, network sharing, or router configuration for enhanced privacy.
Understanding webOS Limitations on VPN Apps
DomineTec Tip: Unblocking certain content libraries might require you to change the LG Services Country in your TV settings, in addition to changing DNS. Learn more about connecting smart tv to internet via ethernet cable.
LG Smart TVs run on webOS, a proprietary operating system designed for a seamless user experience. However, webOS has certain limitations when it comes to installing traditional VPN applications. Unlike Android TVs or other platforms that allow the installation of third-party applications, webOS does not support native VPN apps. This limitation can pose challenges for users looking to secure their internet connection or access geo-restricted content. As such, users need alternative methods to utilize a VPN on their LG Smart TV.
Despite this limitation, users can still achieve their desired level of privacy and access to content through various configuration methods. Understanding these methods is key to effectively using a VPN with your LG Smart TV.

Method 1: Setting Up Smart DNS on LG Smart TV
| VPN Setup Option | Pros | Cons |
|---|---|---|
| Smart DNS | Native settings adjustment, fast streaming speeds | No data encryption, requires compatible VPN provider |
| Router VPN | Secures all devices on the network simultaneously | Difficult manual installation on firmware |
Smart DNS is a popular method for bypassing geo-restrictions without encrypting your connection. This method allows you to access content from different regions by rerouting your DNS queries. Here’s how to set it up on your LG Smart TV:
Step 1: Choose a Smart DNS Service
Before proceeding, you need to select a reliable Smart DNS service. Popular options include:
- Unlocator
- Smart DNS Proxy
- OverPlay
Once you choose a service, sign up and obtain the DNS server addresses provided by the service.
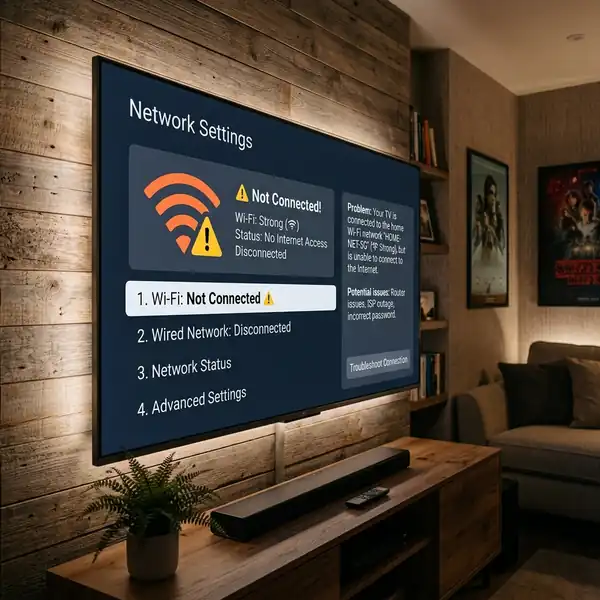
Step 2: Connect Your LG Smart TV to the Internet
Ensure your LG Smart TV is connected to the internet, either via Wi-Fi or Ethernet. Navigate to the Settings menu by pressing the gear icon on your remote.
Step 3: Access Network Settings
In the Settings menu, select "All Settings." From there, navigate to "Network" and choose "Wi-Fi Connection" or "Wired Connection," depending on your setup.
Step 4: Configure DNS Settings
Once you are in the network settings:
- Select "Advanced Settings."
- Scroll down to find the "DNS" option and select it.
- Change the setting from "Automatic" to "Manual."
- Input the primary and secondary DNS addresses provided by your Smart DNS service.
Step 5: Save Settings and Reboot
Save your settings and restart your LG Smart TV for the changes to take effect. After rebooting, your TV should now be configured to use the Smart DNS service.
Step 6: Test the Configuration
To confirm that Smart DNS is functioning correctly, visit a geo-restricted website or a service that was previously inaccessible. If you can access the content, your configuration is successful.
Method 2: Sharing a VPN Connection via Wi-Fi or Ethernet
If you have a VPN service with applications available for Windows or Mac, you can share the VPN connection with your LG Smart TV. This method involves using your computer as a virtual router. Here’s how to do it:
Sharing a VPN connection via Wi-Fi or Ethernet is a practical method for utilizing a VPN on your LG Smart TV. This approach involves configuring your VPN on a computer or a router, which subsequently shares the VPN connection with your LG Smart TV. This setup typically requires you to have a reliable VPN service that supports multiple protocols, such as OpenVPN, L2TP/IPsec, or PPTP. OpenVPN is often preferred due to its robust security features and ability to bypass geographic restrictions effectively. By ensuring your VPN is set up on a device that can connect to the internet, such as a Windows PC or a router, you create a secure tunnel that encrypts your data and masks your IP address, thereby enhancing your online privacy while streaming or browsing on your smart TV.
One of the primary benefits of sharing a VPN connection is that it allows multiple devices, including your LG Smart TV, to connect to the internet securely without the need for individual VPN clients on each device. This is particularly advantageous for smart TVs, as they often do not support direct VPN installations. By sharing your VPN connection, you gain immediate access to geo-restricted content and enhanced security across all devices connected to your Wi-Fi network. Additionally, this method can be more efficient than connecting each device separately, streamlining your setup while maintaining a high level of security and privacy.
However, troubleshooting may be necessary if you encounter connectivity issues when sharing a VPN connection. Common problems include DNS leaks, slow internet speeds, or inability to stream content. To address DNS issues, ensure that your router is configured to use secure DNS servers provided by your VPN service. If you experience slow speeds, consider switching to a different VPN server or protocol, as some servers may offer better performance based on your location. Moreover, ensure that your computer or router's firewall settings allow VPN traffic. If these steps do not resolve the issue, consult your VPN provider’s support resources for specific configurations for LG Smart TVs, as they can offer tailored guidance to optimize your streaming experience.
Step 1: Install and Configure Your VPN
First, download and install your chosen VPN application on your computer. Configure the VPN connection according to the provider's guidelines.
Step 2: Share Your VPN Connection on Windows
If you are using a Windows computer, follow these steps:
- Go to "Settings" and select "Network & Internet."
- Choose "Status" from the left-hand menu and click on "Network and Sharing Center."
- Select "Change adapter settings."
- Right-click on the VPN connection and select "Properties."
- Go to the "Sharing" tab and check the box that says "Allow other network users to connect through this computer's Internet connection."
- In the drop-down menu, select the network connection that corresponds to your Wi-Fi adapter.
- Click "OK" to save the settings.
Step 3: Share Your VPN Connection on macOS
If you are using macOS, the steps are slightly different:
- Open "System Preferences" and select "Sharing."
- Check the box next to "Internet Sharing."
- In the "Share your connection from" dropdown, select your VPN connection.
- In the "To computers using" section, check "Wi-Fi."
- Configure the Wi-Fi options (network name, security, password) as desired.
- Check the box next to "Internet Sharing" to enable it.
Step 4: Connect Your LG Smart TV to the Shared Network
On your LG Smart TV, navigate to the Wi-Fi settings and connect to the network you just created. Enter the password if prompted.
Step 5: Testing the Configuration
Once connected, test your VPN connection by accessing a geo-restricted service or running a location check on a website. This will confirm that your LG Smart TV is using the VPN connection from your computer.
Method 3: Configuring a VPN at the Router Level
One of the most effective methods to use a VPN with your LG Smart TV is by configuring the VPN directly on your router. This method allows all devices connected to the router to route their internet traffic through the VPN, ensuring privacy and access to global content. However, not all routers support VPN configurations. You may need to upgrade to a compatible router, such as those running DD-WRT, Tomato, or AsusWRT firmware.
Configuring a VPN at the router level is a highly effective method for ensuring that all devices connected to your home network, including your LG Smart TV, benefit from VPN protection without the need for individual device installations. This approach entails logging into your router's firmware and setting up the VPN directly within it. Depending on your router model, you may have to install custom firmware such as DD-WRT, Tomato, or OpenWRT to enable VPN functionality. This step is crucial as not all routers come with built-in VPN support. Once the firmware is configured correctly, you can input your VPN provider’s details, including server address, username, and password, often found within your VPN account dashboard. By following these steps, your LG Smart TV will seamlessly connect through the VPN every time it accesses the internet, providing an additional layer of privacy and security.
The benefits of configuring a VPN at the router level extend beyond convenience. With this setup, you can avoid the hassle of manually configuring VPN settings on each device, especially for those that may not natively support VPN applications, such as gaming consoles or smart TVs. Additionally, connecting through a router-level VPN can sometimes enhance the overall network performance by providing a more stable connection. You’ll also gain the ability to manage bandwidth allocation and network traffic more effectively, which is particularly beneficial for households with multiple streaming devices. Furthermore, having a VPN at the router ensures that all devices in your home, including IoT devices, are protected, giving you peace of mind regarding your digital security.
However, configuring a VPN at the router level is not without its challenges. Users may encounter issues such as router compatibility, slow connection speeds due to encryption overhead, or difficulties in accessing certain geo-restricted content. To troubleshoot these problems, ensure that your router is updated with the latest firmware and that it meets the technical requirements set by your VPN provider. If you experience slow speeds, consider switching to a less congested server or adjusting the VPN protocol used (common options include OpenVPN, L2TP, and PPTP) as each has its own strengths and weaknesses in terms of speed and security. Additionally, if you encounter connectivity issues, check your router’s settings to confirm that the VPN tunnel is correctly established and that your ISP is not blocking VPN traffic. By understanding these configurations and potential troubleshooting techniques, you can successfully utilize a VPN on your LG Smart TV, enhancing your streaming experience while safeguarding your privacy.
Step 1: Check Your Router Compatibility
Verify that your router can support VPN connections. If it is not compatible, consider purchasing a router that does. Popular options include:
- Asus RT-AC86U
- Linksys WRT3200ACM
- Netgear Nighthawk R7000
Step 2: Access Your Router's Admin Panel
Connect to your router via a web browser by entering its IP address (commonly 192.168.1.1 or 192.168.0.1). Log in with the admin credentials; often, the default username is "admin," and the password is either "admin" or "password."
Step 3: Configure the VPN Client
Once logged in, navigate to the VPN section in the router settings. The exact steps will depend on your router’s firmware, but typically involve:
- Finding the "VPN" or "VPN Client" option in the settings.
- Choosing the type of VPN (usually OpenVPN or PPTP).
- Entering the VPN provider's details, including server address, username, password, and any required certificates.
Step 4: Save and Reboot
Save your settings and reboot the router. This ensures that the VPN connection is established and active.
Step 5: Connect Your LG Smart TV to the Router
On your LG Smart TV, navigate to the network settings and connect to the router. Ensure that the connection is stable and that your TV is acquiring an IP address.
Step 6: Verify the VPN Connection
To confirm that your LG Smart TV is connected through the VPN, access a geo-restricted service or run a location check. This will help you verify that your IP address reflects the VPN's location.
Testing Your VPN Location Change on LG webOS
After configuring your VPN using any of the methods mentioned above, it is crucial to test that the VPN is working correctly. Here’s how to perform a location check on your LG Smart TV:
Testing your VPN location change on LG webOS is a crucial step to ensure that your virtual private network is functioning effectively. After configuring your VPN on your LG Smart TV, the first thing you should do is verify that your IP address has been altered to reflect the location of the VPN server you connected to. This can be achieved by navigating to an IP checking website through your web browser on the TV. By doing so, you can confirm whether the IP address displayed corresponds to the region you selected in your VPN settings, which is essential for accessing region-specific content or services. If the IP address remains unchanged, it may indicate that the VPN configuration has not been applied correctly or that there is an issue with the connection to the VPN server.
When using a VPN on LG Smart TV, understanding the underlying technology can enhance your experience and troubleshoot any potential issues. Many VPNs utilize various protocols, including OpenVPN, IKEv2, and L2TP/IPsec, which dictate how data is encrypted and transmitted. The effectiveness of these protocols can vary based on your internet connection and the specific requirements of the services you’re trying to access. For instance, OpenVPN is widely considered the most secure and versatile protocol, making it an excellent choice for streaming and browsing. If you find that certain content is still inaccessible even after connecting to your VPN, experimenting with different protocols in your VPN settings may yield better results, as some services may block specific protocols to prevent VPN usage.
In the event that you encounter issues while testing your VPN location change on your LG Smart TV, there are several troubleshooting steps you can undertake. Start by disconnecting and reconnecting to the VPN server, ensuring that you select a different server in the same region if problems persist. Another common issue could be DNS leaks, where your real IP address is exposed despite being connected to a VPN. To address this, consider configuring your VPN to use a secure DNS service, or manually setting the DNS settings on your LG Smart TV. Lastly, if all else fails, consulting the customer support of your VPN provider can provide insights tailored to your specific situation, as they may have encountered similar issues with other users and have established solutions ready to assist you.
Step 1: Access a Location Check Website
Open a web browser on your LG Smart TV or use a built-in app that allows web access. Navigate to a website that can display your current IP address, such as "whatismyipaddress.com." This site will show your public IP address and its geographical location.
Step 2: Compare the Location
Take note of the displayed IP address and its geographical information. If your VPN is functioning correctly, the location should correspond to the country of the VPN server you connected to.
Step 3: Access Geo-Restricted Content
Try accessing content that was previously restricted based on your location. This could be a streaming service or a website specific to a certain region. If you can access the content, your VPN setup is successful.
Step 4: Troubleshooting
If you encounter issues, consider the following troubleshooting steps:
- Ensure your VPN subscription is active and properly configured.
- Check your internet connection and router settings.
- Restart your LG Smart TV and router.
- Contact your VPN provider for technical support if issues persist.
In conclusion, while LG Smart TVs do not support native VPN applications, there are several effective methods to use a VPN on your device. Whether you choose to set up Smart DNS, share a VPN connection from your computer, or configure the VPN directly on your router, each method provides unique benefits. By following these detailed steps, you can enhance your online privacy and access a broader range of content on your LG Smart TV.
Additional Resources and Recommended Links
For more networking and security guides, check out our step-by-step tutorials on connect smart tv to internet via ethernet cable and how to access router settings on phone. For official hardware troubleshooting, visit the Official LG Electronics Support.


