
PrusaSlicer is a powerful slicing software that simplifies the process of preparing 3D models for printing, offering a variety of customizable settings.
Understanding PrusaSlicer: An Overview
PrusaSlicer is designed to be user-friendly while also offering advanced features for experienced users. It supports a wide range of 3D printers and file formats, making it versatile for various applications.
The software is continually updated, adding new features and improving existing ones, ensuring it remains at the forefront of 3D printing technology. Familiarity with its settings is essential for optimizing print quality.
Getting Started with PrusaSlicer Installation
Installing PrusaSlicer is straightforward. Download the latest version from the official Prusa website and follow the installation instructions provided for your operating system.
The installation package is available for Windows, macOS, and Linux, ensuring a wide range of compatibility. Once installed, the software will prompt users to configure printer settings for accurate slicing.
Configuring Printer Settings
Proper printer configuration in PrusaSlicer is crucial for achieving desired print results. Begin by selecting the printer model from the built-in list or manually entering specifications.
Key parameters to configure include build volume, nozzle diameter, and filament type. Accurate configuration will help ensure that prints adhere to the physical constraints of the machine.

Exploring Slicing Settings
PrusaSlicer offers a plethora of slicing settings that can significantly influence print quality and time. These settings are categorized into several tabs: Print Settings, Filament Settings, and Printer Settings.
Within the Print Settings tab, users can adjust layer height, infill density, and print speed. Understanding the implications of each setting will empower users to create prints that meet specific needs.
Key Print Settings Explained
| Setting | Description | Recommended Value |
|---|---|---|
| Layer Height | Thickness of each printed layer | 0.2 mm for standard prints |
| Infill Density | Percentage of fill inside the model | 20% for general use |
| Print Speed | Speed at which the printer moves | 50 mm/s for quality |
Filament Settings: Choosing the Right Material
Filament settings in PrusaSlicer are critical for ensuring that the material used matches the intended print characteristics. Different materials such as PLA, ABS, and PETG have unique properties that require specific settings.
For instance, PLA typically requires lower temperatures and faster print speeds, while ABS needs a heated bed to prevent warping. Understanding the difference between PLA and ABS is essential for selecting the appropriate settings.

Advanced Slicing Features
PrusaSlicer includes advanced features such as support generation, modifiers, and custom G-code scripts. Support structures can be generated automatically, allowing for complex geometries to be printed without failure.
Modifiers can be added to specific areas of a model to adjust print settings, enhancing print versatility. Custom G-code scripts can also be inserted to modify printer behavior during specific phases of the print.
Step-by-Step Slicing Process
Follow this step-by-step guide to slice a model using PrusaSlicer:
- Open PrusaSlicer and import the 3D model file.
- Select the printer profile from the available options.
- Configure print settings based on desired quality and speed.
- Set the filament characteristics for the material being used.
- Adjust any advanced settings, including supports and modifiers.
- Preview the sliced model to check for errors or issues.
- Export the G-code file to the 3D printer.
Common Slicing Issues and Solutions
Despite its robust features, users may encounter common issues during slicing. One frequent problem is incorrect layer adhesion, often resolved by adjusting print temperature and speed settings.
Another issue may relate to print failures due to improper support generation. Reviewing the support settings and increasing their density or changing the type can lead to better results.
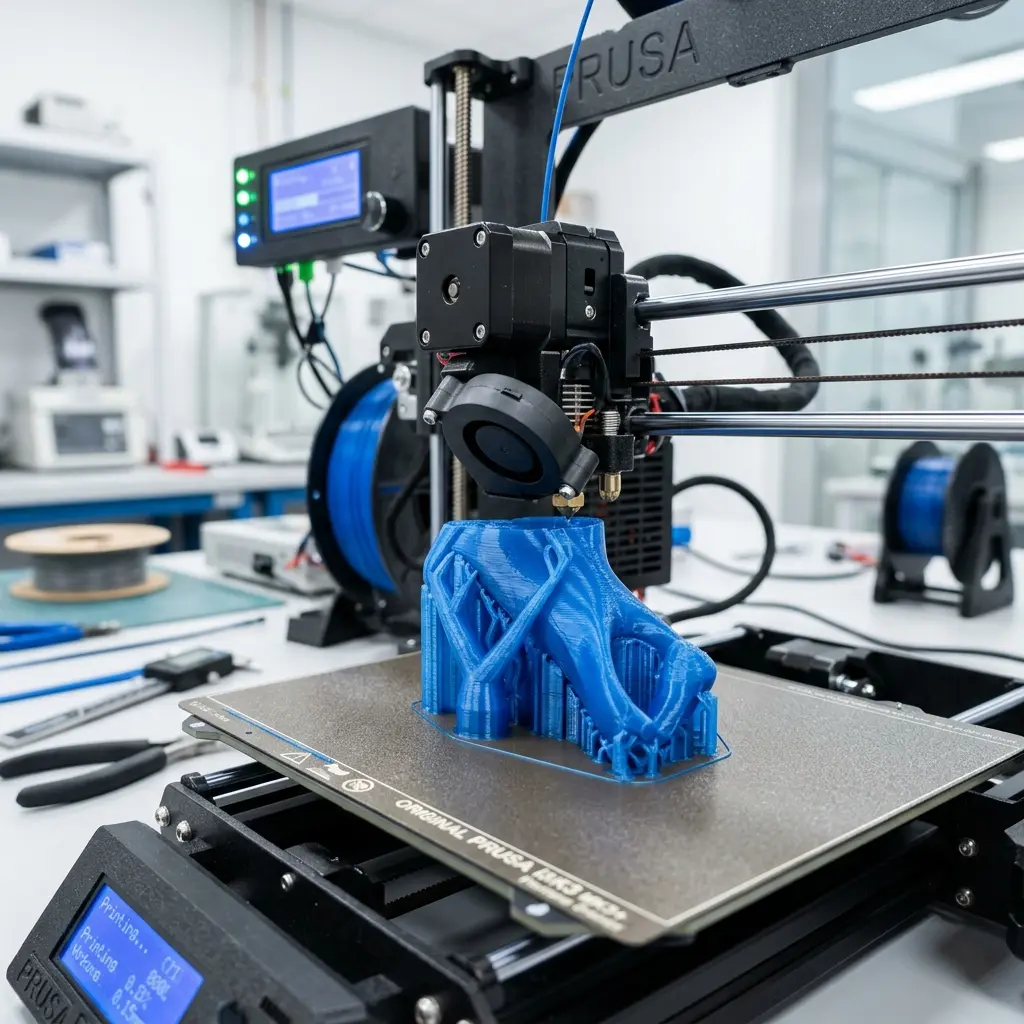
DomineTec Tip: Regularly updating PrusaSlicer allows access to new features and improvements that enhance slicing efficiency. The community around PrusaSlicer is also very active, providing support and sharing profiles for different printers and materials.
Frequently Asked Questions
What is the best layer height for 3D printing with PrusaSlicer?
The best layer height typically depends on the desired print quality. For standard prints, a layer height of 0.2 mm is recommended, while finer details may benefit from 0.1 mm.
How do I select the right filament in PrusaSlicer?
Selecting the right filament involves understanding the material properties and configuring the corresponding settings in PrusaSlicer. Each filament type, such as PLA or ABS, has specific temperature and speed requirements.
Can I use PrusaSlicer with non-Prusa printers?
Yes, PrusaSlicer is compatible with a variety of 3D printers. Users can manually configure settings to match their printer specifications, ensuring optimal slicing results.
What are modifiers in PrusaSlicer?
Modifiers are special features in PrusaSlicer that allow users to alter print settings for specific areas of a model. This can be useful for changing infill density or layer height in targeted sections.
How often should I update PrusaSlicer?
Updating PrusaSlicer regularly is advisable to benefit from new features, bug fixes, and performance improvements. Staying current can provide access to the latest tools and techniques available.
Additional Resources for PrusaSlicer Users
To further enhance the experience with PrusaSlicer, consider the following resources:
- Official PrusaSlicer Blog - Stay informed about updates and new features.
- PrusaSlicer Documentation - Comprehensive guides and FAQs for all features.
- Prusa3D Subreddit - Community discussions, tips, and shared experiences from other users.
- Prusa 3D YouTube Channel - Video tutorials and tips for using PrusaSlicer effectively.
Conclusion
PrusaSlicer is a robust tool for both beginners and seasoned 3D printing enthusiasts. By mastering its features, users can significantly improve the quality of prints and optimize workflow.
Whether printing functional parts, artistic models, or prototypes, understanding how to effectively use PrusaSlicer will enhance the 3D printing experience.
```htmlAdvanced Configurations in PrusaSlicer
Advanced configurations in PrusaSlicer can greatly enhance the quality of 3D prints. Settings such as layer height, infill density, and print speed allow for fine-tuning based on specific project requirements.
Utilizing customizable print profiles can also help in achieving desired outcomes. Each setting can be adjusted to accommodate different materials and geometries, ensuring optimal performance.
For users looking to push the limits of their printers, experimenting with advanced features like adaptive layer height and variable infill can yield impressive results. These settings adjust dynamically during the print process to enhance detail where needed while saving material elsewhere.
Common Calibration Mistakes
Calibration mistakes are a frequent hurdle in achieving satisfactory print quality. Issues such as incorrect bed leveling and improper nozzle height can lead to adhesion problems and print failures.
Failing to account for filament shrinkage can result in dimensional inaccuracies, particularly with larger prints. Regular calibration checks are essential to ensure that settings align with the specific characteristics of the filament being used.
Another common mistake is neglecting to adjust extrusion multiplier settings. This can lead to over-extrusion or under-extrusion, both of which can compromise the integrity of the final print.
Cost Estimations for 3D Printing Projects
Estimating costs for 3D printing projects is crucial for budgeting and resource allocation. Factors such as material cost, print time, and electricity usage all contribute to the overall expenditure.
Utilizing PrusaSlicer’s built-in cost estimation tools can provide a clearer picture of potential expenses. By inputting material prices and calculating print duration, users can forecast project costs with greater accuracy.
Additionally, considering the wear and tear on the printer can be an important aspect of cost analysis. Routine maintenance and replacement parts should also be factored into the overall budget for ongoing projects.
Security Precautions When Using PrusaSlicer
Security precautions are vital when using software like PrusaSlicer, especially when downloading profiles or plugins. Ensuring that downloads come from reputable sources minimizes the risks of malware or faulty configurations.
Regularly updating the slicer software can enhance security and improve functionality. New versions often include bug fixes and security patches that protect against vulnerabilities.
Backing up custom profiles and settings is also a prudent practice. This ensures that valuable configurations are preserved in case of software corruption or system failures.
Alternative Choices for Slicing Software
While PrusaSlicer is a popular choice, several alternative slicing software options are available for different user needs. Software like Cura and Simplify3D offer unique features and interfaces that may better suit specific workflows.
Each slicing software has its advantages, such as Cura’s extensive community support and Simplify3D’s advanced slicing algorithms. Evaluating these alternatives can lead to improved printing outcomes based on personal preferences.
Experimenting with different slicers can also expose users to new functionalities and tools. This exploration can enhance the overall 3D printing experience and expand capabilities.
Optimizing Print Settings for Specific Materials
Each material used in 3D printing has unique characteristics that require tailored print settings. For instance, PLA typically prints well at lower temperatures, while ABS may require higher temperatures to prevent warping.
Adjusting print speed, cooling settings, and retraction distances can significantly affect the quality of prints. Users should consult material specifications and community recommendations for optimal settings.
Experimenting with different materials also allows for discovering new printing techniques. Understanding the nuances of each filament can lead to innovative applications and improved print results.
Understanding Layer Height and Its Impact
Layer height is a critical setting that influences both print quality and time. A smaller layer height results in finer details but increases print duration, while a larger layer height can expedite the process but may sacrifice detail.
Choosing the right layer height depends on the intended use of the printed object. For functional parts, a thicker layer may be sufficient, while intricate designs may require a thinner layer for precision.
It is advisable to experiment with various layer heights to find the best balance between print quality and efficiency. Understanding the trade-offs will lead to more informed decisions in the printing process.
How to Use PrusaSlicer: Settings and Slicing Tutorial
PrusaSlicer is a powerful slicing software developed by Prusa Research for 3D printing. This tutorial will outline the essential settings and features of PrusaSlicer, aimed at optimizing the slicing process for quality prints.
Installation of PrusaSlicer
Before diving into the settings, ensure PrusaSlicer is installed. Download the latest version from the official Prusa website and follow the installation instructions for your operating system.
Understanding the User Interface
The user interface is divided into several sections:
- Menu Bar: Access file operations and settings.
- Toolbox: Contains tools for model manipulation.
- Print Settings: Configure slicing parameters.
- Plater: Visual area for arranging models.
- Preview: View the sliced model layer by layer.
Basic Settings Overview
PrusaSlicer features various settings that affect the final print quality and speed. Below is a list of the most critical settings:
| Setting | Description |
|---|---|
| Layer Height | Controls the thickness of each layer. Lower values yield finer detail. |
| Print Speed | The speed at which the printer moves. Higher speeds reduce print time but may affect quality. |
| Infill Density | Determines the amount of material inside the model. Higher density increases strength. |
| Supports | Enables support structures for overhangs. Can be customized for specific areas. |
| Filament Settings | Specifies material type, temperatures, and other filament properties. |
Slicing Process
To slice a model, follow these steps:
- Launch PrusaSlicer and load a 3D model by clicking on the “Add” button.
- Adjust the model's position and scale using the toolbox.
- Select the desired print settings from the “Print Settings” menu.
- Click on the “Slice Now” button to generate G-code.
- Save the G-code to your computer or directly to an SD card for printing.
Advanced Settings
For users seeking enhanced control over the slicing process, advanced settings provide additional options:
- Advanced Layer Settings: Customize individual layer parameters.
- Filament Settings: Adjust flow rate, temperature, and cooling settings.
- Custom Supports: Manually add supports to specific areas of the model.
- Modifier Meshes: Create variations in settings for specific parts of the model.
Print Settings Breakdown
The following is a detailed breakdown of essential print settings:
| Category | Setting | Description |
|---|---|---|
| Quality | Layer Height | Defines the thickness of each printed layer; affects detail and print time. |
| Speed | Print Speed | Sets the speed of the printer head; impacts print quality and time. |
| Infill | Infill Pattern | Determines the internal structure; options include Grid, Honeycomb, etc. |
| Supports | Support Material | Enables the generation of support structures where necessary. |
| Cooling | Fan Speed | Controls the cooling fan's operation to manage filament solidification. |
Previewing the Slice
After slicing, use the preview feature to visualize the print process:
- View each layer by scrolling through the layers panel.
- Inspect support structures and infill patterns.
- Modify settings if necessary and re-slice.
Common Troubleshooting Tips
Users may encounter various issues while printing. Here are common troubleshooting tips:
- Under-extrusion: Check filament settings and nozzle size.
- Layer Misalignment: Ensure the printer is calibrated correctly.
- Warping: Use adhesion aids like brim or raft.
- Stringing: Adjust retraction settings in the filament settings.
Conclusion
PrusaSlicer is a versatile tool that can greatly enhance the 3D printing experience. By understanding and utilizing the various settings and features, users can optimize their prints for quality and efficiency.
``` ```htmlGetting Started with PrusaSlicer
PrusaSlicer is a powerful tool designed for preparing 3D models for printing. It supports various 3D printers and provides numerous customization options for optimal slicing.
Installation and Setup
To begin using PrusaSlicer, download the software from the official Prusa website. Follow the installation instructions relevant to your operating system.
User Interface Overview
The user interface of PrusaSlicer is intuitive and user-friendly. Key sections include the model view, settings panel, and preview area.
Importing Models
Models can be imported into PrusaSlicer by clicking the 'Add' button. Supported file formats include STL, OBJ, and 3MF.
Model Manipulation
After importing, models can be manipulated using various tools. Options include moving, scaling, rotating, and mirroring the model.
- Move: Drag the model to position it accurately on the build plate.
- Scale: Adjust the size of the model proportionally or non-proportionally.
- Rotate: Change the orientation of the model to optimize printing.
- Mirror: Create a mirrored version of the model for symmetrical designs.
Slicing Settings Overview
Slicing settings dictate how a model will be printed. Key parameters include layer height, infill density, and print speed.
Basic Settings
Basic settings are found under the 'Print Settings' tab. These settings can be adjusted for each print profile.
| Setting | Description |
|---|---|
| Layer Height | Defines the thickness of each layer printed, affecting detail and speed. |
| Infill Density | Specifies the percentage of infill material within the model. |
| Print Speed | Controls how fast the printer moves while extruding material. |
Advanced Settings
Advanced settings provide more granular control over the printing process. These settings can be tailored for specific materials or designs.
- Temperature: Adjust the nozzle and bed temperatures for optimal material flow.
- Retraction: Set retraction distance and speed to minimize stringing.
- Supports: Enable or disable support structures for overhangs.
Previewing the Slice
After slicing, the preview feature allows users to visualize the print layers. This helps identify potential issues prior to printing.
Analyzing Layer View
The layer view shows each layer of the model and can be adjusted using the slider. Zooming in allows for detailed inspection of specific areas.
Exporting G-code
Once satisfied with the settings and preview, the final step is to export the G-code. This code is what the 3D printer will use to recreate the model.
Saving Options
G-code can be saved directly to a file or sent to a printer over USB. Choose the appropriate option based on the printer setup.
Troubleshooting Common Issues
Common issues may arise during slicing or printing. Familiarity with these problems can save time and material.
- Stringing: Adjust retraction settings to minimize excess filament.
- Warping: Use a heated bed or apply adhesion solutions to prevent warping.
- Layer Misalignment: Check for mechanical issues with the printer's axes and belts.
Conclusion
PrusaSlicer is a robust tool that offers extensive customization for 3D printing. Mastery of its settings can significantly enhance print quality and efficiency.
```



