How to Download and Setup Epson L3250 Drivers on Windows 11
The Epson EcoTank L3250 multifunction printer is widely appreciated for its integrated high-volume ink tank system and incredibly low printing cost per page. However, installing it on Windows 11 can present unique challenges, such as automatic driver conflicts, network isolation on local Wi-Fi, and print spooler errors. To set up and install the Epson EcoTank L3250 printer on Windows 11, download the official "Web Installer" package from Epson's support website, run the executable with administrative privileges, select your preferred connection interface (Wi-Fi, Wi-Fi Direct, or USB), and complete the calibration and software setup following the installer's prompts.
This technical guide will walk you through the entire unboxing, installation, and optimization process, ensuring your printer operates at peak performance on your Windows 11 PC.
1. Physical Setup and MicroPiezo Printhead Charging
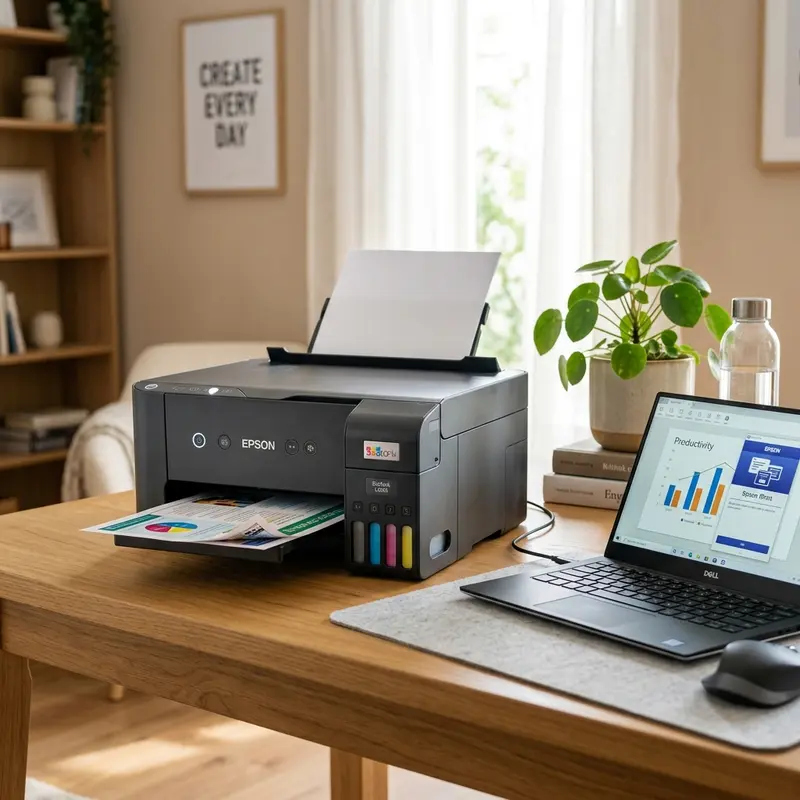
Before executing any software on your Windows 11 machine, the physical printer must be correctly configured. Start by removing all blue transport tape strips from the scanner lid, paper tray, and inside the access carriage door. The Epson L3250 features a MicroPiezo non-thermal printhead. Unlike thermal inkjets (which boil ink to shoot it onto the page), the MicroPiezo system utilizes electric current applied to piezoelectric crystals, which physically deform to eject ink droplets. Because it operates without heat, the printhead suffers significantly less degradation and lasts the entire operational lifespan of the printer.
Abasteça the ink reservoirs (Black, Cyan, Magenta, Yellow) using the provided T544 ink bottles. The bottle tips are keyed to fit only their corresponding color tanks, making spillages and incorrect fills nearly impossible. Once filled, press and hold the physical "Cancel" button (represented by a red triangle icon inside a circle) on the printer panel for approximately five seconds. The green power LED will begin flashing, initiating the ink charging process. This process takes 15 to 20 minutes, drawing ink from the physical reservoirs through the internal silicone tubes and priming the printhead nozzle chambers. Do not connect the USB cable or run any installer on Windows 11 until the ink charging cycle is complete and the power LED stays solid green.
2. Downloading Official Epson Drivers vs. Generic Windows 11 Class Drivers
A common mistake when setting up the Epson L3250 on Windows 11 is letting Windows automatically handle the installation. When you plug in the printer, Windows Update may assign a generic driver class known as Web Services for Devices (WSD). While WSD allows basic black-and-white printing, it does not support advanced features such as borderless photo printing, manual nozzle checks, head cleanings, status monitoring, or high-fidelity scanning via the Epson Scan 2 utility.
To ensure full utility compatibility, download the official drivers:
- Go to the official Epson Support site and search for the EcoTank L3250 model.
- Ensure the detected operating system is Windows 11 (64-bit). If not, select it manually.
- Download the "Drivers and Utilities Combo Package Installer" (Epson Web Installer).
- Right-click the installer file in your downloads folder and select "Run as Administrator." This bypasses restricted Windows 11 User Account Control (UAC) privileges, allowing the installer to write network rules and register virtual printer ports in the registry.
3. Step-by-Step Wireless Wi-Fi Configuration
The Epson EcoTank L3250 is equipped with a single-band 802.11 b/g/n Wi-Fi network interface card that operates exclusively on the 2.4 GHz radio frequency band. If your modern home router uses a combined dual-band SSID (merging 2.4 GHz and 5 GHz into a single network name), the printer might fail to authenticate during configuration. We recommend temporarily connecting your Windows 11 PC to the 2.4 GHz channel of your router before initiating setup.
In the Epson setup utility, select "Wireless Connection (Wi-Fi)" and follow these steps:
- If your router supports WPS (Wi-Fi Protected Setup), press the physical WPS button on your router, then press and hold the "Wi-Fi" and "Network Status" (marked with an "i") buttons on the printer panel simultaneously for 5 seconds. The network LEDs will flash alternately, signaling that it is pairing with the router.
- If using the installer-driven network setup (highly recommended), the utility will scan your local network using the mDNS multicast protocol to identify the printer. Ensure your Windows 11 firewall or third-party antivirus is not blocking incoming TCP/UDP packets.
- If the installer fails to locate the printer automatically, it will prompt you to connect the USB cable temporarily. This cable passes the network SSID name and encryption key from Windows 11 to the printer's internal EEPROM memory. Once completed, the printer will acquire a dynamic IP address via DHCP, and you can unplug the USB cable.
4. Step-by-Step Wired USB Installation
If you prefer a direct, network-free connection, you can connect the Epson L3250 directly to your PC via a USB 2.0 cable. For optimal performance, connect the cable directly to a high-speed USB port on the computer's motherboard (the back ports of a desktop cabinet), avoiding passive USB hubs or extensions exceeding 6 feet (1.8 meters), which can cause voltage drops and lead to spooler errors or cut-off prints.
During the setup wizard, select "Direct USB Connection." When prompted, plug in the USB cable and turn the printer on. Windows 11 will automatically detect the hardware ID and map a virtual USB port (e.g., USB001). If the printer is not recognized, open the Windows 11 Device Manager, expand the "Universal Serial Bus controllers" section, and check for any device with a yellow exclamation point. If found, right-click, uninstall it, and reconnect the cable to trigger a clean hardware query.
| Connection Method | Data Bandwidth | Physical Distance Limit | Windows Port Protocol | Connection Stability |
|---|---|---|---|---|
| USB 2.0 Cable | High (Direct Bus) | Up to 6 feet (1.8m) | Virtual USB001 Port | Excellent (Zero packet loss) |
| Wi-Fi 2.4 GHz Network | Moderate (Wireless) | Router wireless area | Standard TCP/IP Port / WSD | Good (Subject to wall attenuation) |
| Wi-Fi Direct P2P | Moderate (Point-to-Point) | Up to 30 feet (10m) | Direct IP Port | Very Good (Bypasses router issues) |
5. Resolving the "Printer Offline" Error on Windows 11
Windows 11 users often encounter a frustrating issue where the printer status randomly switches to "Offline," preventing printing. This behavior is usually caused by Windows routing print files through a dynamic WSD (Web Services for Devices) port. When the printer enters standby or low-power mode, the WSD port loses track of the connection and fails to wake the printer up.
To resolve this issue permanently, configure the printer to use a Standard TCP/IP Port:
- Retrieve the printer's current IP address by pressing and holding the network status button ("i") on the printer panel for 10 seconds. The printer will print a system status sheet containing its current IPv4 address (e.g., 192.168.1.105).
- Open the Windows 11 Control Panel, navigate to "Devices and Printers," right-click the Epson L3250 icon, and select "Printer Properties."
- Go to the Ports tab and click the Add Port... button.
- Select Standard TCP/IP Port and click "New Port...".
- In the wizard, enter the printer's IP address into the "Printer Name or IP Address" field and click Next. Windows will establish a direct connection to the printer using its network IP.
- Click Apply and close the window. This bypasses the unreliable WSD protocol and establishes a stable, permanent connection path.
Additionally, if you find that print jobs are stuck in the queue, you may need to reset the Windows Print Spooler service. This service organizes and schedules print jobs sent to the printer. If it hangs, the printer will refuse to respond. To restart it, search for `services.msc` in the Windows 11 start menu, locate the "Print Spooler" service, right-click, and select "Restart". This flushes any corrupted queue files and recovers the printer's status immediately.
6. Network Architecture and Port Mapping Settings
For more advanced local network environments, standard DHCP settings on your router may cause issues. If the router reboots, it can assign a new IP address to the printer, breaking any static port configurations you set up in Windows 11. To prevent this, log into your wireless router's administrator panel (typically accessed via a web browser at 192.168.1.1 or 192.168.0.1) and locate the DHCP reservation table. Add the printer's physical MAC address (found on the printed network status sheet) and bind it to a specific static IP address, such as 192.168.1.200. This ensures that no matter how many times the network restarts, the printer will always receive the exact same IP address.
This static IP binding also resolves issues with multi-device environments. If you print from Windows 11 laptops, Android smartphones, and Apple iPads, they will all target the same static destination. This avoids routing problems and conflicts that occur when multiple devices search for the printer on a changing network, keeping your connections fast and responsive.
7. Installing Epson Software Updater and Epson Scan 2 Suite
The Epson Scan 2 utility provides deep control over the built-in flatbed optical CIS scanner. Unlike generic Windows 11 scanning apps, Epson Scan 2 allows you to select specific document sources, perform color adjustments, and scan multiple pages into a single PDF with OCR (Optical Character Recognition) text selection. During the initial driver package installation, make sure the Epson Scan 2 checkbox is enabled. The tool offers a 'Document Mode' for text and a 'Photo Mode' for capturing images at up to 1200 dpi with manual color restoration and back-light correction controls.
Furthermore, running the Epson Software Updater utility on Windows 11 ensures the printer's internal firmware stays updated. Firmware updates fix bugs in the print spooler, improve Wi-Fi signal retention, and update the print head's thermal limits. Connect your printer via a USB cable before starting a firmware update to ensure a stable data transmission, as interrupting a firmware flash can corrupt the printer's motherboard.
8. Configuring Epson Smart Panel and Mobile Print Profiles
The Epson Smart Panel app is available for iOS and Android, allowing you to print, copy, scan, and run maintenance tasks directly from your mobile device. During setup, the app uses Bluetooth to detect the printer and transfer your local Wi-Fi credentials (SSID and password). This is a convenient alternative to using a USB cable if your PC lacks a USB-A port.
Once connected, you can print photo files, PDF documents, and web pages from your phone. The app also monitors ink levels and features a step-by-step cleaning wizard. This mobile integration ensures you can manage all functions of the EcoTank L3250 without needing a computer nearby, providing a flexible printing workflow for your home or office.
9. Maintenance and Printhead Utility Configuration on Windows 11
Once the official driver is installed, you can access the maintenance console by opening the Windows 11 Settings, navigating to Bluetooth & Devices > Printers & Scanners > Epson L3250, and selecting "Printing Preferences". The Maintenance tab contains vital tools for keeping your printer healthy.
Run the Nozzle Check printout whenever you notice missing colors or horizontal white lines on your prints. If the nozzle check shows gaps, click on "Head Cleaning" to perform a mechanical purge. Only run up to three consecutive cleaning cycles, as each cycle draws liquid ink from the reservoirs and deposits it into the waste ink absorber pad (waste ink counter). If the printer remains unused for weeks and the ink inside the printhead nozzles dries up, you can execute a "Power Cleaning" (or Power Ink Flushing) from the maintenance tab. However, use this utility sparingly, as it consumes a significant amount of ink and fills up the waste ink pads quickly.
10. Color Profiles (ICC) and Custom Media Configuration
Configuring the correct print media profiles in Windows 11 is essential for achieving accurate color prints. Printing on standard copy paper is fine for text, but it absorbs too much ink for high-resolution graphics and photos, leading to washed-out colors. For photo printing, change the paper type setting in the driver to "Epson Premium Glossy" or "Epson Matte". This instructs the printhead to spray smaller ink droplets (down to 3 picoliters) and slow down carriage movements, which helps prevent paper warping and improves print detail.
Additionally, you can install the official Epson ICC color profiles on Windows 11 to calibrate the colors you see on your monitor (RGB color space) with the physical ink colors printed on the paper (CMYK color space). This calibration is highly recommended when using image editing software like Adobe Photoshop or Lightroom, ensuring professional-grade color accuracy and preventing dark or color-tinted prints.
Frequently Asked Questions (FAQ)
Does the Epson L3250 work on 5 GHz Wi-Fi networks?
No, the Epson EcoTank L3250 only supports 2.4 GHz Wi-Fi networks. It is not equipped with a 5 GHz wireless card. During setup, make sure your laptop or desktop is connected to your router's 2.4 GHz band so the installer can detect and configure the printer correctly.
How do I fix the Epson L3250 appearing as offline on Windows 11?
This is usually caused by the Windows WSD port losing connection with the printer. To fix it, print a network status sheet from the printer to get its IP address, then open the printer properties in the Windows Control Panel and add a Standard TCP/IP port using the printer's IP address.
Can I set up the Epson L3250 on Windows 11 without a USB cable?
Yes, if your wireless router has a WPS button, you can connect the printer to the network by pressing the WPS button on the router and holding the Wi-Fi and network status buttons on the printer for 5 seconds. Once connected, your Windows 11 PC will detect the printer over the network without requiring a USB cable.
Why are my print jobs stuck in the Windows 11 print queue?
Print jobs can get stuck if the Windows Print Spooler service encounters a corrupted print file or crashes. To resolve this, open the Windows Services app (services.msc), find the "Print Spooler" service, right-click it, and select "Restart". This will clear the queue and restore communication with the printer.


