How to Login to Your Router Admin Page (192.168.0.1 / 192.168.1.1)
To login to your router admin page using IP addresses 192.168.0.1 or 192.168.1.1, you must connect your computer or mobile device to the router's local network (via Wi-Fi or Ethernet cable), open a web browser, type the IP address (192.168.0.1 or 192.168.1.1) into the address bar, and enter the default admin credentials (typically "admin" for both username and password). Gaining access to this local administrative interface is critical for managing wireless security protocols, modifying administrative settings, monitoring connected devices, and optimizing broadband internet performance.
Configuring a home or office network can seem like an overwhelming task if you are unfamiliar with internet protocols, networking hardware, and basic cybersecurity best practices. However, having full control over your router's operating system (firmware) allows you to secure your network against unauthorized access, set up parental controls, configure guest networks, and troubleshoot connection dropouts without waiting for customer support. This exhaustive technical manual provides detailed, step-by-step guidance on how to locate your IP, log in, configure security options, and troubleshoot common errors.
Understanding IP Addresses: 192.168.0.1 and 192.168.1.1
In computer networking, IPv4 (Internet Protocol version 4) addresses are used to identify nodes on a network. The Internet Engineering Task Force (IETF), through the RFC 1918 document, reserved specific blocks of IPv4 addresses for private networks. These include Class A (10.0.0.0/8), Class B (172.16.0.0/12), and Class C (192.168.0.0/16) address ranges. The IP addresses 192.168.0.1 and 192.168.1.1 are the most commonly preconfigured Class C host addresses designated for the local gateway.
Because these addresses are private, they are not routable on the public internet. Instead, they operate inside your local area network (LAN). Your router acts as an intermediary, using Network Address Translation (NAT) to mapping your local devices' private IPs to a single, public WAN (Wide Area Network) IP address assigned by your Internet Service Provider (ISP). By designating 192.168.0.1 or 192.168.1.1 as the default gateway, networking manufacturers like Linksys, Netgear, ASUS, TP-Link, D-Link, and Zyxel ensure that all outbound traffic from your local devices is sent directly to the router for processing and forwarding to the wider web.
Additionally, Classless Inter-Domain Routing (CIDR) notation determines the size of the subnet. A typical home router uses a subnet mask of 255.255.255.0 (written as /24), allowing for up to 254 distinct host IP addresses (from 192.168.0.2 to 192.168.0.254, since 192.168.0.0 is the network address and 192.168.0.255 is the broadcast address). The local DHCP pool manages these addresses dynamically, lease-timing them to client devices as they establish connections.
How to Find Your Router's Default Gateway IP Address
Depending on the manufacturer and the configuration applied by your internet service provider, your gateway IP address might differ from the standard 192.168.0.1 or 192.168.1.1. It is important to query your active network connection to verify the correct IP address of your gateway.
1. Windows OS (Command Prompt)
To find your default gateway on Windows using the Command Prompt:
- Press the Windows Key + R on your keyboard to open the "Run" dialog box.
- Type
cmdin the input box and hit Enter to launch the Command Prompt window. - Type
ipconfigat the command prompt and press Enter. - The utility will output configuration details for all network adapters (Ethernet, Wi-Fi, Virtual Adapters).
- Locate the section labeled "Wireless LAN adapter Wi-Fi" or "Ethernet adapter Ethernet" depending on your connection.
- Look for the line named Default Gateway. The IP address next to it (e.g.,
192.168.0.1or192.168.1.1) is the address of your router's admin interface.
2. macOS (Terminal or System Settings)
On Apple Mac computers, you can retrieve the default gateway IP address through either the graphic interface or terminal commands:
- System Settings: Click on the Apple Logo in the upper-left corner of your screen, choose "System Settings," click "Network," choose your active network connection (Wi-Fi or Ethernet), and click "Details." Under the "TCP/IP" tab, you will find the router's IP address listed next to the label "Router."
- Terminal: Open the Terminal application (accessible via Spotlight search) and input the following command:
route -n get default. Locate the row marked "gateway" in the output, which will display the IP address.
3. Android OS
Because Android versions and custom manufacturer overlays (like Samsung's One UI or Xiaomi's MIUI) vary, menu options may differ slightly, but the technical steps remain consistent:
- Navigate to the "Settings" menu on your Android device.
- Select "Connections" or "Network & Internet," then tap on "Wi-Fi."
- Tap the gear icon next to your currently connected wireless network.
- Tap "Advanced" or look at the network status information. In some versions, you must change the IP settings dropdown from "DHCP" to "Static" to reveal the Gateway field. Once you note down the IP address, revert the setting back to "DHCP" to prevent IP configuration conflicts.
4. Apple iOS (iPhone & iPad)
To find the router IP address on an iOS device:
- Open the "Settings" application.
- Navigate to the "Wi-Fi" menu.
- Tap the blue information icon (i inside a circle) located next to the network name you are connected to.
- Scroll down to the section titled "IPv4 Address."
- You will find the router's IP address listed next to the label Router.
Step-by-Step Guide to Log Into the Router Admin Panel
Once you have identified the correct IP address (192.168.0.1 or 192.168.1.1) and ensured your client device is connected to the router's network, follow these steps to access the interface:
Step 1: Open a Web Browser
Use any web browser such as Google Chrome, Apple Safari, Microsoft Edge, Opera, or Mozilla Firefox. Ensure your browser is not in offline mode and that any active VPN (Virtual Private Network) software is disabled. VPNs redirect your network traffic through an encrypted tunnel, which prevents you from connecting directly to local resources like the router's admin interface.
Step 2: Enter the Gateway IP Address into the Address Bar
Click on your browser's address bar at the top of the window, clear any existing text, and type 192.168.0.1 (or 192.168.1.1). Press Enter.
Caution: Do not type the IP address into the search bar (e.g., Google or Bing search). Doing so will display search results for the numbers instead of navigating to the router. Additionally, make sure to enter only numbers and periods; do not append "www" or ".com" to the address.
Step 3: Bypass SSL Certificate Warning (If Applicable)
Some modern routers use secure HTTPS connections but use self-signed SSL certificates. Your browser may flag this and display a warning saying "Your connection is not private." This warning is normal for local networks since the certificate is not registered with an external certificate authority. To proceed, click "Advanced" and select "Proceed to 192.168.0.1 (unsafe)" to access the login page.
Step 4: Input the Default Username and Password
A login interface will appear asking for administrative credentials. If you have not changed these credentials, use the defaults printed on the physical sticker located on the back or bottom of the router. Common default combinations include:
- Username:
admin| Password:admin - Username:
admin| Password:password - Username:
admin| Password: (leave blank) - Username:
root| Password:root
Crucial Router Settings to Configure for Network Security
Leaving your router settings at their default values poses severe security risks. Anyone connected to your Wi-Fi network could log into the admin page, monitor your internet traffic, or lock you out of your network. Follow these recommendations to secure your router:
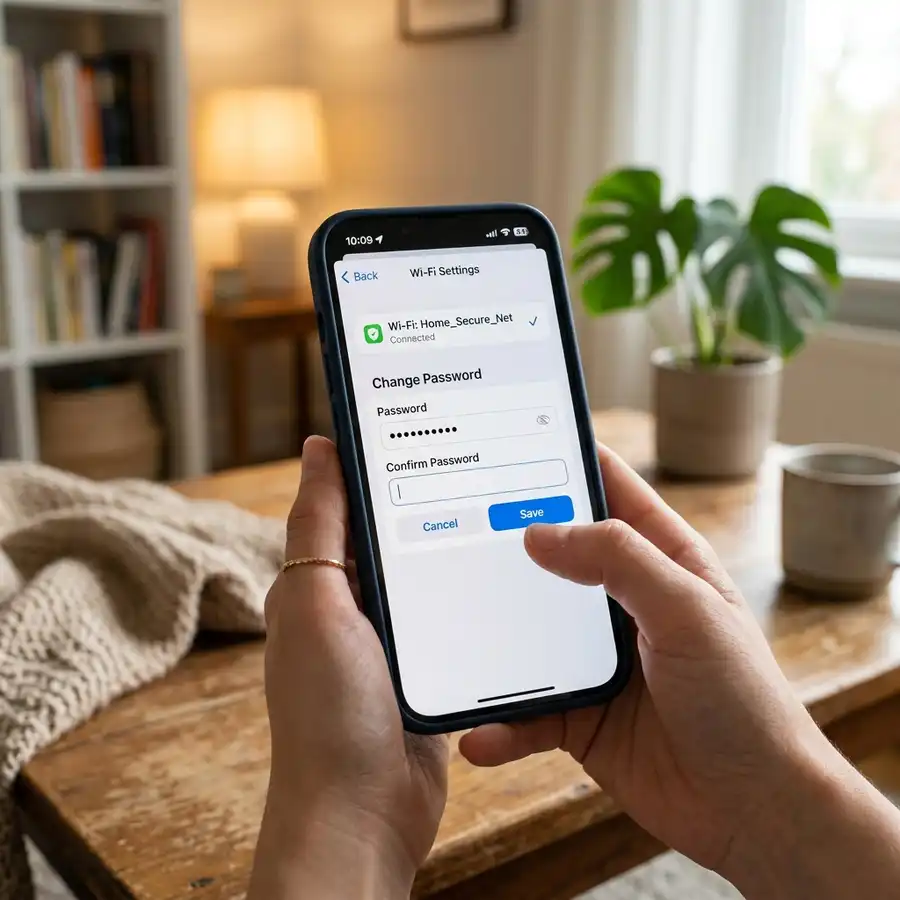
1. Change the Default Admin Password
Immediately update the default password used to access the router's settings page. Find the "System Tools," "Administration," or "Security" section, locate the password settings, and enter a new, complex password. Avoid reusing your Wi-Fi password for the admin login; they should be distinct keys.
2. Customize the Network Name (SSID) and Password
Rename your network SSID (Service Set Identifier) to something unique that does not identify your address or identity. Set your security mode to WPA2-PSK (AES) or WPA3-SAE. Do not use legacy security standards like WEP or WPA, as they are vulnerable to brute-force cracking tools. Use a passphrase containing at least 12 to 16 characters, combining numbers, special symbols, and mixed-case letters.
3. Disable Wi-Fi Protected Setup (WPS)
While WPS is designed for easy connection, it is highly insecure. The PIN-based verification process can be targeted by automated cracking tools, allowing attackers to access your Wi-Fi password. Find the WPS menu within your wireless settings and toggle it to Disabled.
4. Upgrade the Router Firmware
Router manufacturers regularly release firmware updates to patch security vulnerabilities and fix operational bugs. In the admin panel, look for "Firmware Update" or "System Update." Many modern routers feature an "Auto-Update" or "Check for Updates" button that downloads and installs the latest patch automatically. Always perform updates over a wired connection to avoid corrupting the firmware during transmission.
Advanced WAN and Network Architecture Configurations
Once you are comfortable with the basic settings, you can explore more advanced configuration parameters to improve throughput, control traffic priority, or enable remote access securely. These settings are usually found under the 'Advanced' tab:
- Quality of Service (QoS): This protocol allows you to prioritize traffic for specific applications (like VoIP, online gaming, or video streaming services) or specific physical devices on the network. This ensures that high-priority activities remain responsive even when another device is downloading large files at maximum capacity.
- Port Forwarding (NAT / Virtual Server): Port forwarding allows external devices on the internet to reach services hosted on your local network (such as web servers, game servers, NAS storage, or network security cameras). You configure the router to redirect traffic received on a specific WAN port to a specific local IP and port.
- Static DHCP Leases: By mapping a client's MAC address to a specific IP address within the DHCP server settings, you guarantee that the target device always receives the same local IP. This is crucial for devices that rely on port forwarding or local network sharing.
Troubleshooting Guide for 192.168.0.1 / 192.168.1.1 Login Issues
If you encounter errors when attempting to connect to the administrative page, refer to this diagnostic table to identify the cause and apply the appropriate resolution:
| Error / Symptom | Root Cause | Step-by-Step Resolution |
|---|---|---|
| Connection Timed Out / "Page Cannot Be Displayed" | Client device is not on the same network subnet as the router, or the router is offline. | Ensure the client is connected via Ethernet or Wi-Fi. Unplug any secondary routers or modems that may cause IP conflicts. Verify that the client device has obtained an IP address dynamically from the router. |
| Redirected to Web Search Results | The browser interpreted the IP address as a search query due to formatting issues or input location. | Type http://192.168.0.1 directly into the address bar at the top of the browser. Remove any trailing characters, spaces, or domain extensions like ".com". Press Enter. |
| Default credentials do not work | The admin login credentials have been changed, or the router was configured by an ISP with a unique password. | Check the sticker on the router for unique ISP-assigned passwords. If unavailable, perform a physical factory reset of the router to restore default credentials. |
| Client has an IP address starting with 169.254.x.x | DHCP service is disabled on the router, or the network handshake failed. This is an APIPA (Automatic Private IP Addressing) address. | Assign a static IP address to your network card (e.g., IP: 192.168.0.10, Subnet Mask: 255.255.255.0, Gateway: 192.168.0.1) in your OS settings, and then attempt to access the router. |
| Web interface crashes or displays broken code | Browser cache conflict or corrupted firmware files. | Clear your browser's cache and cookies, use Private/Incognito mode, or try using a different web browser. Reboot the router by power cycling it. |
How to Factory Reset Your Router
If you cannot access the admin page due to an forgotten password, or if the router firmware is unresponsive, performing a factory reset is the most effective troubleshooting option. A factory reset erases all custom configurations and restores the router to its factory default state. This means your Wi-Fi network name, password, and custom DNS settings will be deleted, and you will need to set them up again.
To perform a factory reset safely:
- Ensure the router is powered on. Do not disconnect the power during this process, as doing so can damage the firmware memory (bricking the device).
- Locate the Reset button on the back or bottom of the router. It is usually recessed inside a small hole to prevent accidental presses.
- Insert a paperclip, pin, or similar tool into the reset hole.
- Press and hold the button for 10 to 15 seconds.
- Watch the router's LED indicators. They should blink rapidly or turn off and back on, signaling that the reset process has begun.
- Release the button and wait 2 to 3 minutes for the router to finish rebooting.
- Reconnect your device using an Ethernet cable or connect to the default Wi-Fi network listed on the sticker.
- Open a browser, navigate to
192.168.0.1(or192.168.1.1), and configure your network.


