Integrating wireless printers into a home or corporate local area network (LAN) is a crucial step in optimizing daily document workflows. The Epson EcoTank series, known for its high page yields and low printing costs, offers stable Wi-Fi performance, but users frequently encounter connection timeouts, driver mismatches, and discovery errors during initial setup. To connect your Epson printer to Wi-Fi from a laptop, you must download the official printer driver setup utility from the Epson website, run the installer, choose the wireless connection option, temporarily connect the printer via USB for network credential synchronization, and complete the network installation.
Whether you are operating on Windows or macOS, understanding the physical and logical networking architecture of your printer will make debugging network conflicts much simpler. If you also need to manage mechanical printer troubleshooting, check out our guide on how to run Epson L3250 printhead cleaning from a PC to maintain optimal ink viscosity. Additionally, if you work with multiple hardware brands, you might benefit from learning how to reset an HP DeskJet 2776 printer when it suffers hardware or connectivity lockups.
1. The Wireless Hardware Architecture of Epson EcoTank Printers
Epson EcoTank printers house an integrated wireless network interface controller (WNIC) directly on the main control logic board. This Wi-Fi module operates exclusively on the 2.4 GHz frequency band, utilizing the IEEE 802.11 b/g/n wireless standard. Epson engineers selected the 2.4 GHz band for its superior physical characteristics: it covers longer distances and penetrates solid obstacles, such as concrete walls and wooden doors, much more effectively than higher-frequency signals.
However, the lack of 5 GHz support presents a common obstacle during initial network handshakes. Modern home routers often utilize dual-band SSID unification (Band Steering) to broadcast both 2.4 GHz and 5 GHz bands under a single network name. If your laptop connects to the 5 GHz band while the printer searches for the 2.4 GHz band, local network broadcast protocols may fail to bridge the two devices. For a seamless setup, you must configure your laptop to connect to the router's 2.4 GHz channel during the installation procedure.
Regarding network security and encryption, Epson's onboard network card supports WEP, WPA-PSK (TKIP/AES), and WPA2-PSK (AES) protocols. Only high-end enterprise models include native support for WPA3 security. If your network router is set to WPA3-only mode, the printer will fail to authenticate with the access point, causing the Wi-Fi status LED to flash amber or red, signaling an association failure in the router's DHCP lease log.
2. USB Handshake Method: The Most Reliable Setup Protocol
The USB handshake method uses a temporary physical cable link to write the local network credentials (SSID and security passphrase) directly into the printer's non-volatile EEPROM memory. This method bypasses wireless transmission failures and is the most reliable way to configure printers that lack a built-in LCD screen.
Follow this technical step-by-step procedure to connect via USB handshake:
- Launch a web browser on your laptop, go to the official Epson Support site, and search for your printer model (e.g., EcoTank L3250 or L4260). Download the complete "Drivers and Utilities Combo Package."
- Right-click the downloaded executable file and run it as an Administrator. Accept the end-user licensing agreements to proceed.
- When prompted by the installer to select the connection type, select Wireless Connection (Wi-Fi).
- Next, select "Set up printer for the first time" when asked if the printer is already connected to your network.
- The installer will instruct you to connect the physical USB Type-A to Type-B cable from the laptop to the printer. Plug the cable securely into both devices. The system will open a serial communication link with the printer's logic board.
- The setup utility will search for local Wi-Fi networks and import the network name and security key your laptop is currently using. If needed, manually select the correct 2.4 GHz SSID and type in the WPA2 password.
- The printer's processor will write the network configurations to its memory and request a DHCP IP address from the router. Once the Wi-Fi status light turns solid green, the utility will prompt you to disconnect the USB cable.
This method prevents interference from other nearby networks and ensures the network password is keyed in correctly, making it the preferred method for IT professionals and support technicians.
3. Connecting via Wi-Fi Protected Setup (WPS) Button
For installations where a USB cable is unavailable, the Wi-Fi Protected Setup (WPS) protocol provides an alternative hardware-based method to connect the printer to your router without manual configuration or entering passwords.
WPS establishes a brief pairing window where the router and the printer negotiate security credentials. Follow this procedure to configure WPS:
- Confirm that your wireless router supports WPS and has a physical WPS button. In some enterprise routers, WPS is disabled by default in the administrator firmware settings for security reasons.
- Locate the Wi-Fi button on the printer's front control panel. Press and hold this button down for roughly 5 seconds, until the Wi-Fi and Wi-Fi Direct LEDs begin flashing alternately.
- Within 2 minutes of starting the printer's pairing process, walk to your router and hold down its physical WPS button for 3 to 5 seconds. The WPS light on the router should begin blinking.
- Wait for the printer to finalize the connection. Once the handshake is complete, the alternative flashing will stop. The left Wi-Fi LED (green) will turn solid green, indicating a successful connection.
- Open your laptop, run the downloaded Epson setup software, and select "The printer is already on my wireless network." The installer will run an ARP discovery scan to detect the printer's IP address and bind it to your local printer spooler.
While the WPS method is convenient, keep in mind that many network administrators disable WPS in office settings to prevent unauthorized clients from joining the network via physical proximity.
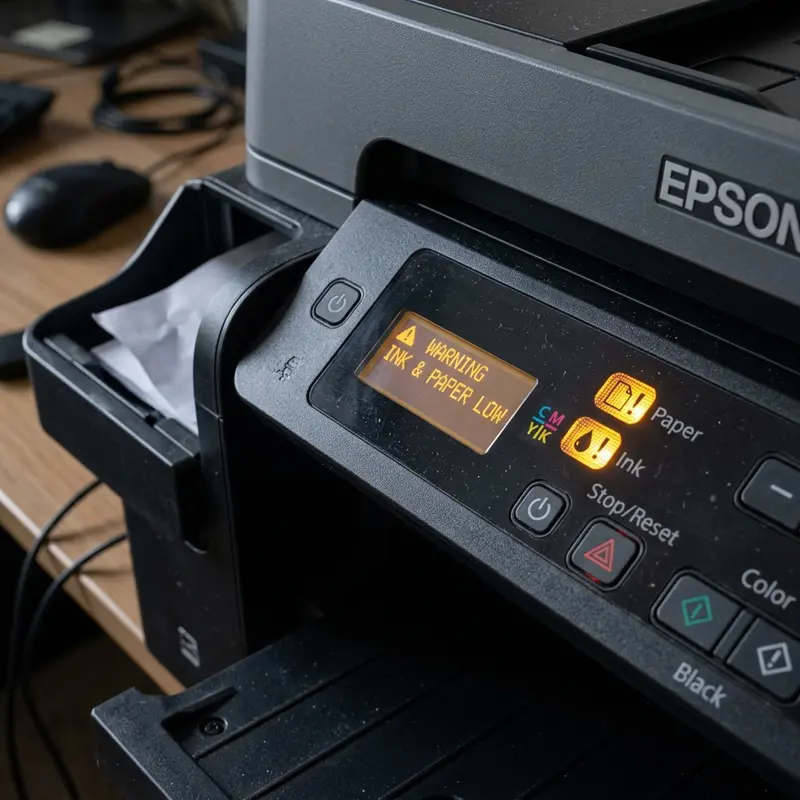
4. Deciphering Wi-Fi LED Light Codes on the Control Panel
On Epson EcoTank printers that do not have an LCD screen, the Wi-Fi LEDs serve as your primary diagnostic interface. Understanding what these light codes mean will help you resolve connection issues quickly without running unnecessary driver reinstalls.
Here are the common LED statuses and what they indicate about your network hardware:
- Solid Green LED (Wi-Fi Icon): The printer is connected to your local Wi-Fi network and has been assigned an IP address. It is ready to receive print jobs from any laptop on the same subnet.
- Alternating Green and Orange LEDs: The printer is in discovery mode, searching for a WPS signal from the router or waiting for DHCP configuration. If this state persists, the connection has timed out.
- Solid Orange LED (Wi-Fi Direct Icon): Wi-Fi Direct is active. The printer is acting as an independent software access point. You can connect your laptop directly to the printer's custom network SSID, though your laptop will lose internet access while connected.
- Simultaneous Blinking (Both Green and Orange): A connection error has occurred. This indicates that the printer found the network but failed to connect (often due to an incorrect WPA key), or that there is an IP address conflict with another device on the network.
To reset the printer's network settings to factory defaults, turn off the printer. Press and hold the network status button (labeled with an "i") while turning the printer back on. Keep holding the button until all LEDs flash together, clearing the old network settings from the EEPROM.
5. Comparison of Printer Connection Interfaces
The following table compares the physical and logical interfaces available on Epson EcoTank printers, detailing their reliability, setup speed, and network limits.
| Connection Interface | Signal Reliability | Security Rating | Primary Drawbacks |
|---|---|---|---|
| USB Cable (Type A-B) | Perfect (Physical copper wire) | Highest (No wireless interception) | Restricts mobility; only prints from one connected computer at a time. |
| Wi-Fi Infrastructure | High (Depends on router coverage) | High (Uses router WPA2/WPA3) | Subject to RF interference and IP conflicts from DHCP changes. |
| Wi-Fi Direct (Ad-Hoc) | Medium (Requires close physical range) | High (Local device-to-device) | Disconnects the client laptop from the internet while printing. |
6. Resolving DHCP IP Conflicts and Windows WSD Port Issues
After successfully connecting your printer to the network, you may find that the laptop reports the printer is offline a few days later. This is a common issue caused by dynamic IP allocation and the default use of Web Services for Devices (WSD) ports in Windows.
By default, Windows installs wireless printers using a dynamic WSD port. While WSD is useful for quick detection, it is notoriously unstable and often loses track of the printer if it enters deep sleep mode or if your router assigns a new IP address to the printer when the DHCP lease expires. If your printer's IP address changes from 192.168.1.50 to 192.168.1.65, Windows will continue sending print jobs to the old IP, resulting in spooler errors.
To prevent this connection loss, implement these configuration adjustments:
- Log into your router's admin portal (typically 192.168.1.1 or 192.168.0.1) using a web browser on your laptop.
- Access the DHCP client list, locate your Epson printer's MAC address, and assign it a Static IP Reservation. This ensures the router always assigns the exact same IP address to the printer.
- On your Windows laptop, open "Devices and Printers," right-click your Epson printer, and select "Printer Properties." Go to the "Ports" tab, click "Add Port," select "Standard TCP/IP Port," and enter the static IP address you reserved in your router. This binds the driver to a persistent IP address, resolving offline errors.
7. Setting up Standard TCP/IP Port vs WSD Port in Windows Spooler
By default, Windows configures network-attached printers using a WSD (Web Services for Devices) port for quick plug-and-play detection. However, WSD protocols are known to drop connections when the printer enters deep sleep power-saving mode. To eliminate the recurring 'Printer Offline' status on your PC, configure a Standard TCP/IP port manually. Go to printer properties, select the Ports tab, click Add Port, choose Standard TCP/IP Port, and type in the reserved static IP address of your printer. This binds the queue directly to the IP, stabilizing connection permanently.
8. Checking Network Interface Status via Printer WebConfig Utility
For advanced network analysis, you can access the printer's WebConfig administrative console by entering its IP address in your laptop's web browser. The dashboard displays the real-time link speed, signal strength (in dBm), and active MAC address of the network interface card. Through this console, IT administrators can review DHCP lease time, verify subnet mask compatibility, and upload custom security certificates to secure the local printing pipeline.
9. Troubleshooting Local Firewall Exceptions
Antivirus and third-party firewalls on your laptop can block communication on UDP port 161 (SNMP) and TCP port 9100. Ensure you add an inbound exception rule for the Epson print spooler process to permit two-way data sharing, allowing you to monitor ink cartridge levels and scanner functions remotely.
10. Resolving AP Isolation and Managed Switch Disconnects
If your office utilizes managed network hardware with active AP (Access Point) Isolation, the laptop will not be able to ping or print to the Epson device. This feature prevents local client-to-client communication. You must log into the hardware dashboard and create an exception for the printer's MAC address or disable local AP isolation inside the 2.4 GHz subnet configuration.
11. Configuring Epson Connect for Remote Cloud Access
Epson Connect allows your printer to receive documents from anywhere in the world by assigning a unique email address to the printer. Register your EcoTank L3250 in the Epson Connect portal, verify the email link, and configure strict sender access filters. This enables secure printing via cloud queues without routing through the local router interface.
12. Configuring Static DNS Settings and DHCP Lease Duration
To ensure cloud features run continuously, configure static DNS settings in the network preferences of the printer. Open the WebConfig interface, locate the IPv4 DNS section, change the configuration from DHCP auto-discovery to manual, and enter Google's public DNS (8.8.8.8) or Cloudflare's public DNS (1.1.1.1). Additionally, setting a custom DHCP lease duration on your home router prevents the router from dropping the printer's MAC address reservation. This guarantees that your laptop's OS never loses communication with the printing spooler.
13. Setting up Local Host Files for Dynamic DNS Resolution
In network configurations where IP addresses are subject to change despite static reservations, you can configure local host name resolution on your Windows laptop. By adding the printer's host name and MAC address to the local hosts file located in the Windows drivers directory, you create a direct mapping that bypasses external router resolution entirely, improving spooler speed. Remember that you must run your text editor as an Administrator to save changes to the hosts file, as Windows blocks user-level writes to system directories for malware prevention. Once saved, flush the DNS cache by running 'ipconfig /flushdns' in the Command Prompt to force immediate local mapping updates.


