How to Turn an Old Router into a Wi-Fi Repeater: Complete Technical Guide
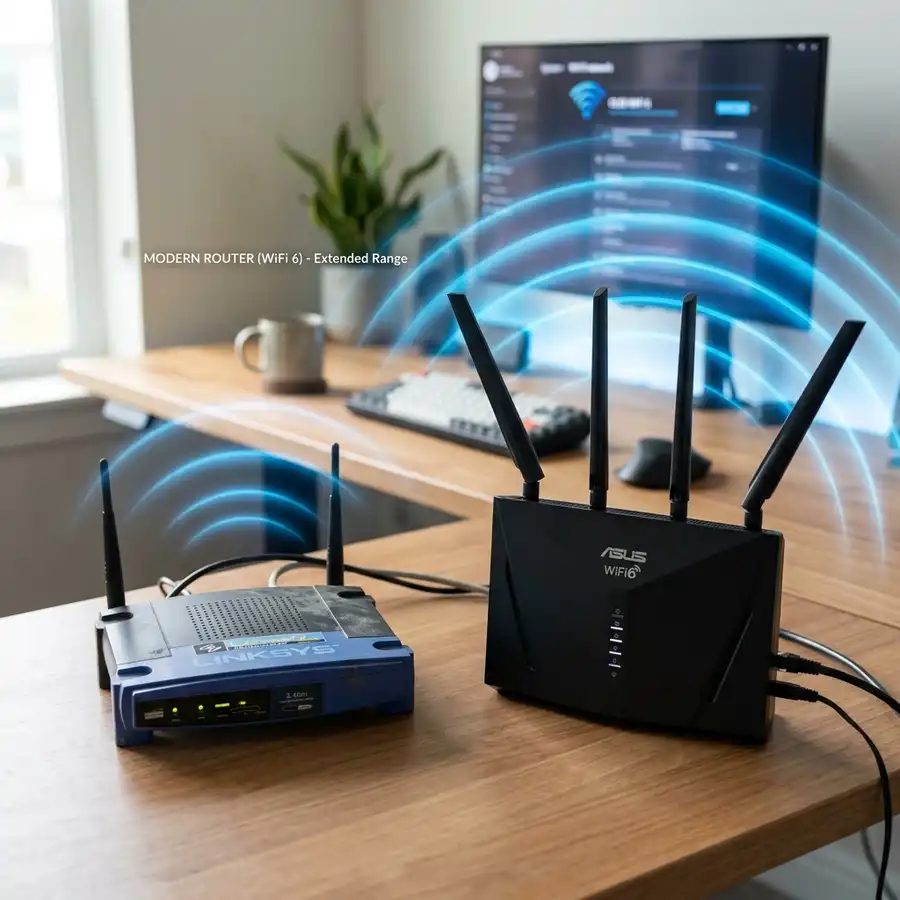
Reusing obsolete networking hardware is a smart technical strategy for extending wireless coverage in homes or offices without purchasing new commercial range extenders or costly mesh systems. However, converting an access point requires precise adjustments in the router's logical settings to avoid serious routing issues on the primary network. To turn an old router into a Wi-Fi repeater, connect it to your computer or phone, change its local IP address to avoid conflicts with your main router, disable the DHCP server in the network settings, enable the WDS (Wireless Distribution System) or Repeater/Bridge mode, select the primary wireless network, and enter its security key to retransmit the signal.
In this advanced networking guide, we will examine the local area network architecture required for this wireless link, explain broadcast packet loops, show how to configure routers from different manufacturers using WDS (Wireless Distribution System) technology, and provide diagnostics for common errors. If you are configuring your wireless infrastructure for smart home devices, you might also find it helpful to read about how smart home appliances connect to networks in our guide on connecting a robot vacuum to the Smart Life app or check out our guide on how to clean Xiaomi robot vacuum sensors.
1. The Logic of Wireless Bridging (WDS vs. Client Bridge Mode)
To convert an old router into a repeater successfully, you must understand how data packet routing functions wirelessly between your primary router (connected directly to the fiber ONT or modem) and the secondary router (the old router being repurposed). There are two main technical approaches to establishing this link:
WDS (Wireless Distribution System)
WDS is an IEEE 802.11-based protocol that allows the wireless interconnection of access points in a local network. It allows a wireless network to be expanded using multiple APs without requiring a wired backbone. A key benefit of WDS is that it preserves the original MAC addresses of client devices in the data packets. When a smartphone connects to the secondary router via WDS, the primary router sees the phone's actual physical MAC address, allowing features like static IP reservation, parent controls, and MAC filtering to operate correctly. WDS configuration requires both routers to operate on the same wireless channel and use identical security standards.
Furthermore, in the context of frame structure, WDS utilizes the four-address frame format in IEEE 802.11. Standard client associations only require three MAC address fields within the MAC header (Source, Destination, and Transmitter). However, when bridging two access points, the wireless medium must transport frames that include both the intermediate wireless bridge nodes and the original host source/destination endpoints. If either router does not fully support this four-address frame configuration due to hardware or chipset driver incompatibilities (such as conflicts between Broadcom and Atheros chips), the WDS bridge will fail to route unicast packets, leading to connection failures.
Universal Repeater Mode (AP Client Bridge)
In this mode, the secondary router behaves as a standard wireless client toward the primary router (similar to a laptop or smart TV). When it receives data packets from the primary router, it retransmits them under its own local SSID. The downside of this method is that the secondary router masks the MAC addresses of its connected client devices, replacing them with its own MAC address during communication with the primary router. While this mode is compatible with almost all router brands, it limits individual device management on your primary router's admin panel.
2. IP Address Conflicts and DHCP Server Loops
The most common error when setting up an old router as a repeater is failing to disable its internal DHCP server. On any local network, there must be only one active DHCP server—typically managed by the primary router connected to your internet line. If the secondary router's DHCP server remains enabled, it will assign competing IP addresses to your home devices. This creates "IP Address Conflicts" or "No Internet Connection" errors because client devices will try to route data through the secondary router (which has no physical WAN link to the internet), breaking your internet connection.
Additionally, the secondary router's local IP address (LAN IP) must be manually changed to match the primary router's subnet while staying outside its active DHCP pool. For instance, if the primary router uses 192.168.1.1 and assigns IPs from 192.168.1.100 to 192.168.1.199, you should set the secondary router's IP to 192.168.1.254. This allows you to manage both devices on the same local subnet without causing ARP table conflicts. Understanding ARP tables and IP routing helps debug issues where client packets are routed to incorrect physical gateways.
If you fail to adjust the LAN IP address, an IP routing loop or duplicate gateway conflict will occur. When a device on the network sends an ARP query for the gateway address, both routers may respond, corrupting the ARP cache tables on your client devices. This causes packets to be sent intermittently to the non-routing secondary access point, resulting in severe packet loss and a perceived drop in connection stability. For safe operation, always configure the secondary gateway address outside the dynamic IP allocation range.
| Network Parameter | Primary Router Setting | Secondary Router (Repeater) Setting |
|---|---|---|
| LAN IP Address | 192.168.1.1 (Example) | 192.168.1.254 (Same subnet, free IP) |
| DHCP Server | Enabled (Distributes IPs) | Disabled (Off) |
| Wireless Channel | Fixed (e.g., Channel 6) | Identical to Primary (e.g., Channel 6) |
| Security Key / Password | WPA2-PSK (AES) + Password | Identical to Primary Router Settings |
3. Step-by-Step Guide for TP-Link Routers Using WDS Bridging
Here is the configuration process for older TP-Link routers utilizing the classic green-and-white management interface:
- Isolate the Router: Plug the old router into power. Connect it to your PC via an Ethernet cable (LAN port) or connect to its default Wi-Fi using your phone. Do not connect it to the main router yet;
- Access the Web GUI: Open your browser and go to the default IP (usually
192.168.0.1or192.168.1.1). Log in using the default credentials (typicallyadmin/admin); - Change the LAN IP Address: Navigate to Network > LAN. Change the IP address to a free IP within your primary router's subnet (such as
192.168.1.254). Click Save. The router will reboot. Log back in using the new IP address192.168.1.254; - Configure Wireless and WDS Settings: Go to Wireless > Wireless Settings. Match the SSID to your primary router's name, or choose a custom name if you want to identify the repeater. Change the Channel setting from Auto to a fixed channel that matches your main router (e.g., Channel 6). Check the Enable WDS Bridging checkbox;
- Scan for Your Primary Network: Tap the Survey or Search button. A list of nearby Wi-Fi networks will appear. Locate your primary SSID and click Connect;
- Enter Security Parameters: Match the Key Type to your primary router's security setting (usually WPA-PSK/WPA2-PSK). In the Password field, enter your main Wi-Fi security key. Click Save;
- Disable the DHCP Server: Navigate to DHCP > DHCP Settings. Change the setting to Disable. Click Save;
- Reboot the Device: Go to System Tools > Reboot and restart the router. Once rebooted, the secondary router will bridge with the primary network and begin routing client traffic.
After completing these steps, verify the routing path using utility tools on a connected client. Open the command line or terminal on a laptop and execute a traceroute (e.g., tracert 8.8.8.8 or traceroute 8.8.8.8). The output should show the first hop routing directly through the primary gateway IP (192.168.1.1) without listing the intermediate repeater's IP as a routing hop. This confirms that the secondary device is operating strictly as a Layer 2 bridge, forwarding packets transparently at the MAC level without introducing Layer 3 processing overhead.

4. Customization for Other Brands: D-Link, Asus, and Linksys
If your old router is from a different manufacturer, the core networking logic remains the same, but the menu names on the admin panel will vary:
- D-Link Routers: Access the admin GUI (often at 192.168.0.1). Navigate to Setup > Wireless Connection. Change the Wireless Mode from Access Point to Repeater. Select your main SSID, enter your password, and disable the DHCP server under Network Settings;
- Asus Routers: Asus firmware features an intuitive setup wizard called QIS (Quick Internet Setup). In the advanced settings menu, choose "Operation Mode" and select Repeater Mode. The firmware will scan for local Wi-Fi networks, ask for the security key, and automatically disable the LAN DHCP server to apply the changes safely;
- Linksys Routers: On classic Linksys routers (such as the WRT54G), you may need to navigate to Wireless > Basic Wireless Settings and change the configuration mode to Client Bridge or Repeater, ensuring the wireless channels match and the internal DHCP server is turned off.
For advanced users, installing third-party open-source firmware like OpenWrt, DD-WRT, or Tomato on your old hardware can significantly improve bridging performance. These customized platforms provide robust routing stacks that bypass manufacturer software limitations. For instance, OpenWrt's interface allows you to configure a pseudo-bridge mode using the relayd utility, which establishes a transparent Layer 2 link even when communicating with primary access points that do not support standard WDS specifications. However, flashing custom firmware carries risks of permanent hardware bricking if the bootloader is corrupted during the write process.
5. Common Troubleshooting and Diagnostic Checks
If your repeater setup fails to load web pages, or if you experience high latency and frequent drops, use this checklist to diagnose the routing issues:
1. Connected with "No Internet" Error: This is almost always caused by a DHCP conflict. Log into your secondary router (using its assigned IP, e.g., 192.168.1.254) and confirm the DHCP server is disabled. Also, verify that the primary network security key was entered correctly in the WDS settings;
2. Low Bandwidth and Slow Speeds: Retransmitting data wirelessly using a single radio antenna reduces the maximum throughput of the repeater by half because the antenna must split its bandwidth cycles between receiving packets from the primary router and sending them to clients. To minimize this, place the repeater in a physical location where it still receives at least a 50% signal level from the main router;
3. Primary Channel Instability: If your main router's Wi-Fi channel is set to Auto, it will periodically change channels to avoid local congestion. When this occurs, the secondary router (which requires a fixed channel to maintain its WDS bridge) will lose connection. Resolution: Access your primary router's admin panel and set its 2.4 GHz channel to a fixed setting, such as Channel 6.
Additionally, monitor the Received Signal Strength Indicator (RSSI) of the bridge link. In your secondary router's status page, look for the signal strength value expressed in decibels relative to one milliwatt (dBm). An RSSI value between -50 dBm and -65 dBm is ideal for maintaining a high-throughput connection. If the RSSI drops below -75 dBm, the bridge will experience high packet loss and packet retransmissions, resulting in sluggish browsing speeds and high ping spikes for connected clients. Moving the repeater closer to the primary router or adjusting the antenna angles can help stabilize this physical link.
Network Engineer Tip: If your old router has functional Ethernet ports and you can run a physical cable through your home, use Access Point (AP) Mode instead of wireless repeating. Connect the cable from a LAN port on the primary router to a LAN port on the secondary router. Keep the DHCP server on the old router disabled. This avoids wireless bridging lag and delivers full internet speeds to your clients.
6. Optimal Placement and Physical Installation
The efficiency of your range expansion depends on how you position the repurposed hardware within your building. Avoid these common installation mistakes:
- The 50% Rule: Do not place the repeater in a Wi-Fi dead zone where the primary signal is already weak. If the repeater receives poor signal quality from the source, it will broadcast a strong signal that lacks usable throughput. Place the repeater midway between the primary router and the target coverage area;
- Physical Barriers: Position the repeater at least 5 feet off the ground. Keep it away from metallic structures, mirrors, and concrete walls, which cause significant signal reflection and absorption;
- RF Interference: Place the device away from other appliances that operate on the 2.4 GHz spectrum, such as cordless phones, microwaves, and bluetooth transmitters.
When positioning your antennas, keep in mind how electromagnetic waves propagate. Dipole antennas emit radio signals perpendicular to their physical orientation. If you want the signal to cover a single floor, position your antennas vertically. However, if you are repeating the signal between floors in a multi-story building, tilting one antenna horizontally can help direct the signal upward and downward, improving inter-floor connectivity.
Frequently Asked Questions (FAQ)
Why does my internet connection drop when I power on the repeater?
This is usually due to a DHCP server conflict. If you did not disable the DHCP server on the old router, it will assign conflicting or invalid IP addresses to your client devices, disrupting internet access across the local subnet. Disabling DHCP on the secondary router resolves this issue.
Can I repeat a 5 GHz network using a 2.4 GHz old router?
No. Wireless bridging requires physical frequency compatibility. A router that only supports 2.4 GHz does not contain the radio antennas or processing chips required to detect or decode 5 GHz wireless signals.
Can the repeater's Wi-Fi network name and password be different from the main router?
Yes. While the WDS bridge authentication credentials must match your primary router's Wi-Fi key, you can configure the SSID and password broadcasted by the repeater to be different from the main router if you want to distinguish between the two signals.
What is DD-WRT firmware, and how does it help reuse old routers?
DD-WRT is a Linux-based open-source replacement firmware for wireless routers. It unlocks advanced commercial features on budget consumer hardware, including a stable, highly compatible "Client Bridge" repeating mode that performs better than factory WDS options.


