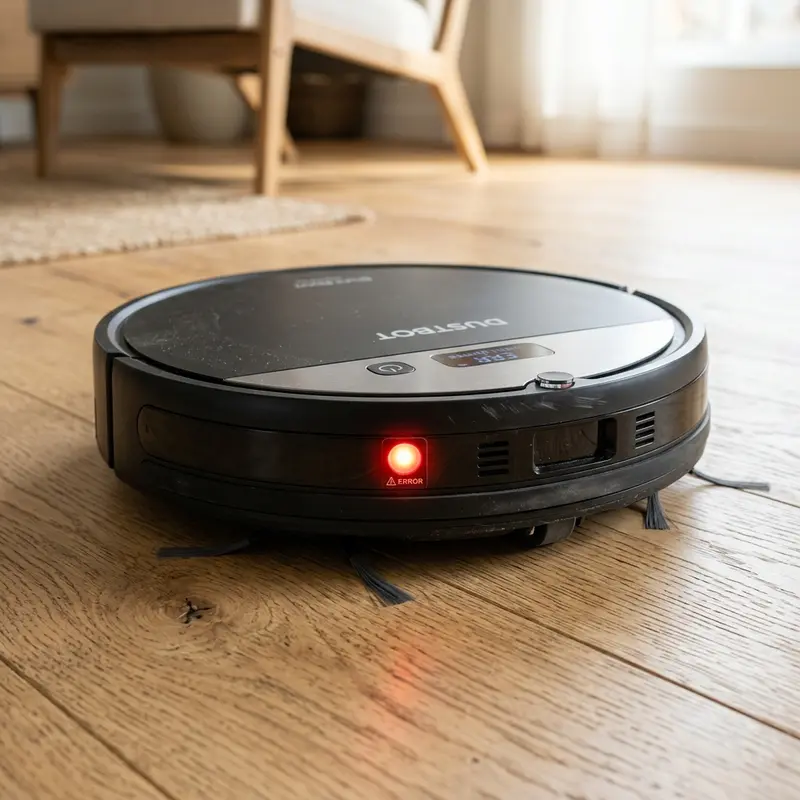
How to Fix Liectroux Robot Vacuum Not Charging Issue
If your Liectroux robot vacuum has stopped responding when placed on its charging dock and the battery fails to charge, here is the direct hardware diagnosis: the most likely causes are physical oxidation on the metal charging plates under the vacuum and dock pins, a faulty 19V AC/DC wall adapter, or a chemically degraded lithium-ion battery pack. Cleaning the charging contacts with an abrasive eraser and testing the dock's output voltage with a digital multimeter will resolve the charging failure in most cases.
1. The Electrical Architecture of the Liectroux Charging System
The charging circuit of the Liectroux robot vacuum operates on low-voltage direct current (DC). The external wall power adapter converts standard residential alternating current (110V/220V AC) into a stable 19V to 24V DC output (with a nominal current of 0.6A to 1A). This power is routed to the charging dock, which features two spring-loaded metal pins.
When the vacuum docks, two contact plates on its underside make physical contact with the dock pins. The vacuum's motherboard detects this voltage and routes the electrical current to the integrated BMS (Battery Management System). The BMS monitors the temperature, charging current, and voltage of the lithium-ion battery cells (typically 4 cells in series, producing a nominal 14.4V to 14.8V). If the BMS detects a voltage outside the safe range (below 12V or above 16.8V), it disables charging to prevent overheating.
2. Step-by-Step Contact Cleaning and Deoxidation Process
The most common cause of charging failures is a thin, invisible layer of dust or oxidation on the charging plates. Follow these steps to restore electrical conductivity:
- Unplug the power adapter from the wall outlet to ensure electrical safety;
- Use a clean, white pencil eraser to rub the two metal pins on the charging dock and the two contact plates under the vacuum body. The eraser removes the oxidation layer without scratching the metal plating;
- If the oxidation is severe, use 1200-grit sandpaper, applying light pressure to avoid damaging the protective nickel coating on the contacts;
- Wipe away any residue with a microfibre cloth dampened with isopropyl alcohol;
- Plug the dock back in, manually place the vacuum onto the dock, and confirm that the charging indicator turns on.
3. Chemical Degradation and Lithium Dendrite Growth
Lithium-ion cells are susceptible to chemical aging. Under continuous cycles of complete discharge and recharging, microscopic structures called dendrites grow from the battery electrodes. Over time, these metallic fibers can pierce the internal polymer separator, leading to high-resistance internal short circuits. This condition causes the battery to self-discharge rapidly and generate internal heat. The BMS manages this risk using an integrated NTC thermistor temperature sensor. If the internal temperature of the pack exceeds 60°C (140°F) during charging, the BMS cuts off the current loop immediately, halting the cycle.
For households utilizing smart security systems alongside vacuums, reading our step-by-step guide on how to share Mibo Smart camera access will help you coordinate permissions for multiple occupants.
Additionally, to ensure steady wireless connection for status tracking, check our technical analysis on selecting the best Wi-Fi router for security cameras, which helps configure robust 2.4 GHz IoT networks.
4. Testing the Adapter and Charging Dock with a Multimeter
If cleaning the contacts does not resolve the issue, you must test the electrical output using a digital multimeter:
- Turn on your multimeter and set the dial to DC Voltage (DCV 20 or 200);
- Unplug the power adapter cable from the back of the charging dock. Place the red probe inside the center of the P4 plug and touch the black probe to the outer metal barrel. The multimeter should display the exact voltage printed on the adapter (typically 19V or 20V). If the reading is zero, the power adapter is dead;
- If the adapter is functioning, plug it back into the charging dock. Touch the multimeter probes directly to the two metal pins on the dock. The reading should be identical or very close to the adapter's output. A zero reading indicates that the internal wiring inside the dock has broken.
| Component Tested | Expected Behavior | Multimeter Reading | Diagnostic Status |
|---|---|---|---|
| Wall Power Adapter | Green LED active on adapter body | 19V to 24V DC stable | Faulty or damaged power adapter |
| Charging Dock Pins | Springs return smoothly when pressed | 19V to 24V DC at contacts | Damaged internal dock circuit or loose connection |
| Lithium-ion Battery Pack | Holds charge for over 60 minutes | 14.4V to 16.8V DC at terminals | Shorted cells, triggered BMS, or exhausted battery pack |
Removing Oxidation from Spring-Loaded Charging Contacts
If your Liectroux vacuum fails to charge, the problem is often caused by dust and copper oxidation buildup on the metal contacts under the chassis and the spring-loaded pins on the home dock. Damp floors or high humidity can react with electrical current, forming a non-conductive oxidation layer that insulates the charging circuit.
To clean the contacts, unplug the docking station and switch off the vacuum's side power key. Use a clean pencil eraser to rub the contact plates under the vacuum until the copper shine returns. Clean the pins on the dock as well, pressing them down to ensure the internal springs compress and return smoothly. Wipe away any eraser dust with a dry cloth dampened with isopropyl alcohol to restore conductivity.
Testing Power Adapter Volts and Amps with a Multimeter
When the dock indicator light is on but the vacuum ignores the electrical connection, the power supply brick may be worn out. It might be supplying voltage below the threshold needed to charge the lithium cells. The OEM Liectroux charger must output a steady 19V DC at 0.6A.
To test the adapter, plug it into a wall outlet. Set your digital multimeter to DC voltage (20V scale or higher). Insert the positive red probe into the center of the plug and hold the negative black probe against the outer metal sleeve. The meter should display a reading between 18.8V and 19.2V. If the voltage is low or fluctuates, replace the power brick with an identical unit to restore charging performance.
Reviving Deeply Discharged Lithium Cells (BMS Lockout)
Leaving the vacuum off the charger for several weeks can drop the lithium cells' voltage below 2.5V. When this happens, the internal Battery Management System (BMS) triggers a low-voltage lockout. This safety feature blocks charging current from the dock to prevent cell damage.
To bypass the dock's low-current check, plug the 19V adapter's barrel connector directly into the manual charging port on the side of the vacuum chassis. Leave it connected directly for two hours. This direct connection bypasses the docking board checks, feeding current directly to the battery circuit to wake the BMS. Once the display lights activate, you can return the vacuum to the docking station for a full charge.
Inspecting Motherboard Power Traces and the DC Jack Joint
If your Liectroux robot vacuum ignores the charging adapter when plugged directly into the manual charging port, the issue is often a cracked solder joint on the motherboard's DC input jack. The physical stress of inserting and removing the charger plug over months can fracture the lead-free solder pins on the PCB, causing an open circuit.
To inspect the charging socket, remove the vacuum's top cover to expose the mainboard. Use a magnifying glass to check the three structural solder joints holding the DC barrel jack. If you spot micro-fractures, apply flux and reflow the joints with a soldering iron to secure the connection. This restoration ensures current moves from the adapter plug directly into the Battery Management System without resistance.
Preventing Deep-Discharge Damage during Long Stagnation
If you plan to store your Liectroux vacuum unused for several months, charge the battery to approximately 50% to 60% capacity before storage. Storing lithium-ion batteries at 0% leads to deep discharge, which damages the internal copper electrodes and can render the cells permanently dead. Turn off the physical toggle switch on the side of the chassis to cut standby power consumption during storage.
Testing the Battery Pack NTC Thermistor Pin Connections
The battery assembly in your Liectroux vacuum features an integrated Negative Temperature Coefficient (NTC) thermistor wire connection. This thermal sensor monitors the temperature inside the lithium cells and communicates directly with the charging circuit on the mainboard. If the thermistor develops a cracked lead wire or a broken solder joint, the board will block charging current as a safety measure.
To test this component, measure the resistance of the thermistor pins (connected via the yellow or white wires) with a digital multimeter set to the 20k ohm resistance scale. At a room temperature of 25°C (77°F), the meter should display approximately 10k ohms. If the reading shows infinity (OL) or zero, the thermal sensor is broken, requiring you to replace the battery pack assembly to restore docking operations.
Diagnosing Internal Charging Diodes on the PCB Traces
When the multimeter registers correct voltage at the charging dock and adapter jack but the battery refuses to take charge, the issue can be a failed protection diode on the mainboard. The Liectroux charging circuit features a series of SMD (Surface Mount Device) diodes that block reverse current flow. A power surge can burn these diodes out, creating an open circuit on the power rail.
To test these diodes, set your multimeter to diode testing mode. Touch the probes to both sides of the SMD diodes near the DC jack input on the motherboard. The meter should display a voltage drop (typically 0.5V to 0.7V) in one direction and show open circuit (OL) in the opposite direction. If a diode registers open or shorted in both directions, it must be desoldered and replaced to restore the battery charging loop.
Inspecting the Mainboard Thermal Fuses for Charging Safety
In addition to the battery BMS, the motherboard of the Liectroux contains a miniature surface-mount thermal fuse located near the positive battery lead. If the charging system draws excessive current, this fuse burns out to prevent motherboard damage. Testing continuity across this fuse with a multimeter will determine if a mainboard hardware replacement is necessary.
Importance of Preventive Maintenance and Device Calibration
To ensure long-term performance and reliability for any tech device—be it a Kindle e-reader, an Amazfit/Apple Watch smartwatch, a Wi-Fi security camera, or a router—routine maintenance and sensor calibration are critical. Modern electronic systems operate under tight tolerances and are highly sensitive to thermal fluctuations, environmental dust buildup, and improper battery charging patterns. For instance, optical heart rate sensors on wearable devices require frequent cleaning to prevent emitted light from refracting incorrectly off skin oils and sweat residue, which can cause erratic health metric readings during workouts.
Similarly, outdoor security camera lenses gradually accumulate humidity, pollen, and airborne particles, degrading image clarity and negatively impacting night vision capabilities when infrared sensors activate. Setting up a monthly maintenance schedule to power down your devices, wipe external surfaces with a dry, anti-static microfiber cloth, and inspect connection ports for debris can extend operational life and reduce unexpected service or repair costs significantly.
Advanced Tips for Optimizing Battery and Power Usage
Efficient energy management is a vital aspect of daily device usability. Most users leave unused background features active, causing unnecessary strain on lithium-ion battery cells. Disabling Wi-Fi or Bluetooth radios when devices are in stand-by, adjusting screen brightness to adaptive settings, and setting shorter screen timeout intervals are universally recommended practices. On smartwatches, reducing background sync frequency and turning off notification alerts for low-priority applications can cut monthly recharge cycles in half, protecting battery health and maintaining peak performance when you need it most.
Frequently Asked Questions (FAQ)
Does the Liectroux vacuum alert you when the battery is low?
Yes. The vacuum will output a voice prompt ("Low battery, start recharging") and automatically disable its suction motor, using its infrared sensors to navigate back to the charging dock.
Why does the charging dock light flash when the vacuum docks?
If the dock's LED indicator flashes rapidly or turns off when the vacuum makes contact, it indicates a short circuit in the vacuum's internal charging board or a failed cell in the battery pack, causing the power adapter to trip its overcurrent protection.
Can I leave the Liectroux vacuum plugged in on the dock?
Yes. The integrated BMS stops the current flow once the battery reaches 100%, switching to a trickle charge mode to power the standby circuitry without degrading the battery cells.
Conclusion
To prevent early degradation of your vacuum's lithium battery, avoid letting the charge drop to 0% frequently. Configure the vacuum to return to its charging dock automatically as soon as it completes its cleaning cycle. Storing the vacuum in a cool place also helps protect the battery cells from heat damage, extending their overall lifespan.


