
How to Use AirDrop Between iPhone and Mac: How to Use AirDrop iPhone Mac Guide
In the digital landscape, sharing files across devices seamlessly is an absolute necessity. Whether you are a creative professional transferring high-resolution video footage, a student sharing a PDF, or a casual user trying to send family photos, you need a method that is fast and secure. Within the Apple ecosystem, this connection is powered by a proprietary technology called AirDrop. In this guide, we will explore exactly how to use airdrop iphone mac, configuring your devices for optimal performance, and resolving any communication issues that might arise along the way.
Before AirDrop, users relied on cumbersome methods like emailing files, uploading documents to cloud storage like iCloud, or finding physical cables to connect their mobile devices to their desktop machines. These workarounds waste time and consume cellular data. The native AirDrop feature bypasses these limitations, establishing a direct connection between your iPhone and Mac to transfer data in a matter of seconds. Let us analyze how AirDrop compares to alternative file transfer methods.
File Transfer Methods Comparison: Why Choose AirDrop?
To understand the value of learning how to use AirDrop, here is a comparison table detailing transfer speeds, limits, and requirements for the most popular options available to Apple users:
| Method | Transfer Speed | Maximum File Size | Wireless? | Requires Internet? | Best Suited For |
|---|---|---|---|---|---|
| AirDrop | Extremely Fast (up to 250 Mbps) | Unlimited (restricted only by local storage) | Yes | No | Photos, 4K videos, heavy documents, and contacts between nearby Apple devices. |
| USB Cable | Very Fast to Ultra-Fast (up to 10 Gbps) | Unlimited | No | No | Massive backups, system restores, and transferring hundreds of gigabytes at once. |
| iCloud Drive | Medium (dependent on upload/download speeds) | 50 GB (limited by iCloud capacity) | Yes | Yes | Long-term cloud storage, document sync across devices, and sharing files with distant users. |
| WhatsApp / Email | Slow (compresses files and relies on connection) | Highly Limited (usually 25MB for Email, 2GB for WhatsApp) | Yes | Yes | Quick, casual sharing of low-resolution images or short clips with non-Apple users. |
What is AirDrop and How Does It Work Under the Hood?

To fully appreciate the simplicity of AirDrop, it is fascinating to understand the sophisticated protocols that make it work behind the scenes. AirDrop does not rely on your home Wi-Fi router, cellular towers, or an active internet connection. Instead, it creates a secure, localized peer-to-peer network between the sending and receiving devices. This is achieved through a combination of two primary wireless technologies: Bluetooth Low Energy (BLE) and point-to-point Wi-Fi.
When you initiate a transfer, your iPhone uses Bluetooth Low Energy to scan for other AirDrop-enabled devices in the immediate physical vicinity. Bluetooth operates as the discovery mechanism, broadcasting a cryptographic signal that contains hashed representations of your Apple ID contact information. This discovery protocol is designed with privacy in mind; your actual phone number or email address is never broadcasted in plain text. Once the devices locate each other and agree to connect, AirDrop spins up a direct, high-speed Wi-Fi link between the two devices using Apple Wireless Direct Link (AWDL). Because this connection is direct, it does not matter if your local router is offline or if you are in a remote forest with zero cellular coverage. The data is encrypted using TLS (Transport Layer Security) as it travels, ensuring that nobody in the vicinity can intercept, record, or modify the contents of your transfer.
How to Use AirDrop iPhone Mac: System Requirements and Compatibility
While AirDrop is built into the vast majority of Apple products in active use today, there are basic hardware and software requirements that must be met for the feature to function properly. Below is a detailed compatibility matrix that outlines the software versions and hardware standards required to use AirDrop between mobile devices and desktop computers:
| Device Category | Minimum Software Version | Hardware Requirements | AirDrop Status |
|---|---|---|---|
| iPhone, iPad, & iPod Touch | iOS 7 or later / iPadOS 13 or later | iPhone 5 or newer, iPad 4th Gen or newer, iPad mini, iPod Touch 5th Gen | Fully Supported |
| Mac (Transferring to Mac) | OS X Yosemite or later | All Macs introduced in 2012 or later (excluding Mid-2012 Mac Pro) | Fully Supported |
| Legacy Mac-to-Mac Transfers | OS X Lion or later | Macs from late 2008 to 2011 (uses older Wi-Fi search protocols) | Legacy Support Only |
In addition to hardware specifications, both devices must have Bluetooth and Wi-Fi enabled. You do not need to be signed into the same Apple ID on both devices to transfer files, but doing so simplifies the process considerably, as transfers between your own devices are accepted automatically without prompting. Furthermore, make sure that "Personal Hotspot" is disabled on your iPhone, as hosting a hotspot locks your device's Wi-Fi radio, preventing AirDrop from establishing its peer-to-peer Wi-Fi network.
How to Turn On AirDrop on iPhone
Activating AirDrop on your iPhone is a quick process that can be accomplished through two primary methods: using the Control Center or going through the main Settings app.
Method 1: Activating AirDrop via the Control Center (Recommended)
- Access the Control Center on your iPhone:
- On iPhones featuring Face ID (iPhone X and newer): Swipe down from the top-right corner of the screen.
- On iPhones featuring a physical Home Button (iPhone 8, SE, and older): Swipe up from the bottom edge of the screen.
- Locate the network settings card in the upper-left corner of the Control Center (the block containing the Airplane Mode, Cellular Data, Wi-Fi, and Bluetooth icons).
- Press and hold anywhere inside the network card to expand it.
- Tap the AirDrop icon (represented by concentric circles with a small wedge cut out at the bottom).
- Select one of the three visibility states from the pop-up menu:
- Receiving Off: Disables AirDrop transfers. You will not receive any share requests.
- Contacts Only: Only individuals who are saved in your Contacts app with a valid email or phone number can see your device. Both devices must be signed into iCloud.
- Everyone for 10 Minutes: Allows any nearby Apple device to see your iPhone and initiate a transfer. iOS automatically reverts this setting to "Contacts Only" after 10 minutes to protect your privacy.
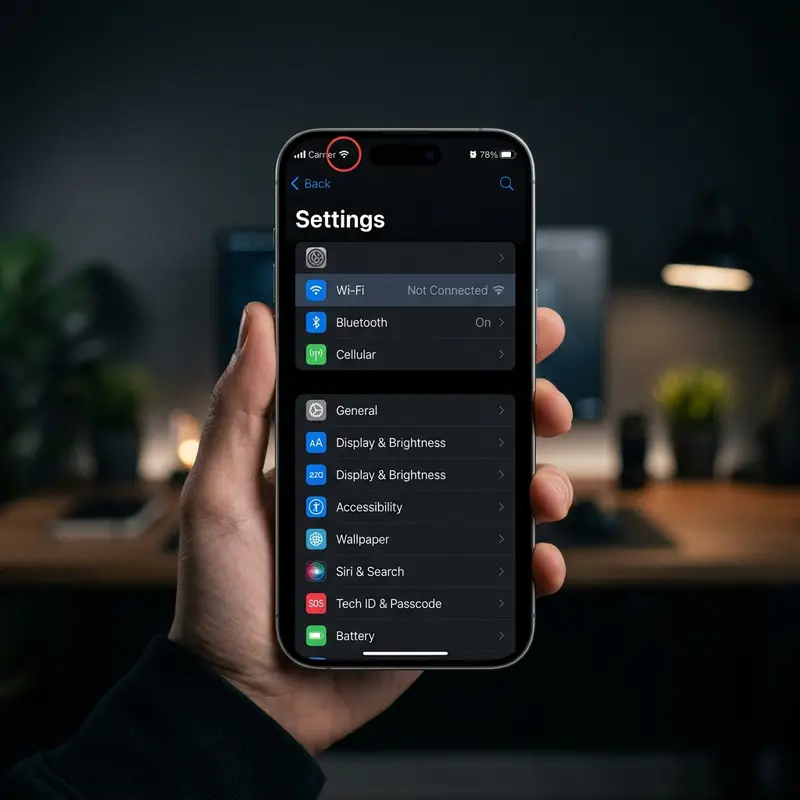
Method 2: Activating AirDrop via the Settings App
- Open the native Settings app on your iPhone.
- Scroll down and select the General category.
- Tap on AirDrop.
- Choose your preferred setting: Receiving Off, Contacts Only, or Everyone for 10 Minutes.
How to Turn On AirDrop on Mac
Just like on iOS, macOS offers multiple ways to configure and activate AirDrop. You can access these configurations via the Control Center or the Finder sidebar.
Method 1: Enabling AirDrop via the macOS Control Center (macOS Big Sur and Newer)
- Click the Control Center icon (two toggle sliders) in the top-right corner of the menu bar.
- In the panel that slides down, click on the AirDrop section.
- Toggle the switch to the On position.
- Click the dropdown options beneath the toggle to choose your desired visibility level: Off, Contacts Only, or Everyone. Note that on macOS, the "Everyone" setting is persistent and does not automatically expire, so manually switch it back when in public places.
Method 2: Enabling AirDrop via Finder
- Open a new Finder window (click the smiley-face icon in your Dock, or press Command + N).
- In the sidebar on the left, click on AirDrop under the Favorites category.
- At the bottom of the AirDrop window, click the text link next to "Allow me to be discovered by:".
- Select No One, Contacts Only, or Everyone from the dropdown menu.
How to Send Files from iPhone to Mac
Now that both devices are configured and discoverable, you are ready to perform your first file transfer. Sending media or documents from an iPhone to a Mac is incredibly straightforward and utilizes the system-level Share Sheet. Follow these steps to initiate a transfer:
- Open the application containing the files you wish to send (for example, the Photos app for pictures or Files for PDF documents).
- Select the item or items you want to transfer. In the Photos app, you can tap "Select" in the top-right corner and swipe across multiple thumbnails.
- Tap the Share button (represented by a square with an arrow pointing upward), located in the bottom-left corner of the screen.
- In the list of sharing options that appears, tap the AirDrop icon.
- Tap the name of your Mac computer under the available devices list.
- A progress ring will display the transfer status. Once completed, you will hear a chime, and the status will change to "Sent".
On your Mac, if you are signed into the same Apple ID on both the sending iPhone and the receiving Mac, the files will accept automatically and save directly to your Downloads folder. If you are transferring files to a Mac owned by someone else, a notification banner will slide out from the top-right corner of their Mac screen. The recipient must click Accept and choose where to save the files.
How to Send Files from Mac to iPhone
Sending files in the opposite direction—from a macOS computer to an iOS device—is just as easy. This is incredibly useful for moving spreadsheets, presentations, or designed graphics to your phone for quick presentations. Before diving into this, remember that if you are switching devices or upgrading your gear, you can also transfer all your data from an iPhone to another device using Apple's migration assistant or Quick Start.
To transfer files from your Mac to your iPhone using AirDrop, you can utilize one of three convenient methods:
Method 1: Right-Click / Context Menu
- Open Finder and locate the file or folder you want to send.
- Right-click on the file to open the context menu.
- Hover your mouse cursor over Share, then select AirDrop from the secondary menu.
- Click on your iPhone icon in the window that pops up.
- Tap Accept on your iPhone when the notification appears.
Method 2: Drag and Drop in Finder
- Open a Finder window and click on AirDrop in the left sidebar. The window will display avatars for discoverable devices.
- Select the files you wish to transfer from another Finder window or your desktop, and drag them over the avatar of your iPhone in the AirDrop window.
- Release the mouse button to drop the files and begin the transfer.
Method 3: Native App Share Buttons
Many built-in macOS applications, such as Safari, Pages, Numbers, and Keynote, have a native Share button in their toolbars. Click the Share button, choose AirDrop, and select your iPhone from the list of available devices.
Where do the files go on the iPhone? iOS handles incoming files dynamically based on file type. If you send a photo, it will save inside the Photos app. If you send a PDF or spreadsheet, a prompt will appear asking you to choose which app should open the file (such as the Files app or Books). Web links will immediately open in Safari.
AirDrop Not Working? How to Fix It
Despite Apple's focus on seamless experiences, you may occasionally run into situations where AirDrop refuses to cooperate—either your Mac cannot find your iPhone, or the transfer hangs. If you find yourself struggling with connectivity, it can be as frustrating as dealing with critical device errors. For instance, if your phone freezes during a transfer, you might end up troubleshooting iPhone restarting issues to get your system operating smoothly again. Fortunately, most AirDrop bugs can be resolved by systematically checking a few configuration settings.
Here is a troubleshooting checklist to get AirDrop working again:
- Verify Wi-Fi and Bluetooth States: AirDrop requires both antennas to be active on both devices. Turn Bluetooth and Wi-Fi off and back on again on both your iPhone and Mac to reset the wireless stack.
- Turn Off Personal Hotspot: If your iPhone is hosting a hotspot, AirDrop will fail. Swipe down to open the Control Center, long-press the network card, and ensure the Personal Hotspot icon is greyed out.
- Adjust Visibility Settings: If your AirDrop is set to "Contacts Only," try switching both devices to "Everyone" (or "Everyone for 10 minutes" on iOS) to bypass any iCloud contact-matching bugs.
- Check Device Proximity: Keep the devices within 30 feet (9 meters) of each other. Physical obstacles like thick walls or wireless interference can weaken the peer-to-peer Wi-Fi signal.
- Disable Mac Firewall Restrictions: If your Mac's firewall is configured too strictly, it may block incoming requests. Go to System Settings > Network > Firewall, click Options, and ensure "Block all incoming connections" is disabled.
- Ensure the Screen is Unlocked: An iPhone that is locked or asleep will not respond to AirDrop. Wake up your iPhone and unlock it before attempting a transfer.
Frequently Asked Questions (FAQ)
Does AirDrop reduce the quality of photos or videos during transfer?
No, AirDrop does not compress or reduce the quality of your photos, videos, or files. Unlike sending media through messaging apps like WhatsApp, which aggressively compress images, AirDrop transfers the exact, byte-for-byte original file. If you shoot a 48-megapixel ProRAW photo or a 4K ProRes video on your iPhone, the recipient will receive the file in its full, uncompressed resolution and color depth.
Can I use AirDrop to transfer files to an Android phone or Windows PC?
No. AirDrop is a proprietary Apple technology that relies on closed-source network protocols (AWDL) and specific hardware integration. As a result, it is strictly limited to Apple devices, including the iPhone, iPad, Mac, and Apple Vision Pro. If you need to transfer files to an Android device or a Windows computer, you must look for cross-platform alternatives such as cloud-based transfer links.
Why is AirDrop not showing up in my Finder sidebar or Control Center?
If AirDrop is missing entirely, check if Content & Privacy Restrictions are enabled on your iPhone or Mac. On iOS, go to Settings > Screen Time > Content & Privacy Restrictions > Allowed Apps and ensure the toggle next to AirDrop is turned green. On macOS, go to System Settings > Screen Time > Content & Privacy Restrictions and verify that AirDrop is permitted.
How do I change my AirDrop name on my iPhone and Mac?
Your AirDrop name is pulled directly from your device name. To change it on your iPhone, navigate to Settings > General > About > Name, delete the existing text, enter your new preferred name, and tap Done. To change it on your Mac, click the Apple logo in the top-left corner, go to System Settings > General > About, and edit the text field next to "Computer Name".