
To install solar panels on concrete roofs, use triangular tilt frames anchored with expansion bolts, chemical adhesive, or weighted ballast blocks.
Introduction
As solar technology advances, more homeowners and businesses are considering solar panels as a viable energy solution. Installing solar panels on flat concrete roofs is an increasingly popular choice due to the unique advantages flat roofs offer. In this article, we will delve deeper into the technical aspects of solar panel installation, explore the intricacies of solar technology, and provide comprehensive insights into the installation process, costs, and long-term maintenance.
How to Install Solar Panels on a Flat Concrete Roof
Flat roofs present unique challenges and opportunities for solar panel installation. The absence of slope means that careful planning and precise installation techniques are necessary to ensure optimal energy production and structural integrity.
Understanding Solar Panel Technology
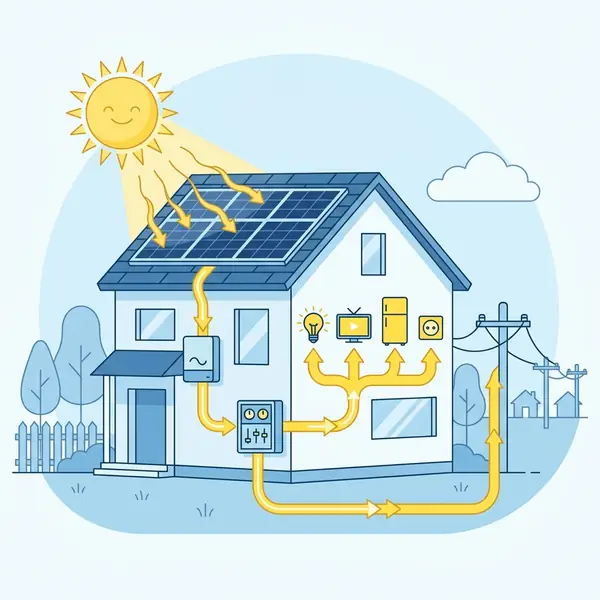
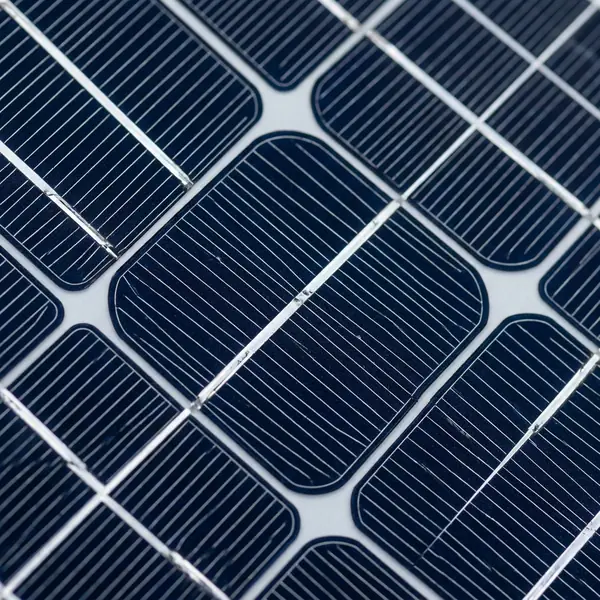
Solar panels convert sunlight into electricity using photovoltaic (PV) cells. These cells are made from semiconductor materials, typically silicon, that absorb photons from sunlight. When photons strike the cells, they knock electrons loose, generating a flow of electricity.
This process is known as the photovoltaic effect, and it is the fundamental mechanism behind solar energy generation.
Operational Specifications
Modern solar panels typically have an efficiency rating between 15% to 22%. The efficiency rating indicates how much sunlight the panel can convert into usable electricity. The higher the efficiency, the more power you can generate from a given area.
For flat roofs, where space may be limited, using high-efficiency panels can maximize energy production. As an example, a high-efficiency panel rated at 22% can produce significantly more power than a standard panel rated at 15% given the same surface area.
In terms of power output, a standard module rated at 300 watts can produce approximately 1,200 to 1,500 kWh per year under optimal conditions. This makes it key to select the right panel based on your energy needs, roof size, and budget.
Advantages and Disadvantages
Installing solar panels on a flat concrete roof has both benefits and drawbacks. Understanding these can help in making informed decisions.
Advantages
- Space Efficiency: Flat roofs often provide ample space for solar installations without obstruction.
- Easy Installation: The installation process is generally simpler and can be done without extensive structural modifications.
- Optimal Angle Adjustment: Panels can be tilted to achieve the best angle for maximum sunlight exposure.
- Reduced Ground Space Usage: Flat roof installations do not interfere with ground or landscaping, preserving your property.
- Accessibility: Flat roofs allow easier access for maintenance compared to steeply sloped roofs.
Disadvantages
- Water Drainage Issues: Improper installation can lead to water pooling, which may cause leaks or damage.
- Heat Management: Flat roofs may retain heat, affecting the performance of solar panels.
- Potential for Damage: Heavy snow or debris accumulation could pose risks to the panels.
- Maintenance Access: Accessing panels on flat roofs can be more challenging compared to sloped roofs.
- Wind Exposure: Flat roofs can be more susceptible to high winds, potentially impacting the stability of the installation.
Installation Process
The installation of solar panels on a flat concrete roof involves several steps. Proper planning and execution are important for a successful installation. Below are the steps to follow:
Step 1: Site Assessment
Before any installation, assess the roof's suitability for solar panels. Check for structural integrity, potential shading from nearby objects, and the overall condition of the roof. Ensure that the roof can support the weight of the panels, mounting system, and any additional equipment.
Consider hiring a structural engineer to evaluate the load-bearing capacity of the roof, especially if planning a large installation. This evaluation will help mitigate risks associated with structural failure. Para saber mais detalhes, leia nosso guia sobre install solar panels on ceramic tile roofs.
Step 2: Obtain Necessary Permits
Check local building codes and regulations regarding solar installations. You may need to apply for permits from municipal authorities. This process may involve submitting plans and specifications for the installation.
Para saber mais detalhes, leia nosso guia sobre install solar panels on ceramic tile roofs.
Consulting with a professional installer can help navigate the permitting process and ensure compliance with all local regulations. Additionally, they can assist in preparing necessary documentation and drawings. Para saber mais detalhes, leia nosso guia sobre install solar panels on ceramic tile roofs.
Para saber mais detalhes, leia nosso guia sobre install solar panels on ceramic tile roofs. Para saber mais detalhes, leia nosso guia sobre install solar panels on ceramic tile roofs. Para saber mais detalhes, leia nosso guia sobre install solar panels on ceramic tile roofs.
Para saber mais detalhes, leia nosso guia sobre install solar panels on ceramic tile roofs. Para saber mais detalhes, leia nosso guia sobre install solar panels on ceramic tile roofs. For a step-by-step walkthrough, check out our guide on install solar panels on ceramic tile roofs.
For a step-by-step walkthrough, check out our guide on install solar panels on ceramic tile roofs.
Para saber mais detalhes, leia nosso guia sobre install solar panels on ceramic tile roofs.
Step 3: Choose the Right Equipment
Decide on the type of solar panels and mounting systems suitable for flat roofs. Use lightweight panels and a mounting system that allows for appropriate angling. Consider using ballasted mounts, which do not require roof penetrations and rely on weight for stability.
Para saber mais, veja nosso artigo sobre solar energy savings.
Popular panel options include monocrystalline and polycrystalline panels. Monocrystalline panels are more efficient but often come at a higher price. Weigh the cost versus performance to determine the best fit for your project.
Step 4: Prepare the Roof
Clean the roof surface to ensure it is free of debris. If installing a ballasted system, ensure that the surface is level. For other mounting systems, mark the locations where the mounts will be installed.
Additionally, inspect for any cracks or damage in the concrete surface that may need repair prior to installation. Addressing these issues upfront can prevent future problems.
Step 5: Install the Mounting System
Attach the mounting brackets or rails according to the manufacturer's instructions. If using a ballasted system, position the ballast blocks to secure the panels. Ensure that the mounts are evenly spaced and securely affixed to avoid shifting.
Using a level during installation can help ensure that the panels are installed at the correct angle, optimizing sunlight exposure. Proper alignment is key for maximizing energy production.
Step 6: Install Solar Panels
Carefully lift the solar panels onto the mounting system. Secure them according to the manufacturer's specifications. Make sure to connect the panels in series or parallel as required, ensuring proper electrical connections.
It is advisable to use safety harnesses and other fall protection equipment during this step to ensure safety while working at heights. Safety should always be a priority during installation.
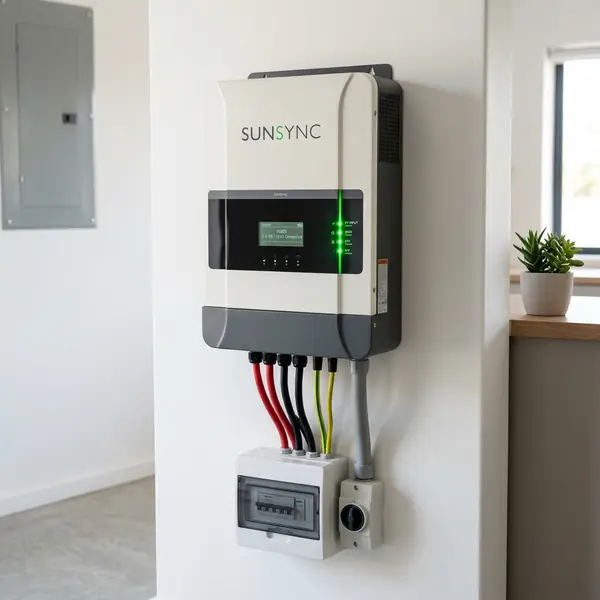
Step 7: Electrical Connections
Connect the solar panels to the inverter, which converts the DC electricity generated by the panels into AC electricity for use in your home or business. Ensure all connections are tight and insulated to prevent electrical faults. Adicionalmente, você pode conferir as regras de wire solar panels to inverters.
Consider using a string inverter or microinverters based on your specific energy needs and roof layout. Microinverters can offer increased efficiency, especially if shading is a concern.
Step 8: System Testing
Once the panels are installed, conduct a thorough system test to ensure everything is functioning correctly. This includes checking the electrical connections, verifying inverter operation, and monitoring energy output. Adicionalmente, você pode conferir as regras de wire solar panels to inverters.
Use a solar meter to measure the system output and confirm that it aligns with expected generation values. This testing phase is important to ensure optimal performance from the outset.
Regulations and Compliance
Compliance with local building codes and regulations is important for solar panel installations. This includes adhering to safety standards, obtaining necessary permits, and following guidelines set by utility companies. Some regions may also require inspections at various stages of the installation process.
Adicionalmente, você pode conferir as regras de wire solar panels to inverters. Adicionalmente, você pode conferir as regras de wire solar panels to inverters. Adicionalmente, você pode conferir as regras de wire solar panels to inverters.
Adicionalmente, você pode conferir as regras de wire solar panels to inverters. Additionally, you can learn more about wire solar panels to inverters. Additionally, you can learn more about wire solar panels to inverters.
Adicionalmente, você pode conferir as regras de wire solar panels to inverters.
Adicionalmente, você pode conferir as regras de wire solar panels to inverters.
Adicionalmente, você pode conferir as regras de wire solar panels to inverters.
Calcule também o payback period do sistema solar fotovoltaico.
Understanding net metering policies can also be beneficial, as they may allow you to sell excess energy back to the grid, offsetting your installation costs. Familiarizing yourself with local regulations can also prevent potential legal issues down the road.
Costs of Installation
The costs associated with installing solar panels on a flat concrete roof can vary widely based on several factors, including location, panel type, and system size. Below is a breakdown of typical costs:
| Cost Category | Estimated Cost (USD) |
|---|---|
| Solar Panels (per watt) | $0.70 - $1.50 |
| Installation Labor (per hour) | $50 - $100 |
| Mounting Hardware | $1,000 - $3,000 |
| Inverter Costs | $1,000 - $2,500 |
| Permits and Fees | $200 - $1,000 |
| Total Estimated Cost (for a 5kW system) | $15,000 - $25,000 |
Note that these estimates may fluctuate based on market conditions, local incentives, and the specific needs of your project. Always obtain multiple quotes from contractors to ensure competitive pricing. Additionally, consider financing options that may be available to help manage upfront costs.
Real-World Case Studies
Residential Application
A family in Los Angeles installed a 5kW solar system on their flat concrete roof. The total cost was approximately $20,000. They received a tax credit of 26%, reducing their net cost to $14,800.
Their average monthly electricity bill was $150, which dropped to $30 after installation, resulting in a payback period of about 9 years. This family saw a significant improvement in their energy independence, and the installation increased their home’s value due to the added renewable energy source.
Commercial Application
A retail store in Chicago opted for a larger 20kW solar installation on their flat roof, costing around $80,000. With the federal tax credit and state incentives, their effective cost was reduced to $60,000. Their previous monthly electric bill of $600 decreased to $100, leading to a payback period of approximately 10 years with an estimated ROI of 12% over the system's lifespan.
This commercial installation not only reduced operating costs but also enhanced the store's green credentials, appealing to environmentally-conscious consumers. Many businesses are finding that sustainability initiatives can also improve customer loyalty and brand perception. Para consultar referências e normativas oficiais, acesse a página da Solar Energy Industries Association (SEIA).
Maintenance of Solar Panels
Proper maintenance ensures optimal performance and longevity of solar panels. Below are the maintenance steps to follow:
Step 1: Regular Inspections
Check the panels for dirt, debris, or any physical damage at least twice a year. Ensure that there are no obstructions blocking sunlight. Regular inspections can help identify any early signs of wear or malfunction.
Look for signs of wear, corrosion, or loose connections that may impact the performance of your solar system. Early detection can lead to more manageable repair costs and prevent significant downtimes. Para consultar referências e normativas oficiais, acesse a página da Solar Energy Industries Association (SEIA).
Step 2: Cleaning
Clean the panels with water and a soft brush or sponge. Avoid using harsh chemicals or abrasive materials that can scratch the surface. Cleaning is especially important in areas with bird droppings or heavy dust.
Consulte dados oficiais diretamente no site da National Renewable Energy Laboratory (NREL). Para consultar referências e normativas oficiais, acesse a página da Solar Energy Industries Association (SEIA). Para consultar referências e normativas oficiais, acesse a página da Solar Energy Industries Association (SEIA).
Para consultar referências e normativas oficiais, acesse a página da Solar Energy Industries Association (SEIA). For official guidelines and safety standards, visit the Solar Energy Industries Association (SEIA) website. For official guidelines and safety standards, visit the Solar Energy Industries Association (SEIA) website.
Para consultar referências e normativas oficiais, acesse a página da Solar Energy Industries Association (SEIA). Para consultar referências e normativas oficiais, acesse a página da Solar Energy Industries Association (SEIA).
Para consultar referências e normativas oficiais, acesse a página da Solar Energy Industries Association (SEIA).
Using a professional solar cleaning service can help maintain your panels without risking damage. Regular cleaning can enhance efficiency by ensuring maximum sunlight absorption. Para consultar referências e normativas oficiais, acesse a página da Solar Energy Industries Association (SEIA).
Step 3: Monitor Performance
Use monitoring systems to track the performance of your solar panels. If you notice a significant drop in energy production, investigate potential issues such as shading or equipment malfunctions. Investing in monitoring technology can provide insights into your system's operational efficiency.
Many modern solar systems come with monitoring apps that provide real-time data on system performance, making it easier to spot issues. This data can also be valuable for understanding energy consumption patterns over time.
Step 4: Professional Inspections
Consider hiring a professional to inspect the system every few years. They can check electrical connections, inverter functionality, and the overall health of the installation. Professional inspections can uncover hidden issues that may not be apparent during routine checks.
Regular professional maintenance can extend the lifespan of your system and identify problems before they become costly repairs. Establishing a maintenance schedule can help ensure the system continues to operate at peak performance.
Hidden Costs and Long-Term Operational Issues
While the initial costs of solar panel installation can be significant, there are hidden costs and long-term operational issues to consider:
Hidden Costs
- Maintenance Costs: Over time, maintenance and cleaning can add up. Budget for these expenses to ensure long-term performance and functionality of the system.
- Inverter Replacement: Inverters typically have a lifespan of 5 to 10 years. Factor in the cost of replacement when planning your budget, as this can significantly affect overall system costs.
- Insurance Premiums: Increased property insurance premiums may occur due to the addition of solar panels. It is advisable to inform your insurer about your installation to understand potential policy adjustments.
- Unexpected Repairs: Equipment failure or damage from extreme weather can lead to unanticipated repair costs. Setting aside a contingency fund for repairs can mitigate financial strain.
Long-Term Operational Issues
- Degradation: Solar panels degrade over time, typically losing about 0.5% to 1% of efficiency per year. This gradual decrease can impact long-term energy production, so it's important to choose high-quality panels with strong warranties.
- Weather Damage: Extreme weather conditions, such as hail or heavy snow, can cause physical damage to the panels. Understanding your local climate can help in selecting more durable materials.
- Shading Over Time: Nearby trees or buildings may grow and create shading, diminishing the output of the solar system. Regularly assessing the surrounding environment is important to avoid potential shading issues.
- Wear and Tear: Regular wear and tear can lead to reduced efficiency and may necessitate component replacements. Staying proactive with maintenance can help extend the lifespan of your system.
How do you prevent water leaks when drilling into concrete?
Installers use chemical anchors (epoxy) and seal attachment points with heavy-duty roof flashing and bitumen membranes.
What is the ideal tilt angle for concrete roof solar mounts?
Usually between 10 and 20 degrees, oriented towards the south in the Northern Hemisphere for maximum sun exposure.
How do flat roof solar panels handle high winds?
Engineers calculate wind loads and apply correct ballast weight or mechanical anchoring to withstand storm gusts.
Is flat roof maintenance easier?
Yes, walking on flat concrete roofs makes cleaning, maintenance, and wiring adjustments much easier than pitched roofs.


