How to Calibrate Your 3D Printer: Step-by-Step E-Steps and Axis Calibration

Calibrating a 3D printer ensures accurate prints and optimal performance, enhancing the printing experience.
Understanding the Importance of 3D Printer Calibration
A 3D printer operates on a balance of precision and mechanical performance. Calibration is crucial for achieving high-quality 3D prints.
It directly affects the accuracy, layer adhesion, and overall print quality of projects. Proper calibration ensures that the printer is positioned correctly and performing optimally, contributing to the desired results.
Improperly calibrated printers can lead to issues including warping, stringing, misalignment, and ultimately failed prints. Understanding the calibration process is essential for anyone looking to produce high-quality 3D prints consistently.
Essential Tools and Materials for Calibration
Before embarking on the calibration process, it is important to gather the necessary tools and materials. Here is a comprehensive list:
- Ruler: A standard ruler is essential for measuring distances accurately.
- Digital Caliper: This tool offers precision measurement for more detailed adjustments.
- Level: A spirit level will help ensure that the printer bed is completely flat.
- Calibration Print File: A specific file or model designed to test various aspects of the printer's performance.
- Slicing Software: Software like Cura, PrusaSlicer, or Simplify3D is crucial for generating test prints and adjusting printing parameters.
- Filament: Ensure the type of filament planned for use is available, as different materials may require different settings.

Step-by-Step Guide to Calibrate Your 3D Printer
Follow these detailed steps to effectively calibrate a 3D printer:
- Level the Printer Bed: Check and adjust the bed screws to ensure that the printer bed is level. A level bed is critical for ensuring proper adhesion of the first layer.
- Check the Nozzle Height: Use a piece of paper to check the height of the nozzle from the bed. The paper should slide with slight resistance under the nozzle.
- Adjust the Extruder Steps per Millimeter (E-steps): This ensures that the right amount of filament is being pushed through the nozzle during printing.
- Calibrate the X, Y, and Z Axes: Ensure that each axis moves accurately according to the expected distances.
- Perform a Test Print: After adjustments, execute a test print to evaluate the calibration and make any necessary tweaks.
Axis Calibration: Detailed Instructions
Calibrating the axes involves adjusting the steps per millimeter for each axis. This is critical because if the steps are off, the printer will not move accurately, leading to misaligned prints.
For each axis, measure the distance moved and compare it with the expected distance. If discrepancies are found, adjustments to the steps in the firmware will be necessary.
Example of Axis Calibration
| Axis | Expected Movement (mm) | Actual Movement (mm) | Steps per mm Adjustment |
|---|---|---|---|
| X | 100 | 98 | 80 |
| Y | 100 | 100 | 80 |
| Z | 100 | 102 | 400 |
Extruder Calibration: Ensuring Correct Filament Flow
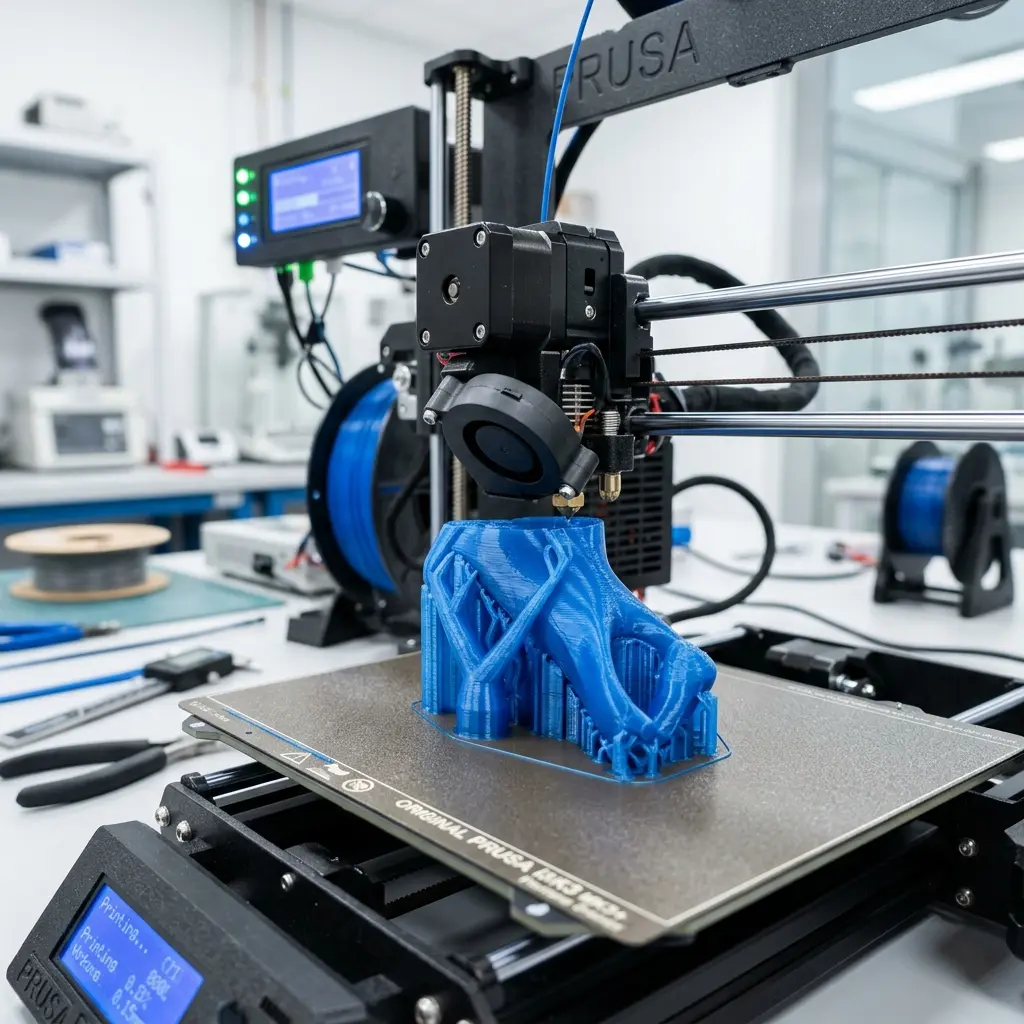
Extruder calibration is essential to ensure the correct amount of filament is being extruded. This step is critical as over-extrusion can lead to blobs and stringing, while under-extrusion can result in weak prints.
To calibrate the extruder, measure the length of filament that is fed through the extruder and compare it to the expected length. This process can be broken down into the following steps:
Extruder Calibration Steps
- Mark 120mm on the Filament: Use a marker to create a clear mark on the filament above the extruder entrance, precisely at the 120mm mark.
- Command the Printer to Extrude: Using slicing software or the printer interface, command the printer to extrude 100mm of filament.
- Measure the Distance: After extrusion, measure the distance from the mark made to the entrance of the extruder. This will show how much filament was actually extruded.
- Adjust the E-steps: If the measurement does not match the expected 100mm, adjust the E-steps in the firmware based on the discrepancy observed.
Common Issues and Troubleshooting Tips
Calibration might not always go smoothly. Here are some common issues encountered along with troubleshooting tips:
- Uneven Bed Leveling: If the bed isn’t level, adjust the screws evenly. Use a level to ensure the bed is flat.
- Improper E-step Settings: If prints are under or over-extruded, repeat the extruder calibration steps.
- Nozzle Clogs: Regularly check and clean the nozzle. A clogged nozzle can lead to inconsistent extrusion.
- Debris on the Print Bed: Before starting a print, ensure the print bed is clean and free of any debris that could affect adhesion.
- Filament Issues: Ensure quality filament is being used, as poor-quality filament can lead to inconsistent results.
DomineTec Tip: Regularly clean the extruder and bed to prevent clogs and improve adhesion. A clean workspace contributes to high-quality prints.
Material Considerations: PLA vs. ABS
Different materials can significantly impact the calibration process. For instance, PLA is generally easier to print with due to its lower thermal requirements, while ABS may require higher temperatures and specific settings to avoid warping.
Understanding the difference between PLA and ABS helps in selecting the right settings for prints. Here’s a comparison table:
| Feature | PLA | ABS |
|---|---|---|
| Print Temperature | 180-220°C | 220-250°C |
| Bed Temperature | 0-60°C | 80-110°C |
| Ease of Printing | Easy | Moderate |
| Post-Processing | Easy to sand and paint | Can be smoothed with acetone |
| Environmental Considerations | Biodegradable | Not biodegradable |
Testing Your Calibration
After calibration, performing a test print is essential. A simple calibration cube or a model like the 'Benchy' can help evaluate the results. Here’s what to look for during a test print:
- Dimensional Accuracy: Check the dimensions against the model specifications to ensure they match.
- Surface Quality: Inspect the surface for any imperfections like stringing or blobs.
- Layer Adhesion: Assess whether the layers are adhering well to each other.
Frequently Asked Questions
What is the best way to level a 3D printer bed?
Using a piece of paper to gauge the distance between the nozzle and the bed is a reliable method for leveling. The paper should slide with slight resistance under the nozzle, ensuring a proper gap.
How often should a 3D printer be calibrated?
Calibration should be performed regularly, especially after changing filaments or if print quality declines. It is also wise to check calibration before starting a new project.
What are the signs of an improperly calibrated printer?
Common signs include poor layer adhesion, inconsistent extrusion, and dimensional inaccuracies in prints. Additionally, excessive stringing or warping may be noticed.
Can calibration affect print speed?
Yes, proper calibration can optimize print speed by ensuring accurate movements and reducing errors. An accurately calibrated printer can operate more efficiently.
Is software calibration necessary?
Software calibration helps fine-tune settings that may not be physically adjustable on the printer. This makes it crucial for optimal performance, particularly for advanced settings like acceleration and jerk control.
```htmlUnderstanding Advanced Configurations
Advanced configurations play a crucial role in achieving precise calibration of a 3D printer. Settings such as stepper motor current, acceleration, and jerk settings can significantly influence print quality and accuracy.
Accessing the firmware settings or using software like Marlin or PrusaSlicer allows for fine-tuning these parameters. Adjustments should be made meticulously, as even minor changes can lead to substantial differences in printer performance.
Common Calibration Mistakes to Avoid
Calibration errors can arise from overlooking essential steps in the process. One common mistake is failing to properly level the print bed, which can result in poor adhesion and uneven layers.
Another frequent issue is neglecting to check the filament diameter and extrusion multiplier, leading to inconsistent material flow. Addressing these mistakes is vital for achieving optimal calibration and improving print outcomes.
Cost Estimations for Calibration Tools
Investing in calibration tools can enhance the calibration process and overall print quality. Basic tools such as digital calipers and feeler gauges are relatively inexpensive, typically costing between $10 and $30.
More advanced options, like automatic bed leveling sensors, can range from $20 to $100, depending on the brand and features. Budgeting for these tools can lead to improved calibration results and a more efficient printing experience.
Security Precautions During Calibration
Safety should always be a priority when calibrating a 3D printer, especially when dealing with high temperatures and moving parts. Ensuring that the printer is placed on a stable surface can prevent accidents during operation.
Additionally, maintaining a safe distance from the printer while it operates can mitigate the risk of injury. Regular inspection of wiring and components is also recommended to avoid electrical hazards.
Exploring Alternative Calibration Methods
Alternative calibration methods can provide different approaches for achieving optimal printer settings. Techniques such as mesh bed leveling or using software-assisted calibration can simplify the calibration process.
Utilizing calibration prints, like the popular 3D Benchy or temperature towers, can also serve as effective benchmarks for assessing printer performance. These alternatives can offer unique insights into the calibration needs of specific printers.
Importance of Regular Calibration Maintenance
Regular maintenance of calibration settings is essential for sustaining print quality over time. As components wear out or environmental conditions change, recalibration may be necessary to maintain optimal performance.
Establishing a routine for periodic checks and adjustments can help prevent issues before they arise. This proactive approach ensures that the printer continues to deliver high-quality results consistently.
Utilizing Community Resources for Calibration Support
Engaging with online communities and forums can provide valuable insights and support during the calibration process. Experienced users often share tips, tricks, and troubleshooting advice that can enhance your calibration efforts.
Utilizing resources such as YouTube tutorials, dedicated calibration guides, and manufacturer forums can also offer step-by-step assistance. Leveraging these community resources can lead to improved understanding and successful calibration outcomes.
How to Calibrate Your 3D Printer: Step-by-Step E-Steps and Axis Calibration
Calibrating a 3D printer is essential for achieving optimal print quality. Proper calibration ensures that the printer's movements are accurate, which leads to better layer adhesion and overall print success. This guide outlines the necessary steps for calibrating both the extruder (E-steps) and the axes of a 3D printer.
Understanding Calibration
Calibration can be divided into two main categories:
- E-Steps Calibration: Adjusts the amount of filament extruded by the printer.
- Axis Calibration: Ensures that the printer moves the correct distances along the X, Y, and Z axes.
E-Steps Calibration
The E-steps calibration ensures that the printer extrudes the correct amount of filament. If the printer extrudes too much or too little filament, print quality will suffer.
Materials Needed
- Filament
- Digital caliper
- Ruler
- Calculator
Steps for E-Steps Calibration
- Heat up the hotend to the printing temperature of the filament.
- Measure 100 mm of filament from the entry point of the extruder.
- Mark this point clearly on the filament.
- Extrude 100 mm of filament using the printer's control panel or G-code commands.
- Measure the distance from the entry point of the extruder to the mark on the filament.
- Calculate the new E-steps value using the following formula:
| Original E-Steps | Measured Distance (mm) | New E-Steps Calculation |
|---|---|---|
| [Original E-Steps] | [Measured Length] | New E-Steps = (Original E-Steps * 100) / Measured Length |
Update the firmware with the new E-steps value and save the setting.
Axis Calibration
Axis calibration ensures that the printer moves the correct distance along the X, Y, and Z axes. This is crucial for the dimensions and accuracy of 3D prints.
Materials Needed
- Digital caliper
- Ruler or measuring tape
- Calibration cube model (20x20x20 mm recommended)
Steps for Axis Calibration
- Print a calibration cube using the current settings.
- Measure the dimensions of the printed cube using the digital caliper.
- Compare the measured dimensions with the expected dimensions (20 mm for each side).
- If discrepancies are found, calculate the calibration factor for each axis.
Calibration Factor Calculation
The calibration factor for each axis can be calculated using this formula:
| Axis | Measured Length (mm) | Expected Length (mm) | Calibration Factor Calculation |
|---|---|---|---|
| X | [Measured X] | 20 | New X Steps = (Current X Steps * 20) / Measured X |
| Y | [Measured Y] | 20 | New Y Steps = (Current Y Steps * 20) / Measured Y |
| Z | [Measured Z] | 20 | New Z Steps = (Current Z Steps * 20) / Measured Z |
Updating the Firmware
After calculating the new steps per millimeter for each axis, update the firmware with the new values. This process typically involves accessing the printer's control panel or using a connected computer.
Final Checks
After calibration, it is advisable to perform a few test prints to ensure that all adjustments have been accurate. Consider printing a simple object, such as a calibration cube or a series of test shapes, to verify the printer's performance.
Common Issues and Solutions
- Over-extrusion:
- Check E-steps calibration.
- Reduce the print speed.
- Under-extrusion:
- Verify the filament diameter.
- Check for clogs in the nozzle.
- Inaccurate Dimensions:
- Recheck axis calibration.
- Ensure the printer is level.
Conclusion
Calibration is a crucial process in maintaining a 3D printer's performance. Regularly performing E-steps and axis calibration can lead to consistent print quality and fewer failed prints. By following the steps outlined in this guide, users can ensure their 3D printer operates at its best.
How to Calibrate Your 3D Printer: Step-by-Step E-Steps and Axis Calibration
Understanding 3D Printer Calibration
Calibration is essential for achieving high-quality prints and ensuring consistent results. It involves adjusting the printer's settings for optimal performance.
Tools and Materials Needed
- Digital Caliper
- Filament
- Ruler
- Calibration Cube STL file
- Printer Control Software
Step 1: Bed Leveling
Bed leveling is the first and most critical step in the calibration process. An uneven build plate can lead to poor adhesion and print quality.
Manual Bed Leveling
Manual bed leveling typically involves adjusting the height of the bed at various points. This can be done using a sheet of paper to gauge the distance between the nozzle and the bed.
Automatic Bed Leveling
If the printer is equipped with an automatic bed leveling sensor, initiate the leveling process through the printer’s control interface. Follow the on-screen instructions to complete the leveling.
Step 2: Z-Axis Offset Calibration
The Z-axis offset determines the distance between the nozzle and the print surface. Adjusting this setting ensures the first layer adheres properly to the bed.
- Home the printer to set the Z-axis to its starting position.
- Use a piece of paper to find the correct distance.
Step 3: X and Y Axis Calibration
Calibrating the X and Y axes ensures that the printer moves accurately along these directions. This calibration can significantly impact the dimensions of the printed object.
Measuring Movements
Print a calibration cube that measures 20x20x20 mm. Measure the dimensions of the cube after printing to check for accuracy.
Adjusting Steps Per Millimeter
If the printed dimensions do not match the intended size, adjust the steps per millimeter in the firmware. The formula for adjustment is:
| Current Steps | Measured Size (mm) | Target Size (mm) | New Steps |
|---|---|---|---|
| Current Steps | Measured Size | 20 | New Steps = (Current Steps * Target Size) / Measured Size |
Step 4: E-Steps Calibration
E-steps calibration is crucial for ensuring the correct amount of filament is extruded during printing. This step directly affects the material flow and print quality.
Performing E-Steps Calibration
To calibrate E-steps, mark a specific length of filament and extrude that length using the printer’s control interface. Measure the actual length of filament extruded to determine the necessary adjustments.
Calculation for E-Steps
Adjust the E-steps using the formula:
- New E-Steps = (Current E-Steps * Entered Length) / Actual Length
Step 5: Temperature Calibration
Temperature calibration ensures that the printer extrudes filament at the optimal temperature. Each type of filament has a specific temperature range for optimal printing.
Testing Extrusion Temperature
Print a temperature tower to identify the best temperature for the filament used. Observe the results and choose the temperature that yields the best quality.
Final Steps and Testing
After completing the calibration steps, perform a test print of a complex model. This will help verify the effectiveness of the calibration.
Maintenance Tips
Regular calibration and maintenance can prolong the life of the 3D printer. Ensure that the printer is cleaned and inspected regularly for optimal performance.
```



