Epson L3250 Not Printing Yellow Color: Troubleshooting Guide
The Epson EcoTank L3250 is widely recognized for its cost-efficiency and reliable performance in the desktop inkjet printer market. However, like any continuous ink supply system (CISS), it can occasionally experience issues with specific colors failing to print after periods of inactivity or when low-quality third-party inks are introduced. If your Epson L3250 is not printing the yellow color, the problem is usually caused by air locks trapped inside the yellow ink tubes, an empty or unprimed internal yellow damper (cartridge), or dried ink deposits clogging the micro-apertures of the piezoelectric printhead nozzles.
Fixing this issue requires a technical understanding of the fluid dynamics governing Epson's EcoTank line. Unlike traditional cartridge-based printers that rely on sponge capillary action to retain ink, the EcoTank system operates under balanced atmospheric and hydrostatic pressure. When a leak occurs in this sealed pressure loop, or if the printer is left unused for extended periods, the solvent base of the ink evaporates, resulting in solid pigment or dye deposits that physically seal the microscopic nozzles. This comprehensive guide will walk you through everything from basic software-driven utility cycles to advanced manual damper priming and chemical cleaning procedures to restore your yellow color flow.
The Engineering behind Epson's MicroPiezo Printhead Technology
To successfully troubleshoot a missing yellow color on the Epson L3250, it helps to understand how the printhead functions on a physical level. Unlike thermal inkjet systems used by some competitors (which heat the ink to boiling point to force droplets out), Epson uses its proprietary MicroPiezo technology. Each of the hundreds of nozzles on the printhead is backed by a precise piezoelectric crystal element. When an electrical pulse is sent to the crystal, it undergoes physical deformation, creating a mechanical flexing action that ejects a microscopic droplet of ink through the nozzle without generating heat.
This heat-free process is excellent for preserving ink chemistry and ensuring long printhead service life. However, because there is no thermal agitation to break up blockages, the system relies entirely on the ink maintaining its correct viscosity and density. If the yellow ink thickens due to air exposure, or if air bubbles enter the chamber, the mechanical displacement of the piezo crystal will compress the air rather than ejecting the ink. This results in no ink leaving the nozzle plate, creating the "missing yellow" symptom even when your external tank is completely full.
Moreover, the electronic circuitry on the printhead is highly sensitive. The piezoelectric resistors rely on the physical flow of ink to act as a cooling medium. Operating the printhead dry (by repeatedly running cleaning cycles with no ink in the dampers) can cause thermal and electrical overload on the nozzle driver chips, potentially burning out the printhead or triggering a logic board fuse failure. Therefore, prompt and correct diagnostic action is necessary to prevent permanent hardware damage.
Fluid Dynamics of the Epson EcoTank System
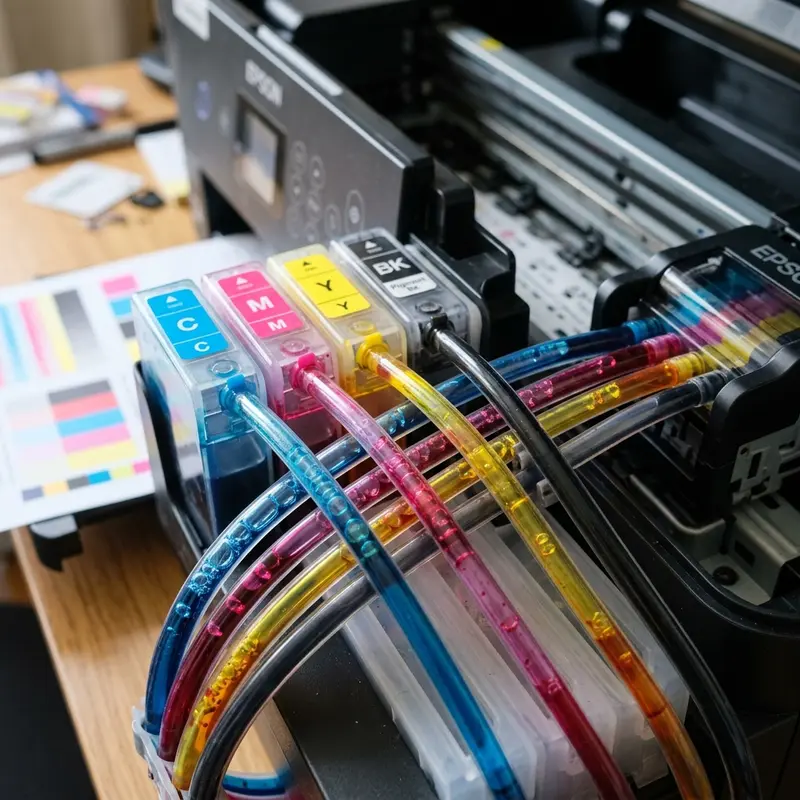
The ink delivery system of the Epson L3250 starts at the front-facing yellow (Y) ink tank. From there, ink travels via flexible silicone tubing into the print carriage assembly. Inside the carriage, the ink enters a damper—a small, specialized cartridge that acts as a pressure-regulating valve. From the damper, the ink is fed into the ink inlet pins of the printhead itself. Any interruption in this chain, from a blocked air vent on the external tank to a leaking gasket at the printhead junction, will cause the yellow color to cut out entirely.
The damper is one of the most critical and misunderstood components of the CISS. It features a thin plastic membrane on one side that acts as a flexible diaphragm. As the printhead expels ink during printing, a negative pressure (partial vacuum) builds up inside the damper. This negative pressure pulls the membrane inward, which mechanically opens a tiny internal valve held shut by a calibrated stainless steel spring. Once open, ink flows from the main tank to equalize the pressure. If the spring fails, or if dried ink locks the membrane, the valve remains closed, cutting off the yellow supply.
Additionally, the rubber sealing ring at the base of the damper must form an airtight seal around the printhead's metallic intake needle. If this seal degrades or is improperly seated, atmospheric air is drawn into the printhead rather than ink. Because air flows much more easily than liquid, the pump mechanism will suck air, leaving the yellow nozzles completely dry.
5 Common Causes for the Yellow Color Not Printing
Before attempting physical repairs, it is helpful to categorize the common failure points. There are five primary reasons why the yellow color stops printing on your Epson L3250:
- Air Pockets in the Tubing: If the printer is moved, tilted, or left unused for a long time, air can creep back up the ink lines from the carriage. This leaves the tubes partially empty, preventing the continuous siphon action needed to deliver ink.
- Empty or Unprimed Damper: Even if the external tank is full, the damper inside the carriage can lose its prime and fill with air. Once the damper is empty, the printhead cannot draw ink from the tank, leading to immediate color loss.
- Nozzle Dry-out and Clogging: Yellow ink formulation uses specific pigments or dyes that dry relatively quickly when exposed to air. If the printer is not capped correctly in its home position, the ink at the nozzle tip solidifies, forming a tough physical plug.
- Capping Station and Purge Pump Failure: The capping station seals the printhead when not in use. It is connected to a peristaltic pump that draws ink through the nozzles to clear them. If the cap is dirty, worn, or the pump tubing is pinched, maintenance cycles will fail to pull ink through.
- Chemical Contamination: Using generic or non-compatible refill inks can cause a chemical reaction when mixed with the remaining original Epson ink, leading to gelation or sedimentation that permanently blocks the micro-channels.
Step-by-Step Software Diagnostics and Cleaning
Your first course of action should always be software-based diagnostics. This allows you to evaluate the severity of the blockage without opening the physical casing of the printer. Do not skip these steps, as they are crucial for verifying whether the issue is a simple surface clog or a deeper pressure problem.
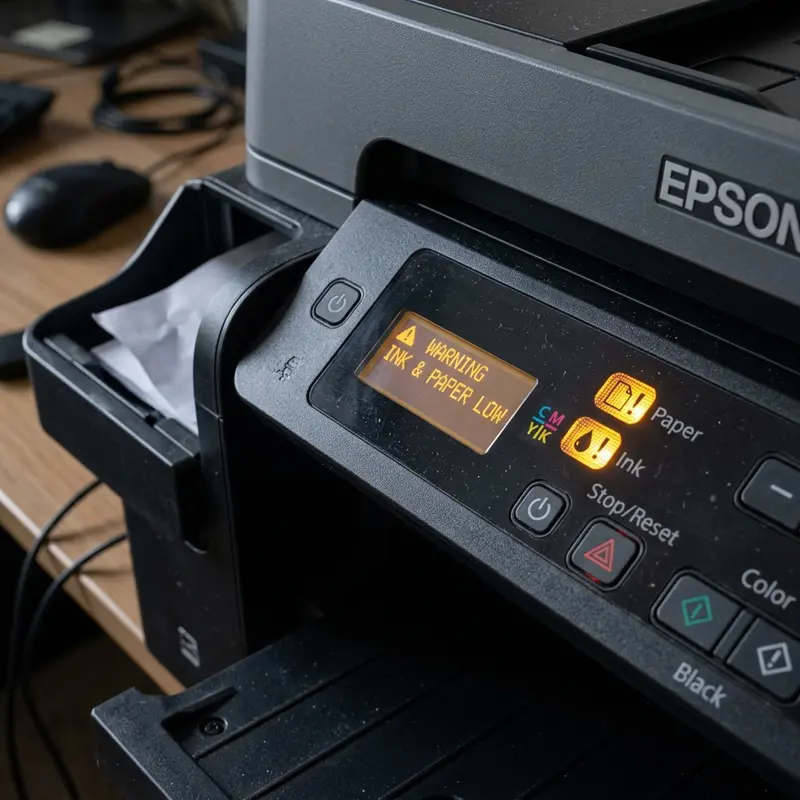
Start by loading standard A4 paper into the rear paper feed. On your computer (Windows), open the Control Panel, navigate to "Devices and Printers," right-click your Epson L3250 icon, and select "Printing Preferences." Go to the "Maintenance" tab and select "Nozzle Check." If the printed sheet shows missing lines or is completely blank in the yellow section while the other colors print perfectly, you have confirmed a yellow-specific clog.
To address this, run a standard printhead cleaning cycle from the same Maintenance menu. This instructs the purge pump to apply gentle suction to the nozzles. You should run a maximum of two cleanings consecutively. If you want to know more about the software steps, you can read our detailed guide on how to run epson l3250 printhead cleaning from pc to ensure you do not waste ink or wear out the mechanics prematurely.
If the standard cleaning does not restore the yellow color, the next option is the "Power Cleaning" (or Limpeza Intensa). This utility runs the purge pump at maximum duty cycle to clear large air locks and stubborn blockages. Important Note: A Power Cleaning consumes approximately 20% of your total ink volume and fills the waste ink pad quickly. Only perform this if your ink levels are above 30% and wait at least 12 hours before testing again to allow air bubbles to dissolve naturally.
How to Manually Prime and Pressurize the Yellow Damper
When software cleanings fail, the issue is almost certainly an unprimed damper. The purge pump cannot pull ink if the line is filled with air. To fix this, you must open the carriage and manually draw the ink using a syringe. This process is highly effective and avoids wasting ink from other colors.
Required Tools: A standard 10ml or 20ml slip-tip syringe (without a needle), a small Phillips screwdriver, and some paper towels.
Follow these steps carefully:
- Power off the printer and disconnect the power cord and USB cable to eliminate any risk of electrical damage or accidental carriage movement during the procedure.
- Open the scanner unit cover to access the internal print compartment.
- Locate the print carriage. If it is locked in the home position (extreme right), manually release it by gently rotating the white plastic gear visible on the left side of the internal chassis or by briefly powering the printer on and pulling the plug when the carriage moves.
- Slide the carriage to the center of the metal guide rail for easier access.
- Remove the single Phillips screw securing the plastic cover plate over the dampers. Lift the cover off and set it aside.
- Locate the yellow damper (marked "Y" or identified by the yellow ink tube). Gently press the retaining clip at the rear of the damper and lift it straight up out of the carriage.
- Insert the tip of the syringe directly into the round rubber valve at the bottom of the damper. Ensure a snug fit.
- Hold the damper vertically with the valve pointing upward so that any trapped air rises toward the syringe.
- Slowly pull back on the syringe plunger. You will see air bubbles, followed by yellow ink, enter the syringe. Continue drawing until the damper is completely filled with ink and no air remains in the chamber (usually 2-3ml of ink).
- Carefully detach the syringe, wipe the damper valve with a clean paper towel, and push the damper back into its slot in the carriage until it clicks into place.
- Reinstall the plastic cover plate, tighten the screw, return the carriage to the home position, close the scanner cover, and plug the printer back in. Run one standard cleaning cycle via your PC to restore pressure.
Troubleshooting Comparison Table
To help you diagnose the exact failure mode of your yellow ink channel, refer to the technical troubleshooting table below:
| Visual Symptom (Nozzle Check) | Root Cause | Recommended Fix | Risk Level / Complexity |
|---|---|---|---|
| Yellow block has minor horizontal white gaps. | Slight dry ink accumulation or dust on the nozzle face. | Perform 1-2 standard software printhead cleanings. | Low (Software) |
| Yellow block is completely missing; other colors are fine. | Air lock in lines or empty yellow damper cartridge. | Manually prime the yellow damper with a syringe. | Medium (Manual Intervention) |
| All colors start fading or fail during long print runs. | Blocked air vents on ink tanks or low ink levels. | Refill tanks and verify that the rubber tank caps are open/vented correctly. | Low (Maintenance) |
| Ink is leaking inside the printer base or smudge on paper. | Damaged damper seal, split ink line, or saturated waste pad. | Inspect and replace damaged dampers. For general hardware resets, see similar guides like how to reset hp deskjet 2776. | High (Hardware Repair) |
Advanced Chemical Flushing of Clogged Nozzles
If priming the damper does not resolve the missing yellow color, the microscopic nozzle channels in the printhead are likely blocked by dried pigment deposits. In this scenario, a manual chemical flush is required to dissolve the hardened ink.
Caution: The printhead's nozzle plate is extremely delicate. Applying excessive force with the syringe can rupture the internal manifold walls, causing permanent cross-contamination of colors or short-circuiting the piezo actuators if liquid spills onto the electronic ribbon cable connectors.
To perform a chemical flush:
- Unplug the printer and move the carriage to the center. Remove the yellow damper as described in the previous section.
- Fold a strip of lint-free paper towel or a coffee filter and slide it directly underneath the printhead carriage. This will act as a blotter to catch the flushing fluid and dissolved ink, protecting the lower mechanism.
- Attach a short piece of flexible silicone tubing (approx. 2mm inner diameter) to a syringe containing 2-3ml of specialized inkjet cleaning solution (or warm distilled water in an emergency).
- Connect the other end of the silicone tubing directly onto the yellow ink inlet port of the printhead.
- Very slowly push the syringe plunger. Apply minimal pressure. You should feel slight resistance, but the liquid should begin to flow. If the plunger will not move, do not force it; let the fluid sit in the tube to dissolve the clog over time.
- Gently push about half of the solution through, then pull back slightly on the plunger to create a vacuum effect. This back-and-forth action helps break up stubborn ink crusts.
- Allow the remaining solution to sit inside the printhead for 15 to 30 minutes to chemically soften the blockage.
- Flush the remaining liquid through, remove the tubing, and slide out the saturated paper towel from beneath the carriage.
- Reinstall the primed yellow damper, close the printer, power it on, and execute a standard cleaning cycle to purge the cleaning solution from the nozzles before testing.
Best Practices for Preventing Ink Clogs on the L3250
Preventative maintenance is the key to ensuring your Epson L3250 operates reliably without recurring color dropouts. By adopting a few simple usage habits, you can keep the ink flowing smoothly and extend the lifetime of your printhead.
- Print at Least Once a Week: Inkjet printers need to be used regularly. Print a test page containing blocks of all four colors (Cyan, Magenta, Yellow, Black) at least once a week. This keeps the ink moving through the lines and prevents it from drying inside the nozzles.
- Keep the Printer Connected to Standby Power: Modern Epson printers perform very brief, quiet maintenance cycles when left plugged in and in standby mode. If you unplug the printer or turn off the power strip, it cannot perform these cycles, making it far more susceptible to drying out.
- Never Let Ink Levels Fall Below the Minimum Line: The clear windows on the front of the printer show your physical ink levels. Letting the ink run dry will introduce large volumes of air into the supply lines, requiring manual priming.
- Only Use High-Quality Inks: Genuine Epson inks are formulated to precise viscosity and surface tension standards. If you choose to use third-party inks, ensure they are from a highly reputable brand designed specifically for Epson MicroPiezo heads to avoid chemical clogs.
- Control the Printing Environment: Printers placed in direct sunlight, near heaters, or in very dry, dusty rooms are much more likely to suffer from dry nozzles. Place your printer in a stable, temperature-controlled environment.
Frequently Asked Questions (FAQ)
Can I use rubbing alcohol to clean my Epson L3250 printhead?
No, you should never use rubbing alcohol (isopropyl alcohol) or commercial denatured alcohol to clean the printhead. Alcohol is highly volatile and can dry out and degrade the internal silicone membranes and gaskets of the piezo assembly. It can also strip the hydrophobic coating off the nozzle plate, ruining the printhead's ability to direct ink drops accurately. Use only specialized inkjet printhead cleaning solutions or warm distilled water.
How many cleanings can I run before damaging the printer?
You should run no more than 2-3 standard cleanings in a single session. If the nozzle check does not show improvement, running more cleanings will only waste ink, fill your waste pads, and potentially overheat the piezo crystals due to lack of ink lubrication. Instead, perform a manual damper prime or let the printer sit for 12 hours before trying again.
Why does the yellow color clog more often than Cyan or Magenta?
Yellow ink formulation contains pigments or dyes that are highly sensitive to light and air exposure. Additionally, because yellow is a light color, minor gaps in the yellow nozzle check are harder to spot on standard printouts than black or cyan. This means a partial clog can go unnoticed for weeks, allowing the ink to dry completely and become a solid plug before the user realizes there is a problem.
Is a Power Cleaning safe if my ink tanks are half-empty?
Yes, a Power Cleaning is safe if the ink levels are at least 30% full. However, if your ink levels are near the lower limit line, do not run a Power Cleaning. Doing so will draw air into the tubes, which will completely empty the dampers and cause severe printhead clogging that software cannot resolve.


