How to Fix Epson L3250 Not Printing Black Ink (Troubleshooting)
The Epson EcoTank L3250 is an incredibly popular and highly efficient ink tank printer, widely praised for its low running costs and reliable long-term performance. However, one of the most frustrating technical issues that users encounter is when the printer suddenly stops printing black ink altogether or begins leaving blank stripes across the page, even though the physical black ink tank is completely full. This issue makes it impossible to print standard text documents or compromises the color balance of images that require deep, dark tones.
Your Epson L3250 is not printing black ink typically because of an airlock inside the ink supply tubes or the damper (ink cartridge reservoir), or due to dried ink residue clogging the microscopic nozzles of the piezo printhead. To fix this, you must manually prime the black damper using a clean syringe to draw out the trapped air, run a printhead cleaning cycle via the software driver, and, if the clog is stubborn, trigger a Power Cleaning (Power Ink Flushing) cycle to restore proper ink flow.
Understanding the EcoTank Ink Delivery System and Fluid Dynamics
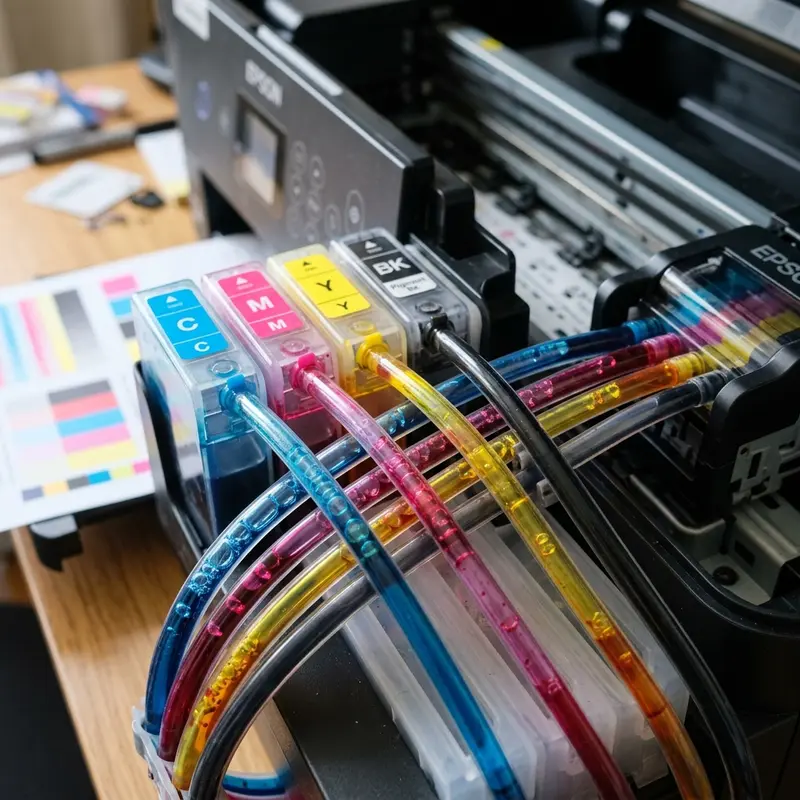
To perform effective troubleshooting, it is essential to understand the underlying mechanics of Epson's continuous ink supply system (CISS). Unlike traditional inkjet printers that use small, self-contained ink cartridges mounted directly onto the carriage, the Epson L3250 features high-capacity stationary ink tanks positioned on the right side of the machine. The ink must travel from these tanks, through a long ribbon of flexible silicone tubing, all the way to the moving printhead assembly on the opposite side.
Before the ink reaches the printhead nozzles, it enters a critical component known as the damper (or ink cartridge damper). The damper acts as a local ink reservoir and a pressure regulator. It contains a delicate physical membrane and a spring-loaded valve mechanism designed to stabilize the ink pressure, preventing gravity-driven leaks and neutralizing the pressure waves generated by the fast, horizontal acceleration of the printhead carriage. From the damper, the ink is fed into the MicroPiezo printhead, which uses electrical impulses to deform piezoelectric crystals, mechanically pushing microscopic droplets of ink out of hundreds of tiny nozzles.
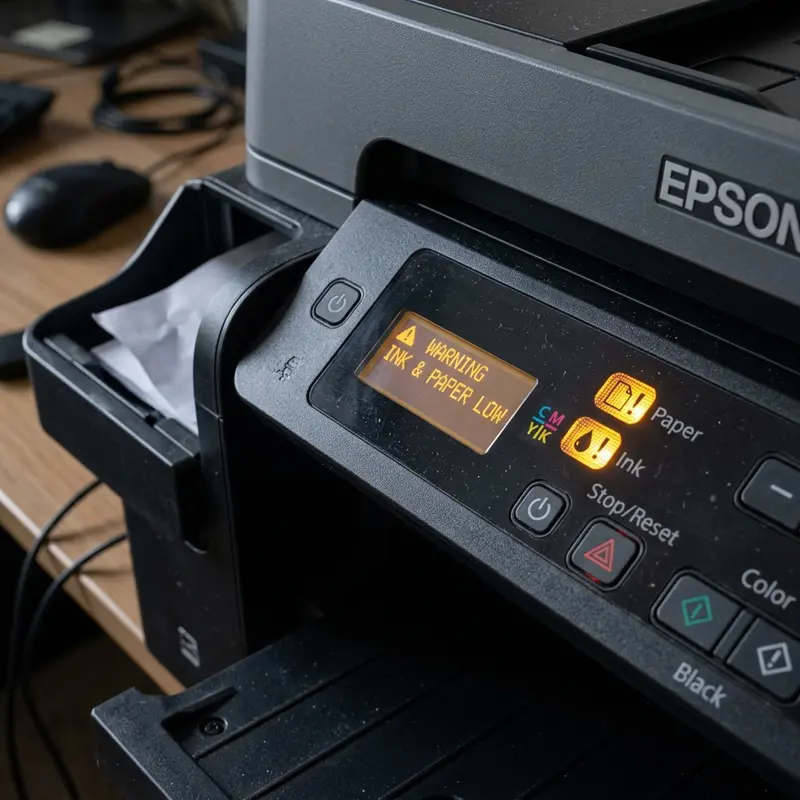
If the printer remains inactive for several weeks, or if you continue printing after the ink tank has dropped below the minimum fill line, air will inevitably find its way into the ink tubes and dampers. Because air is highly compressible compared to liquid ink, any pressure applied by the piezoelectric crystals merely compresses the trapped air instead of ejecting ink from the nozzle plate. This hydraulic failure results in a complete absence of black ink on the page, even if the external tank is topped up to the maximum level.
Diagnostic Phase: Interpreting the Nozzle Check Pattern
Before attempting any invasive physical or chemical cleaning procedures, you must perform a diagnostic test called a Nozzle Check. This utility prints a structured grid pattern of fine lines for each of the four ink channels: Black (K), Cyan (C), Magenta (M), and Yellow (Y). Analyzing the printed output allows you to determine if the issue is a minor nozzle clog, a massive air pocket, or a permanent mechanical failure within the printhead circuit board.
To print a Nozzle Check directly using the hardware buttons on the Epson L3250:
- Turn off the printer completely, ensuring the power cord remains plugged into the wall outlet.
- Load a few sheets of plain, clean A4 paper into the rear paper feed tray.
- Press and hold down the Stop button (the triangle inside the circle).
- While holding the Stop button, press and hold the Power button until the power LED starts flashing, then release both buttons.
- The printer will initialize and output a diagnostic sheet showing the pattern of all ink nozzles.
Examine the black section of the pattern. A few missing lines indicate that some nozzles are temporarily blocked by dried ink, which can be easily resolved using standard cleaning cycles. A completely blank black grid, while the color grids print perfectly, points directly to a severe air lock or a completely dry damper that requires manual priming or deep hydraulic flushing.
Software Cleaning Methods vs. Manual Physical Interventions
Depending on the severity of the blockage identified during the diagnostic phase, you must choose the appropriate level of intervention. Repeatedly running software cleaning cycles can cause the internal waste ink pads to saturate prematurely, triggering a lock-out error that requires hardware servicing. Use the comparative table below to select the safest and most efficient path for your printer's current condition:
| Method | Best Suited For | Ink Consumption | Waste Pad Impact |
|---|---|---|---|
| Standard Printhead Cleaning | Minor gaps in nozzle check pattern | Low | Minimal (Safe to run up to 3 times) |
| Power Cleaning (Power Ink Flush) | Stubborn clogs and empty ink lines after long storage | Very High (approx. 15-20%) | Severe (Fills waste pad counter quickly) |
| Manual Damper Priming (Syringe) | Large air bubbles visible in tubes; empty dampers | Zero waste (Ink can be returned to tanks) | None (Completely manual process) |
| Chemical Printhead Flush (Solvent) | Dried pigment ink or cross-contaminated inks | None | None (Manual injection into nozzle ports) |
How to Manually Prime the Dampers to Pull Ink and Eliminate Air Locks
When there is a visible gap of air inside the black ink line, software cleanings are often ineffective because the pump cannot build enough negative pressure to pull the heavy ink past the air gap. The most reliable solution is to manually draw the ink through the tube using a syringe, filling the damper completely so that it can feed the printhead directly.
Required Tools and Materials: A medium Phillips screwdriver, a standard 10ml or 20ml plastic syringe (slip tip, without any metal needle), some clean paper towels, and protective gloves to prevent ink from staining your skin.
Detailed, Step-by-Step Priming Procedure:
- Power on the printer. When the printhead carriage moves out of its locking station on the far right, disconnect the power cable directly from the back of the printer. This leaves the carriage free to slide left and right manually.
- Slide the carriage to the center of the printer for easy physical access.
- Locate the black plastic cover protecting the dampers on top of the carriage. Unscrew the single Phillips screw securing this cover and set it aside safely.
- Gently press the plastic tab on the side of the cover to release and lift it off, exposing the four color-coded dampers. The black damper is typically the widest damper on the left.
- Use a thin, flat tool or your fingers to press the release latch at the back of the black damper, and carefully pull the damper upward to detach it from the printhead nozzle post. Be extremely gentle to avoid damaging the delicate plastic nozzle underneath.
- Insert the plastic tip of your empty syringe directly into the round rubber valve outlet on the bottom of the black damper. Make sure it forms a tight, secure seal.
- Holding the damper upright, slowly pull back the syringe plunger. You will see air bubbles, foam, and eventually thick black ink enter the syringe. Continue pulling until the syringe is filled with solid black ink and all visible air bubbles have disappeared from both the transparent tube and the damper itself.
- Remove the syringe from the damper. You can recycle this ink by carefully pouring it back into the external black ink tank, ensuring no dirt or dust enters the tank.
- Clean any excess ink from the damper valve with a dry paper towel. Reinsert the damper onto its metal post on the carriage, pushing it down firmly until it clicks back into place.
- Reattach the plastic carriage cover, screw it in, and slide the carriage back to its starting position on the far right. Plug the printer back into the wall outlet and turn it on.
Running the Advanced Power Cleaning Cycle via System Drivers
If you have confirmed that the ink tubes are filled and the dampers are primed, but the black ink is still not rendering on the page, there may be dried ink deposits inside the micro-capillaries of the printhead. You will need to trigger the Power Cleaning function (sometimes called Power Ink Flushing) from the print driver software on your computer.
To run a Power Cleaning under Windows:
- Open the Control Panel, select Devices and Printers (or Printers & Scanners in Windows 10/11 settings).
- Right-click on your Epson L3250 Series printer and select Printing Preferences.
- Click on the Maintenance tab at the top of the utility window.
- Select Power Cleaning (or Power Ink Flushing depending on driver version).
- Read the on-screen warnings carefully. This process consumes a significant volume of ink and requires that the ink tanks are at least one-third full. Click Next and then Start to begin the cycle.
The Power Cleaning cycle takes between 10 to 15 minutes to complete. The printer will make loud pumping noises as it cycles ink. Do not turn off the power, disconnect cables, or load paper while the green power LED is flashing, as interrupting this cycle can damage the internal vacuum pump.
Crucial Technical Tip: After a Power Cleaning cycle finishes, do not attempt to run any more cleaning cycles or print large files immediately. The intense pressure of the flush generates tiny microbubbles within the ink itself, which temporarily prevents proper ink ejection. Turn off the printer and let it rest completely for 12 hours. This quiet period allows the microbubbles to float to the top of the reservoirs and dissipate, restoring perfect print quality the following day.
Preventative Maintenance to Avoid Future Black Ink Flow Issues
Keeping your Epson L3250 running smoothly requires simple, proactive habits. The printhead on these machines relies on the continuous presence of wet ink to prevent dust accumulation and air drying. By adhering to the following practices, you can prevent future clogs and avoid costly manual repairs:
- Print regularly: Try to print a full-color document containing black text at least once a week. This moves the ink through the lines and prevents it from drying inside the microscopic nozzles.
- Use high-quality original ink: Only refill your printer with genuine Epson 544 ink bottles. Third-party inks often contain impurities, incorrect acidity levels, or unstable pigments that can permanently clog the printhead or corrode its delicate components.
- Monitor ink levels: Never let the ink levels drop below the lower limit line on the tanks. Keep the tanks topped up to ensure air cannot enter the lines.
- Keep the printer in a cool, dust-free environment: High ambient temperatures and dry conditions accelerate ink evaporation, while household dust can collect on the printhead cap and cause clogs.
How Air Lock Pockets Form Inside the Black Ink Delivery Tubing
The printhead nozzles on your Epson EcoTank L3250 require a constant, unbroken flow of fluid. If the printer is left unused for several weeks, or if you run a print job when the physical ink level in the black tank is below the minimum limit line, air bubbles will enter the delivery tube. Once an air pocket (air lock) reaches the printhead, it cuts off the hydraulic pressure needed to eject ink droplets. Standard nozzle cleaning cycles cannot push these large air bubbles out. To fix this, you must run a Power Cleaning cycle through the utility driver on your computer, which forces the internal purge pump to draw ink at high pressure, pulling the air pocket out into the waste pad. Ensure your tanks are at least 50% full before executing this cycle.
Performing Manual Damper Syringe Priming on the Epson L3250
When software cleanings fail to restore the black color channel, the black damper cartridge has likely lost its prime. Open the printer casing, locate the carriage assembly in the center, and remove the plastic cover. Gently pull the black damper out, insert a syringe without a needle into its bottom outlet valve, and pull the plunger back to draw out the trapped air until the damper is completely filled with black ink. Reinstall the damper, close the printer cover, and print a nozzle check page. This manual process restores the ink pressure, resolving printing issues without wearing out the printhead.
Preventing Future Ink Delivery System Failures and Air Locks
To prevent air locks from forming inside your Epson L3250 print lines in the future, follow a simple preventative maintenance checklist. First, always refill your ink tanks before they drop below the 20% mark. Letting a tank run completely empty introduces large pockets of air into the delivery tubes that can damage the printhead. Second, print at least one test page or color image every single week. This keeps the ink fluid and prevents it from drying inside the MicroPiezo nozzles. Finally, keep the printer in a stable temperature-controlled environment away from direct sunlight, which reduces temperature swings that cause expansion and pressure drops.
Frequently Asked Questions (FAQ)
Below are the most common technical questions and answers regarding black ink issues on the Epson L3250 printer.


