Creality Ender 3 Review: Is the Classic Budget 3D Printer Still Worth It?

The Creality Ender 3 remains a highly regarded budget 3D printer, offering excellent value for both beginners and experienced users.
Introduction to the Creality Ender 3
Launched in 2017, the Creality Ender 3 quickly became a favorite in the 3D printing community. Its affordability, reliability, and impressive print quality set it apart from competitors.
This printer is often recommended for beginners due to its ease of setup and operation, along with a robust online support community. As 3D printing technology evolves, questions arise about whether this classic model still holds its ground.
Key Features of the Creality Ender 3
The Ender 3 boasts several features that contribute to its popularity. Here’s a breakdown of its key specifications:
| Feature | Specification |
|---|---|
| Build Volume | 220 x 220 x 250 mm |
| Layer Resolution | 0.1 - 0.4 mm |
| Print Speed | 100 mm/s (recommended 60 mm/s) |
| Filament Compatibility | PLA, ABS, TPU, PETG |
| Connectivity | SD Card, USB |
These specifications highlight the printer's capability to handle a variety of materials and its spacious build area, making it suitable for diverse projects.
Assembly and Setup
Assembling the Ender 3 is relatively straightforward, taking approximately 1 to 2 hours for most users. The printer comes partially assembled, which simplifies the process significantly.
Steps to assemble the Ender 3 include:
- Unbox all components and verify against the manual.
- Attach the vertical frame to the base.
- Install the X-axis assembly.
- Connect wiring for the stepper motors and heated bed.
- Level the bed using the provided knobs.
Following these steps ensures a proper setup, leading to successful first prints.
Print Quality and Performance
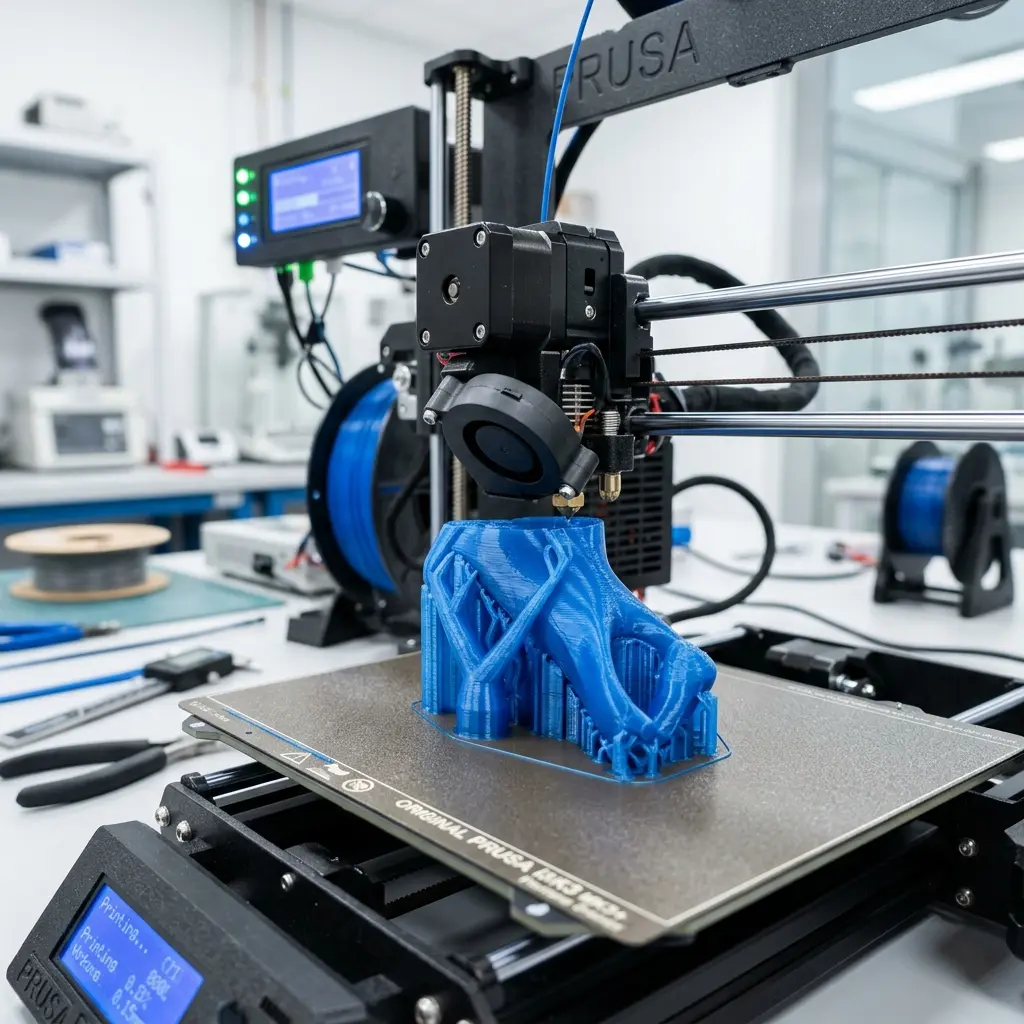
The Ender 3 is known for its impressive print quality, capable of producing detailed models with smooth finishes. This quality is primarily due to its all-metal frame and reliable motion system.
Reports indicate that prints exhibit good layer adhesion and minimal warping, especially when using recommended settings. For optimal results, fine-tuning the Cura slicer settings is crucial.
Common Issues and Troubleshooting
While the Ender 3 is reliable, users may encounter common issues such as bed adhesion problems, layer shifting, or clogs. Addressing these issues quickly can prevent more significant complications.
For bed adhesion, applying a thin layer of glue stick or using specialized adhesives can enhance performance. In the case of clogs, regular maintenance, such as cleaning the nozzle, is recommended.

Upgrades and Modifications
The Ender 3 is highly customizable, with numerous upgrades available to enhance its performance. Popular modifications include installing a glass bed for better adhesion and smoother prints.
Upgrading the extruder to a dual-gear design can improve filament feeding and reduce clogs. Additionally, adding a silent motherboard can significantly reduce noise levels during operation.
DomineTec Tip: Regular maintenance, including cleaning the nozzle and lubricating the rails, can prolong the printer's lifespan and maintain print quality.
Community and Support
The Creality Ender 3 has a vast online community that offers tips, troubleshooting advice, and modifications. Numerous forums, social media groups, and YouTube channels are dedicated to sharing experiences and solutions.
Access to such a rich resource pool empowers users to overcome challenges and maximize their printing experience. Whether seeking help for a specific issue or looking for inspiration, the community is an invaluable asset.

Final Thoughts: Is the Creality Ender 3 Worth It?
Considering its low price point and impressive capabilities, the Creality Ender 3 remains a strong contender in the 3D printer market. Its affordability does not compromise quality, making it an excellent choice for both newcomers and seasoned users.
With continuous support from the community and the potential for upgrades, the Ender 3 can evolve alongside user needs. For those seeking a reliable, budget-friendly 3D printer, this classic model continues to deliver exceptional value.
Frequently Asked Questions
1. What materials can be used with the Ender 3?
The Ender 3 is compatible with various filaments, including PLA, ABS, TPU, and PETG. This versatility allows users to explore a wide range of printing applications.
2. How long does it take to assemble the Ender 3?
Assembly typically takes between 1 to 2 hours, depending on experience and familiarity with 3D printers. The partially assembled design simplifies the setup process.
3. Is the Ender 3 suitable for beginners?
Yes, the Ender 3 is highly recommended for beginners due to its user-friendly setup and operation. A supportive online community further enhances the learning experience.
4. What is the maximum print speed of the Ender 3?
The Ender 3 has a maximum print speed of 100 mm/s, although a recommended speed of around 60 mm/s ensures better print quality and reliability.
5. Can the Ender 3 be upgraded?
Yes, the Ender 3 is highly customizable, with numerous upgrades available to enhance its performance, including better extruders, glass beds, and silent motherboards.
Understanding the 3D Printing Process
To fully appreciate the capabilities of the Creality Ender 3, it's essential to understand the 3D printing process itself. The process typically involves the following steps:
- Designing the Model: Users create a 3D model using CAD software or download pre-made models from online repositories.
- Slicing the Model: The 3D model is converted into a format the printer can understand using slicing software, which generates the G-code.
- Preparing the Printer: Users load filament, level the print bed, and adjust print settings.
- Printing: The printer follows the G-code instructions to create the object layer by layer.
- Post-Processing: Once printing is complete, the object may require post-processing, such as removing supports or sanding.
Material Guide for the Ender 3
Choosing the right filament is crucial for achieving optimal print results. Below is a detailed guide to the materials compatible with the Ender 3:
| Material | Properties | Best Uses |
|---|---|---|
| PLA (Polylactic Acid) | Biodegradable, easy to print, low warping | Prototyping, figurines, educational projects |
| ABS (Acrylonitrile Butadiene Styrene) | Strong, heat-resistant, requires good ventilation | Functional parts, automotive components |
| TPU (Thermoplastic Polyurethane) | Flexible, durable, slightly more challenging to print | Phone cases, wearable items, gaskets |
| PETG (Polyethylene Terephthalate Glycol) | Durable, impact-resistant, slightly more challenging than PLA | Food containers, mechanical parts, outdoor items |
Maintenance Checklist for the Ender 3
Regular maintenance is essential for keeping the Creality Ender 3 in top shape. Here’s a checklist to follow:
- Clean the nozzle regularly to prevent clogs.
- Lubricate the moving parts (rails and lead screws) every few weeks.
- Check and tighten all screws and bolts monthly.
- Inspect the bed for damage; replace if necessary.
- Keep the printer in a dust-free environment to avoid contamination.
Conclusion
In conclusion, the Creality Ender 3 has proven itself as an excellent budget-friendly option for 3D printing enthusiasts. Its combination of affordability, quality, and community support makes it a standout choice for both beginners and experienced users. By understanding the 3D printing process, selecting the right materials, and adhering to a maintenance routine, users can maximize their experience with this remarkable printer.
```htmlAdvanced Configurations for Optimal Performance
Advanced configurations can significantly enhance the printing capabilities of the Creality Ender 3. Users are encouraged to explore firmware updates and custom settings to unlock features that improve print quality.
Adjusting settings such as print speed, temperature, and retraction can lead to better results. Fine-tuning these parameters often requires experimentation to achieve the desired output.
Common Calibration Mistakes to Avoid
Calibration is crucial for achieving high-quality prints with the Creality Ender 3. A frequent mistake involves improper bed leveling, which can lead to first-layer adhesion issues.
Another common error is neglecting to calibrate the extruder steps per millimeter, resulting in inconsistent filament flow. Attention to these details can prevent a host of printing problems.
Cost Estimations for Upgrades and Maintenance
The initial investment in a Creality Ender 3 is relatively low, but users should consider potential upgrade costs. Common upgrades include better nozzles, upgraded hotends, and enhanced print surfaces, which can add to the overall expense.
Maintenance costs, such as replacement parts and filament, should also be factored into the budget. Understanding these costs helps in making informed decisions about long-term usage.
Security Precautions When Operating the Printer
Safety precautions are essential when operating a Creality Ender 3 to prevent accidents. Ensuring that the printer is placed on a stable surface and monitored during operation can reduce risks.
Using fire-resistant materials and avoiding unattended printing sessions are additional measures to enhance safety. Implementing these practices can mitigate potential hazards associated with 3D printing.
Alternative Choices in the Budget 3D Printer Market
Several alternatives to the Creality Ender 3 exist within the budget 3D printer market. Models such as the Anycubic Mega and the Monoprice Select Mini offer similar features and performance at comparable price points.
Choosing an alternative may depend on specific user needs, such as print volume or ease of assembly. Evaluating these options can lead to a more suitable choice for individual requirements.
Community Support and Resources for Troubleshooting
Community support plays a vital role in troubleshooting common issues with the Creality Ender 3. Online forums and social media groups provide invaluable resources and advice from experienced users.
Environmental Considerations in 3D Printing
Environmental factors should be considered when using the Creality Ender 3 for 3D printing. The choice of filament materials impacts both print quality and ecological footprint.
Opting for biodegradable filaments can reduce environmental impact while maintaining print performance. Awareness of these considerations promotes responsible 3D printing practices.
Creality Ender 3 Review: Is the Classic Budget 3D Printer Still Worth It?
The Creality Ender 3 has gained a reputation as one of the best budget 3D printers available. Launched in 2017, it has been praised for its affordability, customization options, and print quality. This review evaluates whether the Ender 3 remains a viable choice in 2023 amidst evolving technology and competition.
Specifications
| Feature | Specification |
|---|---|
| Print Volume | 220 x 220 x 250 mm |
| Nozzle Diameter | 0.4 mm (standard) |
| Layer Resolution | 0.1 - 0.4 mm |
| Print Speed | Up to 180 mm/s |
| Filament Compatibility | PLA, ABS, TPU, PETG |
| Connectivity | SD Card |
| Weight | 7.6 kg |
| Dimensions | 440 x 410 x 465 mm |
Build Quality
The Ender 3 features a sturdy aluminum frame and a well-designed gantry system. This construction provides stability during printing, which is crucial for high-quality results. The print bed is glass, allowing for better adhesion and easier removal of prints.
Assembly Process
Assembly of the Ender 3 typically takes 1-2 hours and requires basic tools. The printer comes partially assembled, with clear instructions provided. While some users may find the assembly straightforward, others may benefit from online tutorials and community support.
Print Quality
The Ender 3 is known for its excellent print quality, especially considering its price point. Prints exhibit minimal layer lines and good detail, making it suitable for both beginners and experienced users. Calibration is essential to achieving optimal results, which can be done through the following steps:
- Level the print bed.
- Adjust the nozzle height.
- Use the correct temperature settings for the chosen filament.
Customization and Upgrades
One of the standout features of the Ender 3 is its ability to be customized and upgraded. Many users have found success in enhancing their printers with the following modifications:
- Upgrading to a better hotend for improved temperature management.
- Adding a glass bed for better adhesion and smoother finishes.
- Installing a silent motherboard for quieter operation.
- Integrating auto-bed leveling systems for easier calibration.
Community Support and Resources
The Ender 3 benefits from a large online community. Numerous forums, social media groups, and YouTube channels offer support, tips, and resources for users. This community-driven approach ensures that help is readily available for troubleshooting and advice on upgrades.
Pros and Cons
| Pros | Cons |
|---|---|
| Affordable price point | Requires assembly and calibration |
| Good print quality | Limited out-of-the-box features |
| Large community support | Basic build quality may require upgrades |
| Customizable with numerous upgrades | Print volume may be small for some projects |
Comparison with Competitors
While the Ender 3 is a strong contender in the budget 3D printer market, it faces competition from several other models. The following table compares key features of the Ender 3 with two popular alternatives:
| Feature | Creality Ender 3 | Anycubic i3 Mega | Monoprice Select Mini V2 |
|---|---|---|---|
| Print Volume | 220 x 220 x 250 mm | 210 x 210 x 205 mm | 120 x 120 x 120 mm |
| Assembly Required | Yes | No | No |
| Display | LCD Screen | Touchscreen | LCD Screen |
| Price | Approx. $200 | Approx. $350 | Approx. $200 |
Final Verdict
The Creality Ender 3 remains a solid choice for those entering the world of 3D printing. Its affordability, print quality, and extensive community support make it a worthwhile investment. However, potential buyers should consider their specific needs and whether they are willing to engage in assembly and calibration. For users seeking a reliable budget printer, the Ender 3 continues to be a compelling option in 2023.
Overview of the Creality Ender 3
The Creality Ender 3 has gained a reputation as a budget-friendly 3D printer since its release. It is known for its solid construction and user-friendly features.
Key Features
- Build Volume: 220 x 220 x 250 mm
- Print Technology: Fused Deposition Modeling (FDM)
- Nozzle Diameter: 0.4 mm (standard)
- Layer Resolution: 0.1 to 0.4 mm
- Filament Compatibility: PLA, ABS, TPU, PETG
Assembly Process
The Ender 3 requires minimal assembly, making it accessible for beginners. The parts are well-packaged, and the instructions are clear.
Step-by-Step Assembly
- Unbox and organize all components.
- Assemble the vertical frame onto the base.
- Attach the X-axis assembly.
- Install the extruder and connect wiring.
- Calibrate the bed and ensure proper leveling.
Print Quality and Performance
The print quality of the Ender 3 is often praised, especially with fine-tuning. It produces detailed prints with layers that can be almost invisible.
Factors Affecting Print Quality
- Print Speed: Slower speeds often yield better quality.
- Temperature Settings: Different filaments require specific temperatures.
- Bed Leveling: Proper bed leveling ensures adhesion and accuracy.
Software and Slicing
The Ender 3 is compatible with various slicing software, including Cura and Simplify3D. These allow users to customize print settings for optimal results.
Recommended Slicing Settings
| Filament Type | Layer Height | Print Speed | Infill Percentage |
|---|---|---|---|
| PLA | 0.1 mm | 50 mm/s | 20% |
| ABS | 0.2 mm | 40 mm/s | 25% |
| TPU | 0.2 mm | 25 mm/s | 30% |
Upgrades and Modifications
The Ender 3 has a robust community that shares numerous upgrade options. Common upgrades include improved hotends, better cooling solutions, and upgraded extruders.
Popular Upgrades
- All-metal hotend for higher temperature capabilities.
- Glass bed for increased adhesion and smooth surface.
- Silent stepper drivers for quieter operation.
Common Issues and Troubleshooting
New users may encounter issues such as poor adhesion or layer shifting. Understanding common problems can help in resolving them effectively.
Frequently Encountered Problems
- Print Not Sticking: Ensure proper bed leveling and use adhesion aids.
- Layer Shifting: Check for loose belts and ensure correct tension.
- Stringing: Adjust retraction settings in slicing software.
Conclusion
The Creality Ender 3 remains a strong contender in the budget 3D printer market. Its combination of quality, community support, and upgrade potential makes it a worthwhile investment.
```



