How to Set Up a TP-Link Router in Access Point (AP) Mode Using Ethernet Cable
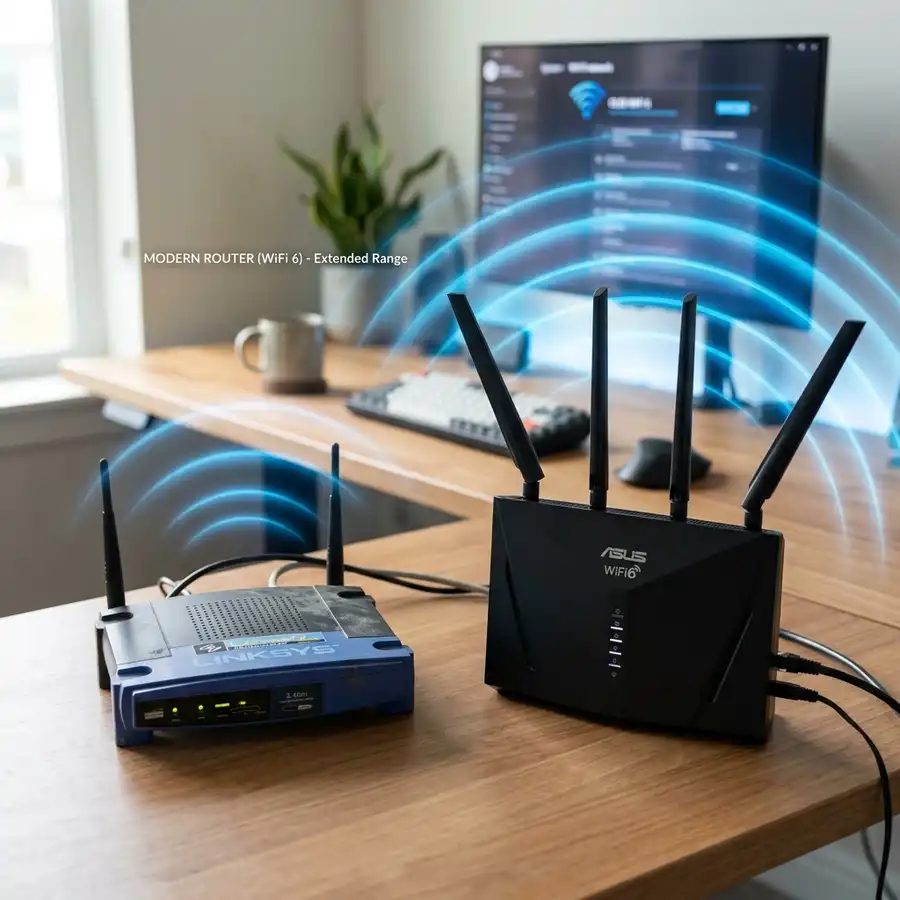
Setting up a TP-Link router in Access Point (AP) mode using an Ethernet cable enhances network coverage and performance.
Understanding Access Point Mode
Access Point mode allows a router to extend a wired network by adding wireless capabilities to it. This mode is particularly useful in environments where Wi-Fi coverage needs to be improved.
By connecting a TP-Link router in AP mode, devices can connect wirelessly while benefiting from a stable Ethernet connection.
Benefits of Setting Up a TP-Link Router in AP Mode
Utilizing a TP-Link router in Access Point mode provides several advantages. This setup can significantly enhance network speed and reliability.
AP mode allows for better management of network traffic, reducing congestion and improving performance for all connected devices.
Required Equipment for Setup
Before starting the setup process, ensure the necessary equipment is available. The primary items required include:
- TP-Link router capable of AP mode.
- An Ethernet cable to connect the router to the main network.
- A computer or mobile device for configuration.
Additionally, having access to the main router's settings may be necessary for proper configuration.
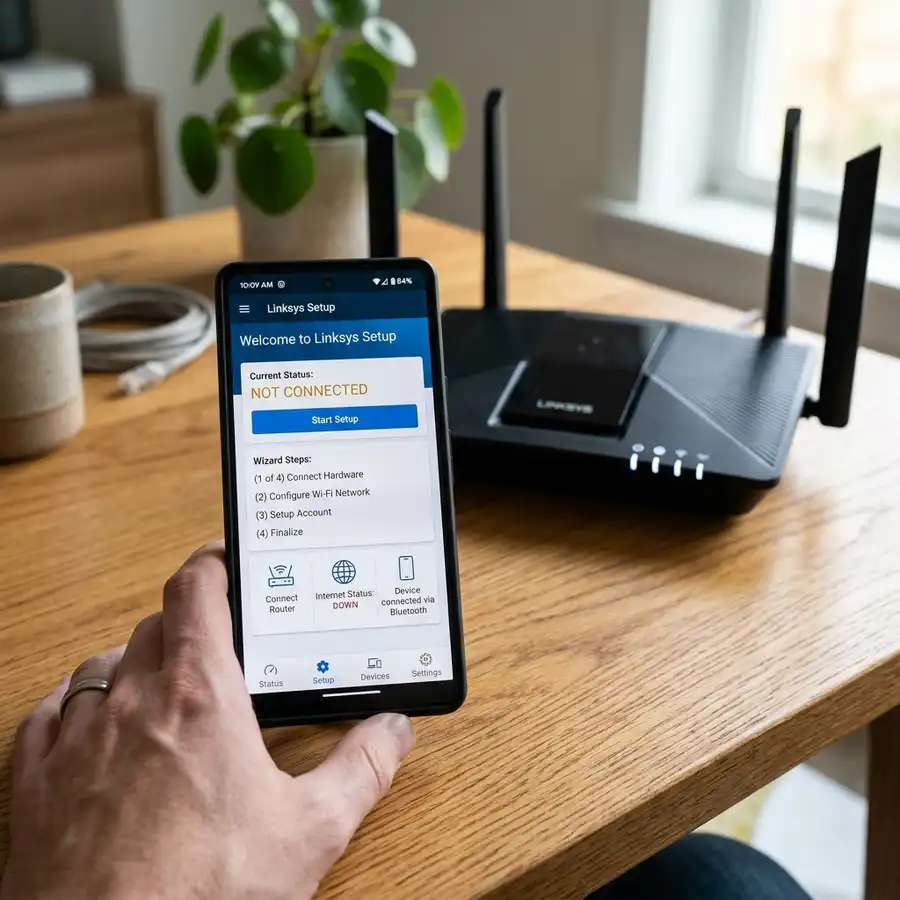
Step-by-Step Guide to Setting Up the TP-Link Router in AP Mode
Following these steps will ensure a successful setup of the TP-Link router in AP mode:
- Connect the TP-Link router to a power source and turn it on.
- Use an Ethernet cable to connect the TP-Link router to the main router.
- Connect your computer or mobile device to the TP-Link router via Wi-Fi or Ethernet.
- Open a web browser and enter the router's default IP address (commonly 192.168.0.1).
- Log in using the default username and password (often both are admin).
- Navigate to the Network settings and select Operation Mode.
- Choose Access Point mode and click Save.
- Configure the wireless settings, including SSID and password.
- Reboot the router to apply the changes.
- Test the network connection using a wireless device.
After completing these steps, the TP-Link router should function effectively in AP mode.
Technical Specifications of TP-Link Routers
When choosing a TP-Link router for AP mode, it is essential to consider the technical specifications. The following table compares key features of popular TP-Link models.
| Model | Wireless Standard | Maximum Speed | Ethernet Ports | Power Supply |
|---|---|---|---|---|
| TP-Link TL-WR841N | 802.11n | 300 Mbps | 4 | 9V/0.6A |
| TP-Link Archer A7 | 802.11ac | 1750 Mbps | 4 | 12V/1A |
| TP-Link Archer C7 | 802.11ac | 1750 Mbps | 4 | 12V/1A |
Security Considerations in AP Mode
When setting up a TP-Link router in AP mode, security must be a priority. Ensure that a strong password is chosen for the Wi-Fi network to prevent unauthorized access.
Additionally, consider disabling features such as WPS, which can pose security risks. Regular firmware updates are essential to protect against vulnerabilities.

DomineTec Tip: For enhanced security, use WPA3 encryption if supported by your devices. Regularly monitor connected devices to ensure no unauthorized access occurs.
Troubleshooting Common Issues
During the setup process, various issues may arise. Common problems include failure to connect to the main router or incorrect login credentials.
To resolve connection issues, verify the Ethernet cable is securely connected. If login problems occur, consult the router's manual for recovery options.
Network Configuration for Optimal Performance
Ensure that the subnet of the TP-Link router matches that of the primary router to avoid IP conflicts; typically, this will require configuring the TP-Link router's LAN settings.
Adjust DHCP settings to disable the DHCP server on the TP-Link router, as the primary router will handle IP assignments for all connected devices.
Firmware Updates and Security Enhancements
Before finalizing the setup, verify that the TP-Link router is running the latest firmware version to ensure stability and security; this can be done via the web interface under the firmware upgrade section.
Implement WPA3 encryption in the wireless security settings to enhance protection against unauthorized access and ensure a secure wireless environment.
Port Forwarding and Quality of Service (QoS) Settings
For applications requiring specific port access, set up port forwarding by specifying the internal IP address of the device along with the required ports in the TP-Link router's web interface.
Enable QoS settings to prioritize bandwidth for critical applications such as gaming or streaming, thereby improving overall network performance.
Monitoring Network Activity and Device Management
Utilize the traffic monitor feature to observe real-time data usage and identify connected devices, which assists in managing bandwidth allocation effectively.
Device management options allow for the customization of access controls, enabling restrictions on specific devices when necessary to maintain network integrity.
Wireless Configuration Options and Range Settings
Adjust the wireless channel settings to minimize interference from neighboring networks, with channels 1, 6, and 11 being optimal for 2.4GHz networks.
Consider enabling the 5GHz band for devices that support it, as this band typically offers higher speeds and less congestion compared to the 2.4GHz band.
Backup and Restore Configuration Settings
Regularly back up the router's configuration settings by navigating to the system tools section, allowing easy restoration in case of misconfiguration or hardware resets.
Document any changes made during the setup process, which aids in troubleshooting and provides a reference for future modifications or upgrades.
Understanding Access Point Mode and Its Benefits
Access Point mode allows a TP-Link router to act as a bridge, extending the existing network's range without creating a separate subnet.
This configuration is essential for improving wireless coverage in larger spaces where the primary router's signal may be weak or nonexistent.
Configuring IP Addressing in AP Mode
When setting up the TP-Link router in AP mode, ensure that the device is assigned a static IP address within the same subnet as the primary router to avoid IP conflicts.
Access the router's settings via a web browser and navigate to the Network section to manually set the static IP, subnet mask, and gateway.
Optimizing Wireless Settings for Performance
In the wireless settings menu, select the optimal channel and band frequency to minimize interference from neighboring networks, ideally using a Wi-Fi analyzer tool.
Additionally, configuring the wireless mode to support both 2.4 GHz and 5 GHz bands can enhance overall performance and device connectivity.
Implementing Security Measures
To ensure network safety, enable WPA3 or WPA2 encryption protocols in the wireless settings, as these provide stronger security than WEP.
Regularly update the router's firmware to protect against vulnerabilities and maintain optimal performance.
Monitoring Network Performance and Client Devices
The TP-Link router provides a network monitoring feature that allows observation of connected devices, bandwidth usage, and overall network health.
Utilizing Quality of Service (QoS) settings can prioritize bandwidth for specific applications or devices, enhancing user experience during high traffic periods.
Advanced Network Configuration Options
To optimize network performance, access the router's web interface and navigate to the "Advanced" settings section.
Configure parameters such as DHCP settings, VLAN tagging, and QoS (Quality of Service) to prioritize bandwidth for specific devices or applications.
Security Protocols and Firewall Settings
Implement WPA3 encryption for enhanced wireless security, ensuring that the access point does not use outdated protocols.
Adjust the firewall settings to restrict unauthorized access, enabling features such as SPI (Stateful Packet Inspection) and NAT (Network Address Translation).
Monitoring and Performance Analysis Tools
Utilize the built-in bandwidth monitoring tools to track data usage and identify any bottlenecks within the network.
Periodic checks of connected devices can reveal unauthorized access, allowing for immediate action to secure the network.
Firmware Updates and Maintenance
Regularly check for firmware updates on the TP-Link website to ensure the access point is equipped with the latest security patches and features.
Scheduled reboots can help maintain optimal performance, reducing the likelihood of connectivity issues over time.
Configuring IP Addressing for Effective Communication
The first step in setting up a TP-Link router in Access Point (AP) mode involves the proper configuration of IP addressing. This process ensures that the devices connected to the network can communicate effectively without IP conflicts, which can disrupt network performance.
Initially, it is essential to connect the TP-Link router to a computer using an Ethernet cable. Once connected, access the router's web interface by entering the router's default IP address, typically 192.168.0.1 or 192.168.1.1, into the web browser’s address bar. This action prompts the user to log in using the default credentials, often 'admin' for both username and password.
Upon successful login, navigate to the 'Network' settings and select 'LAN.' Here, it is advisable to assign a static IP address to the TP-Link router that falls within the subnet of the primary router. For example, if the primary router's IP address is 192.168.1.1, the TP-Link router could be assigned 192.168.1.2, ensuring that it does not conflict with other connected devices.
After setting the static IP address, disable the DHCP server on the TP-Link router to prevent it from issuing IP addresses that could conflict with the primary router’s DHCP pool. This configuration allows the primary router to manage all IP addresses on the network, maintaining a streamlined and conflict-free environment.
Advanced Security Settings for Enhanced Network Integrity
Once the basic setup of the TP-Link router in AP mode is complete, it is critical to implement advanced security settings to protect the network from unauthorized access. This step is essential in safeguarding sensitive data transmitted over the wireless connection.
Begin by navigating to the 'Wireless' settings within the router’s web interface. Enable WPA3 encryption if supported, as it is the most secure protocol available for protecting wireless networks. If WPA3 is not supported, WPA2 should be the minimum standard employed, as it provides robust security features.
Additionally, it is advisable to change the default SSID (Service Set Identifier) to a unique name that does not reveal any personal information. Avoid using easily guessable names such as 'Home' or 'Office,' as these can attract potential intruders. It is also important to disable the SSID broadcast to make the network less visible to outsiders.
Finally, consider implementing MAC address filtering, which involves allowing only specific devices to connect to the network based on their unique MAC addresses. This step adds an additional layer of security, ensuring that only authorized devices have access to the network resources.
Understanding Network Configuration and IP Address Management
In a typical home or office network, the management of IP addresses is crucial for ensuring that devices communicate effectively without conflicts. When setting up a TP-Link router in Access Point (AP) mode, understanding how to configure the IP address settings is essential for seamless integration into an existing network.
By default, the TP-Link router may attempt to use the same subnet as the existing router. To prevent IP address conflicts, it is recommended to assign a static IP address to the TP-Link router that is within the range of the primary router's subnet but outside its DHCP range. For example, if the primary router has a subnet of 192.168.1.0/24 and distributes addresses from 192.168.1.2 to 192.168.1.100, configuring the TP-Link router to use 192.168.1.101 would be appropriate.
To configure this IP address, access the TP-Link router’s web management interface by connecting a computer to it via an Ethernet cable and entering the router's default IP address, commonly 192.168.0.1 or 192.168.1.1, into a web browser. After logging in using the default credentials, navigate to the “Network” settings, and change the IP address to the statically assigned one, ensuring that the “DHCP Server” option is disabled to avoid conflicts with the primary router.
It is also advisable to ensure that the subnet mask matches that of the primary router, typically 255.255.255.0. After making these configurations, save the changes and reboot the router to apply the new settings, ensuring that the TP-Link router can now function effectively as an Access Point without interfering with the existing network architecture.
Advanced Security Considerations for Access Point Deployment
When deploying a TP-Link router in Access Point mode, security is a paramount consideration to protect the network from unauthorized access and potential threats. Configuring the wireless security settings correctly is essential to ensure that only trusted devices can connect to the network.
Begin by navigating to the “Wireless” settings section within the TP-Link router's web interface. Here, the wireless SSID should be set to a unique name that distinguishes it from other networks in the vicinity, making it less predictable for potential intruders. Additionally, enabling WPA3 security should be prioritized if supported, as it offers more robust encryption compared to WPA2.
Furthermore, it is important to create a strong passphrase for the wireless network, ideally consisting of at least 12 characters with a mix of uppercase and lowercase letters, numbers, and special symbols. Avoid using easily guessable information such as birthdays or common words, as this may compromise security and allow unauthorized access.
Consider implementing a guest network if the router supports it. This network should be isolated from the primary network and have its own SSID and password, allowing visitors to access the internet without giving them access to critical devices on the main network. Regularly updating the router’s firmware is also crucial to protect against vulnerabilities, and this can be done through the “System Tools” section in the web interface, where the latest firmware can be downloaded and installed securely.
Frequently Asked Questions
What is the primary purpose of using a TP-Link router in AP mode?
The primary purpose is to extend a wired network's capabilities by adding wireless functionality. This enhances connectivity in larger areas.
Can a TP-Link router support multiple devices in AP mode?
Yes, a TP-Link router can support multiple devices when configured in AP mode. This allows various devices to connect wirelessly to the network.
Is it necessary to update the firmware after setting up in AP mode?
Updating the firmware is recommended to ensure the router has the latest security patches and features. This helps maintain optimal performance.
Can AP mode be used with any TP-Link router model?
Not all TP-Link models support AP mode. Refer to the specific model's documentation to verify compatibility.
What should be done if the router doesn't connect to the main network?
If the router fails to connect, check the Ethernet cable connection and ensure the main router is functioning properly. Restarting both routers may also help.


