You can restore your iPhone without losing data by backing up first via iCloud or Finder/iTunes, then choosing "Restore from Backup" during the setup process.
Few things cause more anxiety for iPhone users than the word "restore." Images of lost photos, missing contacts, and vanished app data come flooding in. But here is the truth: restoring your iPhone does not have to mean losing anything. With the right preparation and the correct method, you can refresh iOS — fixing bugs, slowdowns, and crashes — while keeping every photo, message, and app setting exactly where you left it.
This guide covers all three major restore scenarios, explains exactly what each one does to your data, and walks you through every step with enough detail that you can complete the process confidently, even if you have never done it before. Whether your iPhone is running sluggishly, showing persistent software errors, or stuck on a black screen, there is a safe path forward.
Restore vs. Erase: What's the Difference and Why It Matters
Before touching a single setting on your iPhone, it is critical to understand that "restore" is not a single action — it is a category that covers three very different operations. Using the wrong one for your situation is how people accidentally lose years of photos and messages.
Scenario 1 — Backup Restore (No Data Loss): You erase the iPhone and immediately load a recent backup onto it. This is the safest and most common scenario. Your device returns to a clean state of iOS, but then your personal data is layered back on top. Net result: a fresh iOS installation with all your content intact.
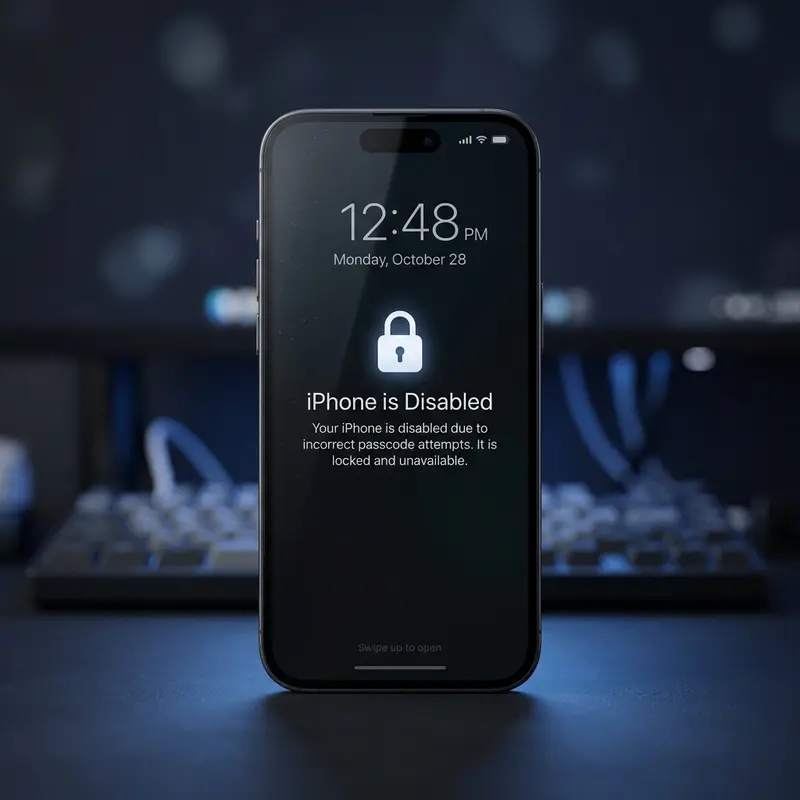
Scenario 2 — System Restore via Recovery Mode (Possible Data Loss Without a Backup): This is used when the iPhone cannot boot normally or is stuck in a software loop. iTunes or Finder reinstalls a fresh copy of iOS. If you have a backup, you can load it immediately after. If you do not, the iPhone comes up as brand new with no personal data.
Scenario 3 — Factory Reset (Intentional Full Erase): You wipe the device completely. This is appropriate when selling or giving away your iPhone. It is not a restore in the traditional sense, and it is never the right choice if your goal is to keep your data.
| Method | Erases Data | Requires Backup | Requires Computer | When to Use |
|---|---|---|---|---|
| Restore from iCloud Backup | Temporarily (data is restored) | Yes — iCloud backup required | No | Software bugs, slowness, persistent errors |
| Restore via Finder / iTunes | Temporarily (data is restored) | Yes — local backup required | Yes | No iCloud space, full backup needed, faster restore |
| Recovery Mode | Yes (always) | Optional (but recommended) | Yes | iPhone won't boot, corrupted iOS, black screen |
| Factory Reset (Erase All) | Yes (permanently) | No | No | Selling, donating, or trading in the iPhone |
The takeaway: if your goal is to fix your iPhone without losing data, methods 1 and 2 are the ones to focus on. Recovery Mode is a last resort, and factory reset should only be used when you intend to part with the device.
Step 0 (Non-Negotiable): Back Up Your iPhone Before Anything Else
No matter which restore method you choose, a current backup is your only safety net. The restore process erases the iPhone before recovering its contents. If something interrupts the process — a power outage, a lost Wi-Fi connection, a server error — and you have no backup, your data is gone. There is no undo button after an erase.
Here is what can go wrong during a restore even under normal circumstances: the iCloud servers might time out mid-transfer; iOS might detect a corrupted backup file and refuse to complete the restore; your Apple ID might throw a verification error partway through. Any of these events leaves your iPhone in an intermediate state with no data. That is why the backup step is non-negotiable.
How to Back Up via iCloud
iCloud Backup is the simplest option and requires no cable or computer. Follow these steps:
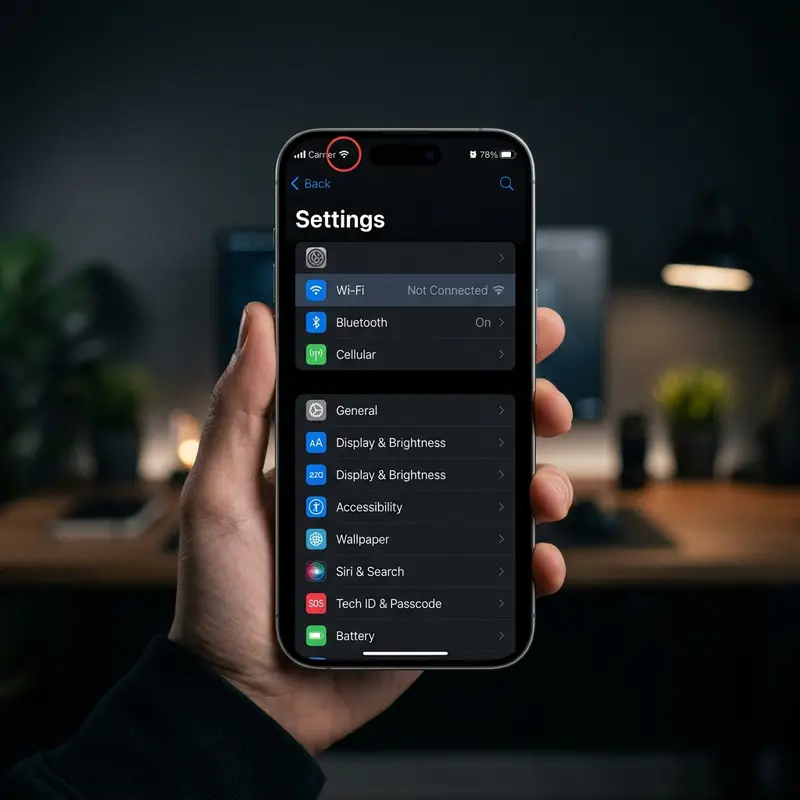
- Open the Settings app and tap your name at the top (your Apple ID card).
- Tap iCloud, then scroll down and tap iCloud Backup.
- Make sure the Back Up This iPhone toggle is turned on.
- Tap Back Up Now and keep the screen awake and connected to Wi-Fi until the backup completes.
- When finished, the date and time of the last successful backup appear below the "Back Up Now" button.
To verify the backup completed, go back to Settings > [Your Name] > iCloud > Manage Account Storage > Backups. Your device should appear in the list with a timestamp from today. Confirm the backup size looks reasonable — a backup of "0 bytes" or a very small file size is a red flag that something went wrong.
Not Enough iCloud Storage? Use Your Computer Instead
iCloud offers only 5 GB of free storage, which is rarely enough for a full iPhone backup. If you see a "Not Enough iCloud Storage" warning, do not skip the backup — use your Mac or PC instead. Learn exactly how to do this in our guide on how to back up iPhone to computer without iCloud, which covers both Finder (Mac) and iTunes (Windows) in detail.
Dica DomineTec: Before restoring, make a list of every banking and financial app on your iPhone. These apps — including most digital wallets, brokerage platforms, and two-factor authentication apps like Google Authenticator — deliberately block their data from being included in backups for security reasons. After restoring, you will need to re-enroll each one manually. This can require access to a phone number, email account, or physical bank card, so plan ahead to avoid being locked out.
Method 1 — Restore iPhone from iCloud Backup (No Data Loss)
This is the most common restore scenario and the one most people mean when they say they want to "reset" their iPhone without losing data. It is ideal when your iPhone is working well enough to navigate menus, but suffering from software issues: random reboots, app crashes, extreme battery drain, or general sluggishness that a simple restart does not fix.
The process takes your iPhone back to a clean iOS installation, then downloads your personal data from iCloud and places it back exactly as it was. To the end user, it feels like the iPhone is brand new out of the box — except everything is already set up exactly the way you like it.
Complete Step-by-Step: iCloud Backup Restore
- Open Settings and tap General, then scroll all the way to the bottom and tap Transfer or Reset iPhone.
- Tap Erase All Content and Settings. Read the warning carefully, then confirm. You may be prompted to enter your passcode and your Apple ID password.
- The iPhone will erase itself and restart, displaying the initial setup screen (the "Hello" screen).
- Follow the setup steps — language, region, Wi-Fi — until you reach the "Apps & Data" screen.
- Tap Restore from iCloud Backup and sign in with your Apple ID.
- A list of available backups will appear, sorted by date. Select the most recent one (the one you just made, ideally).
- Keep the iPhone connected to Wi-Fi and plugged into a charger. The restore will take anywhere from 20 minutes to 2 hours depending on the size of your backup and your internet connection speed.
The iPhone will likely restart once or twice during the process. After the main restore finishes, apps will continue downloading in the background over the next several hours — you can use the phone normally while this happens.
What IS Restored from iCloud Backup
- All photos and videos stored in the iPhone Camera Roll (if iCloud Photos is enabled, these sync separately)
- All contacts, calendars, and reminders
- Safari bookmarks and reading list
- App data for apps that support iCloud backup
- iCloud Keychain (all saved passwords and credit cards)
- iMessage and SMS history
- Mail accounts and settings
- Home screen layout and app arrangement
- Wallpaper, accessibility settings, and most system preferences
What Is NOT Restored Automatically
- Banking apps and digital wallets that use proprietary authentication — these must be re-enrolled manually
- Two-factor authentication apps (Google Authenticator, Microsoft Authenticator, Authy — unless Authy's own backup is used)
- VPN configurations and credentials
- Apps purchased through channels other than the App Store
- Some game progress for titles that use local save data instead of cloud saves
Method 2 — Restore via Finder (Mac) or iTunes (Windows)
Restoring your iPhone through a computer offers several advantages over iCloud: it is faster, it does not consume iCloud storage, and it creates a more complete backup. In fact, a local backup captures certain data categories that iCloud simply does not include by default — particularly when you use an encrypted backup.
This method is the right choice when you do not have enough iCloud storage, when you want the fastest possible restore time, when your iPhone cannot connect reliably to iCloud, or when you simply prefer having a backup stored locally on a hard drive you control.
What Local Backup Includes That iCloud Does Not
- Full Health and Activity data — every step, heart rate reading, sleep record, and workout
- Complete call log history beyond the last 30 days
- Saved passwords from all apps and websites (only in encrypted backups)
- Wi-Fi network passwords
- HomeKit configuration (encrypted backups only)
Step-by-Step: Restore via Finder (macOS Catalina 10.15 or later)
- Connect your iPhone to your Mac using a Lightning or USB-C cable. Unlock the iPhone and tap Trust on the prompt that appears.
- Open Finder (not iTunes — Apple removed iPhone management from iTunes on Mac in 2019).
- Your iPhone will appear in the Finder sidebar under "Locations." Click on it.
- In the main panel, click Restore Backup...
- A dialog box will show all available local backups. Select the most recent one.
- If the backup is encrypted, you will be prompted to enter the backup password. Enter it carefully — there is no recovery option if you forget it.
- Click Restore and keep the iPhone connected until the process completes fully. Do not disconnect mid-restore.
Step-by-Step: Restore via iTunes (Windows 10 / 11)
- Download and open iTunes from the Microsoft Store or Apple's website.
- Connect your iPhone via USB cable and unlock it, trusting the computer if prompted.
- Click the small iPhone icon in the upper-left corner of the iTunes window.
- In the Summary panel, click Restore Backup...
- Select the appropriate backup from the list and enter the encryption password if required.
- Click Restore and wait for the process to complete without disconnecting the device.
Dica DomineTec: Always enable encrypted local backups. To do this in Finder, check the box labeled "Encrypt local backup" and set a strong password before clicking Back Up Now. In iTunes, look for "Encrypt iPhone backup" in the Summary panel. Encrypted backups include saved passwords, Health data, and Wi-Fi credentials — none of which are included in unencrypted backups. Store the encryption password somewhere safe, such as a password manager.
Method 3 — Recovery Mode: When and How to Use It
Recovery Mode is the most powerful tool in Apple's troubleshooting arsenal, and also the most misunderstood. It is designed for situations where the iPhone is so compromised at the software level that it cannot complete a normal boot cycle — meaning you cannot even reach the "Erase All Content and Settings" menu.
Common situations that require Recovery Mode include: an iPhone stuck on the Apple logo for more than 10 minutes, a completely black screen that does not respond to any button combination, a bootloop where the device restarts repeatedly before reaching the home screen, or a corrupted iOS update that stopped partway through.
Critical warning: Recovery Mode always begins by erasing the iPhone completely. It installs a fresh copy of iOS from Apple's servers with no personal data. This is why it is a last resort. If your iPhone can boot at all, use Method 1 or Method 2 instead. If your device is locked and you need to regain access — but it still boots — consult our guide on how to unlock a locked iPhone before jumping to Recovery Mode.
How to Enter Recovery Mode (iPhone 8 and Later, Including All iPhone X Through iPhone 16 Models)
- Connect your iPhone to a Mac or PC with a USB cable.
- On your Mac, open Finder. On Windows, open iTunes.
- Quickly press and release the Volume Up button.
- Quickly press and release the Volume Down button.
- Press and hold the Side (Power) button and keep holding it — do not let go when you see the Apple logo. Continue holding until the screen shows the "Connect to computer" image (a USB cable pointing to a laptop icon).
- Finder or iTunes will detect the iPhone in Recovery Mode and display a dialog box.
For older models: iPhone 7 and 7 Plus use Volume Down + Sleep/Wake simultaneously. iPhone 6s and earlier use Home + Sleep/Wake simultaneously.
Restoring in Recovery Mode
Once Finder or iTunes detects the device in Recovery Mode, you will see two options: Update and Restore. Try Update first — it attempts to reinstall iOS without erasing your data. If Update fails or is not available, click Restore. This downloads and installs a fresh copy of iOS (which may take 15–30 minutes depending on your internet speed), then erases the device entirely.
Immediately after the restore completes, the iPhone will restart into the initial setup screen. At the "Apps & Data" step, choose Restore from iCloud Backup or Restore from Mac or PC to load your backup. If you made a backup before the iPhone became unbootable, your data is safe.
What Isn't Restored and How to Protect Your Data Beforehand
Even with a perfect backup, there are categories of data that will not make the journey through a restore. Understanding these gaps before you begin — and taking manual steps to bridge them — is what separates a stressful restore experience from a smooth one.
What Backups Do Not Save (By Design)
- Banking and financial app data: Apps like Chase, Bank of America, Robinhood, and PayPal explicitly block their internal data from being included in any backup. This is a deliberate security measure. After restoring, you will re-download the app and log in as normal — your account data lives on the bank's servers, not on your phone.
- Two-factor authentication (2FA) tokens: Apps like Google Authenticator store time-based one-time passwords locally with no cloud sync. If you restore without transferring these codes first, you will lose access to every account protected by that app. Use Authy or iCloud Keychain-based 2FA instead, both of which survive a restore.
- VPN configuration profiles: Custom VPN profiles installed by an employer or a third-party provider are not included in standard backups. You will need to reinstall them from your provider's portal.
- Passwords and Health data in unencrypted backups: As noted above, these are only preserved in encrypted local backups — not in iCloud backups or unencrypted Finder/iTunes backups.
How to Manually Protect Data Before Restoring
Export contacts as vCard: Open the Contacts app on your Mac (or iCloud.com on any browser), select all contacts, and export them as a .vcf file. This gives you a standalone backup of your address book that does not depend on iCloud.
Save photos to your computer: Connect your iPhone to your Mac or PC and use Image Capture (Mac) or the Photos app (Windows) to import all photos to a local folder. This is especially important if iCloud Photos is turned off and your photos are only stored locally on the device.
Note your installed apps: Open the App Store, tap your profile picture in the top right, and tap Purchased. This shows every app associated with your Apple ID. Apps will re-download after the restore, but having this list helps you confirm nothing was missed.
Transfer Google Authenticator codes: In Google Authenticator, tap the menu icon and use Transfer Accounts > Export Accounts to move codes to a new device or generate a QR code you can scan during setup. Do this before erasing the iPhone.
Dica DomineTec: Before restoring, open each of your most important apps — email clients, project management tools, note-taking apps — and take a screenshot of the key settings screens. Notification preferences, custom folders, connected accounts, and display options often need to be reconfigured after a restore, and screenshots make the process significantly faster than trying to remember what your setup looked like.
Frequently Asked Questions
Will restoring my iPhone fix performance issues and bugs?
In the majority of cases, yes — especially for software-related problems. A backup restore cleans out fragmented system files, corrupted caches, and leftover data from incomplete app updates, all of which accumulate over time and contribute to sluggishness, battery drain, and random crashes. However, if the problem is hardware-related — a degraded battery, failing storage chips, a damaged charging port — restoring iOS will not help. You can check battery health at Settings > Battery > Battery Health & Charging. If Maximum Capacity is below 80%, battery replacement is likely the real solution, not a software restore.
How long does it take to restore an iPhone from iCloud?
The honest answer is: it depends heavily on your backup size and your internet connection speed. A typical iPhone backup ranges from 3 GB to 20 GB. On a fast home Wi-Fi connection (100 Mbps or more), a 10 GB backup might restore in about 25–30 minutes. On a slower 25 Mbps connection, the same backup could take 90 minutes or longer. The initial phase — downloading iOS and setting up the core system — usually takes about 10 minutes. Then app data and media download in stages. You can use the iPhone during this time; the downloads continue in the background. Count on a minimum of 30 minutes for a small backup on a fast connection, and up to 3 hours for a large backup on a slow connection. Plug in to power before you start and stay on the same Wi-Fi network throughout.
Can I restore a backup from an older iPhone to a newer model?
Yes, and this is one of the most common uses of the restore process — upgrading to a new iPhone and transferring everything from the old one. Apple's backup system is forward-compatible: a backup from an iPhone 13 can be restored to an iPhone 15 or iPhone 16 without any issues. The reverse is not always true; you cannot reliably restore a backup from a newer iPhone onto an older model running an older iOS version. When upgrading phones, the recommended workflow is to back up the old iPhone (iCloud or computer), activate the new iPhone, and choose "Restore from Backup" at the "Apps & Data" screen. Apple's Quick Start feature (holding the two phones near each other) also accomplishes this wirelessly for supported devices and is often the fastest option.
What happens if the battery dies during the restore process?
This scenario is more disruptive than dangerous, but it can leave your iPhone in a confusing intermediate state. If the battery dies during the erase phase (before data restoration begins), the iPhone will simply need to be charged and the restore process restarted from the beginning — nothing is lost because nothing had been written yet. If the battery dies during the data restoration phase (after iOS is installed and data is being downloaded from iCloud), the iPhone will likely restart, iOS will be intact, and you may be able to resume the restore by signing back into your Apple ID and re-selecting the backup. However, if the failure happens at a critical moment during an iTunes/Finder restore, the iPhone could end up in Recovery Mode, requiring you to start the whole process over. The solution is simple: always plug your iPhone into a power source before beginning any restore. Do not attempt a restore when the battery is below 50%.